background image

3  Product description 

3.1  Basic functions

SVP/SVZ door locks lock swing doors automatically 
and immediately after each closing by automatically 
pushing the bolt into the striking plate (insurance-
compliant lock).  At the same time, the cross latch 
blocks so that a two-point locking system is created. 
This offers additional security against manipulation 
or breaking of the door lock. In case of emergency, 
the SVP door locks (except SVZ) can be unlocked and 
opened in the escape direction at any time using the 
door handle. These features ensure that SVP door 
locks (except SVZ) comply with EN 179 for emergency 
exit devices and EN 1125 for panic exit devices. The 
SVP/SVZ door locks 4000, 6000 and 2000/2000F 
can query the status of the control latch, dead bolt, 
door handle and locking cylinder. 

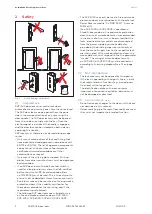
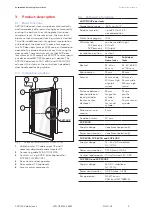
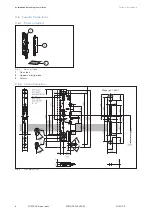
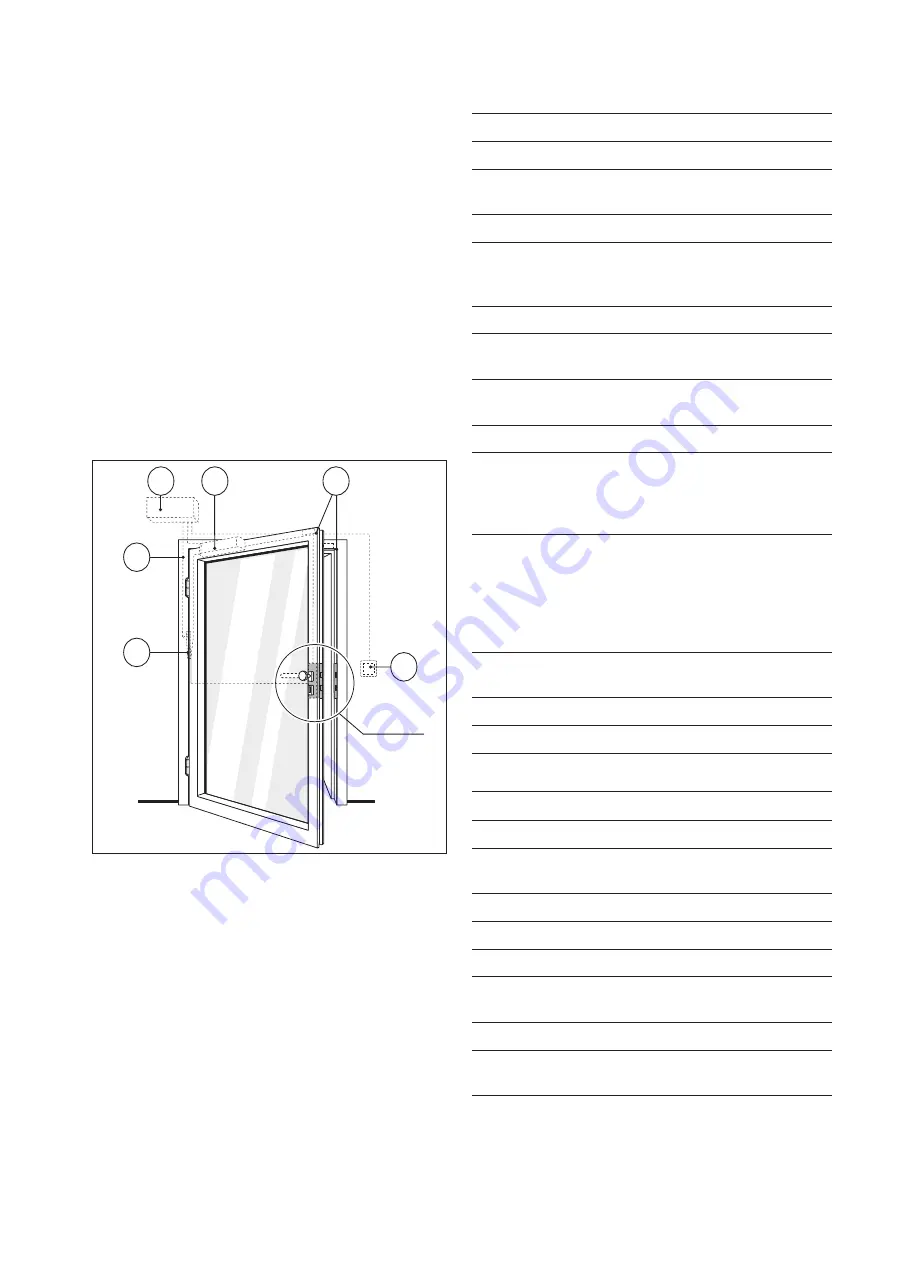
3.2  Installation situation

Fig. 2 

SVP/SVZ

1

3

4

5

2

6

Additional components (not for SVP 5000)

1

  Cable transfer CT, cable spiral CS and if 

necessary detachable cable transfer DT 

2  

Connecting cable SVP-A 1100/2100

3

  Control unit, e.g. SVP-S 3x/4x (optional for  

SVP 2000/SVP2000F)

4

  Door closer or door operator

5

  Door contact TC (optional)

6

  Access control components

3.3   Technical information

All SVP/SVZ door locks

Temperature range

-25°C to +70°C

Relative humidity:

up to 95 % at 55 °C;  
no condensation

Protection category:

IP 54

DIN direction:

SVP 6xxx only: 
SVP 6xxx only:

can be used left/right 
DIN left 
DIN right

Installation position:

vertical

Tubular 
frame locks

Solid door 
locks

Backset:

35, 40 or 
45 mm

55, 60, 65, 80 
or 100 mm

Rear backset:

15 mm

33 mm

Forend:

24 mm wide, 
270 mm high, 
angular/
square

20 mm or 
24 mm wide 
235 mm high, 
round

Distance between 
door handle and 
locking cylinder 
(center-center-
distance):

92 mm 
for profile 
cylinder 
94 mm 
for round 
cylinder

72 mm 
profile 
cylinder 
74 mm round 
cylinder

Follower to inner 
square:

9 mm

Dead bolt throw:

20 mm

SVP 5000

Supply voltage:

none (mechanical only)

Power consumption:

none (mechanical only)

SVP 4000, SVP 6000 and SVZ 6000

Supply voltage:

12 – 24 V DC stabilized  
(+/- 10 %)

Power consumption:

0.15 A (max. 0.3 A)

Contact load capacity: 100 mA at max. 30 V DC

SVP 2000 and SVP 2000F

Supply voltage:

24 V DC stabilized  
(+/- 15 %)

Power consumption:

0.05 A (max. 0.3 A)

Bus operation:

DCW® bus or
CAN bus (ISO 11898-3)

3

SVP/SVZ door locks

2020-03

WN 059744 45532

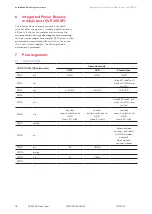
dormakaba Mounting instructions

Product description

Содержание SVP

Страница 1: ...g action SVZ Access control lock with self locking action without emergency escape action 2000 2000F 4000 5000 6000 All versions of a door lock the exact lock type is marked with 3 digits instead of zeros TMS Soft Software for the dormakaba door management system TMS DCW bus DCW is the short form for DORMA Connect Work A dormakaba owned fieldbus system for the connection of up to 4 identical compo...

Страница 2: ...ollowed The following SVP door locks are suitable for use on fire and smoke protection doors SVP 5000 SVP 4000 SVP 6000 SVZ 6000 SVP 2000F The SVP 2000 may only be used in fire and smoke protection doors in combination with the external Power Reserve module SVP PR DCW item no 70922601 If an SVP 2000 or SVP 2000F is operated in Stand Alone mode in a fire and smoke protection door the use of a smoke...

Страница 3: ...P2000F 4 Door closer or door operator 5 Door contact TC optional 6 Access control components 3 3 Technical information All SVP SVZ door locks Temperature range 25 C to 70 C Relative humidity up to 95 at 55 C no condensation Protection category IP 54 DIN direction SVP 6xxx only SVP 6xxx only can be used left right DIN left DIN right Installation position vertical Tubular frame locks Solid door lock...

Страница 4: ...must not be used along escape routes because it does not have an emergency escape function The SVP 2000 is a motorized lock whose function can be controlled electronically When the door is closed the door lock locks automatically It is operated separately stand alone without feedback contacts or on an external control unit via a DCW bus or a CAN bus Operation on an electric door operator with inte...

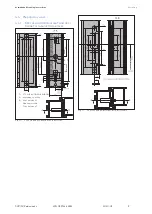
Страница 5: ...R module SVP PR DCW item no 70922601 operation mode Stand Alone 3 5 2 Solid door locks dormakaba Deutschland GmbH Postfach 4009 58247 Ennepetal 0432 CPR 00026 19 15 SVP 4000 VB SVP 5000 VB EN 12209 2003 AC 2005 3 X 9 1 0 G 7 B B 2 0 DOP_0160 0432 CPR 00026 08 15 SVP 2000 VB EN 14846 2008 3 S 5 E 0 L 7 1 1 3 DOP_0161 0432 CPR 00026 08 15 SVP 2000F VB EN 14846 2008 3 S 5 E 0 L 7 1 1 3 DOP_0161 0432 ...

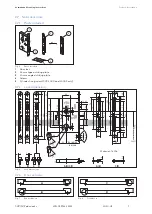
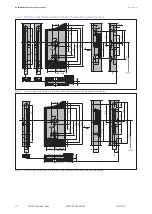
Страница 6: ...luded Fig 3 1 2 3 Parts included 1 Door lock 2 Lipped striking plate 3 Screws 3 6 2 Lock dimensions Fig 4 5 14 5 Lock dimensions Material 1 4301 6 SVP SVZ door locks 2020 03 WN 059744 45532 dormakaba Mounting instructions Product description ...

Страница 7: ...C B D 2 8 A B C D 2 5 40 24 28 50 50 232 104 30 30 50 28 104 101 50 76 70 170 76 20 3 A B C D 16 5 33 55 60 65 Ø6 90 20 209 235 30 41 5 20 10 7 22 12 13 Ø7 Ø8 Ø7 21 5 38 35 63 79 5 17 5 165 Ø10 9 5 12 5 5 8 100 0 max 45 max 45 80 PZ 80 5 RZ 72 PZ 74 RZ PZ RZ 12 5 12 5 Lock dimensions 3 7 3 Door versions Fig 7 A B Rebated doors Fig 8 D C Flush doors Material 1 4016 7 SVP SVZ door locks 2020 03 WN 0...

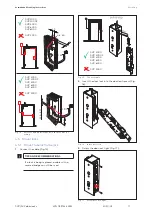
Страница 8: ...pens in the escape direction If the door opens in the opposite direction to the escape direction a building authority permit must be obtained There are recesses and pre drilled holes in the door leaf see chapter 4 4 There are recesses and pre drilled holes in the door frame see chapter 4 4 For all locks except SVP 5000 The door leaf is equipped with the connection cable SVP A 1100 2100 If the door...

Страница 9: ... Fig 10 1 ST 3 9x19 A2 70 EN ISO 7050 2 depending on fitting 3 45 at backset 35 50 at backset 40 55 at backset 45 Cut outs and pre drilled holes in door leaf Fig 11 Cut outs and pre drilled holes in door frame 9 SVP SVZ door locks 2020 03 WN 059744 45532 dormakaba Mounting instructions Mounting ...

Страница 10: ...98 21 5 73 13 Ø 10 Ø 22 38 55 20 18 20 18 124 85 ø 22 ø10 ø7 8 100 0 55 60 65 R6 13 9 ø7 13 2 R6 8 26 20 5 Fig 13 24 18 124 26 2 5 119 24 X 28 28 56 15 3 24 232 89 28 13 85 13 209 235 1 185 80 72 PZ 74 RZ 98 21 5 73 13 Ø 10 Ø 22 38 55 60 65 55 X ø7 ø 22 ø 10 ø7 8 100 0 7 104 56 14 28 Cut outs and pre drilled holes in the door leaf and door frame with a lipped striking plate 10 SVP SVZ door locks 2...

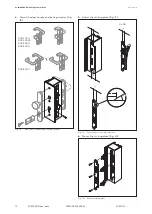
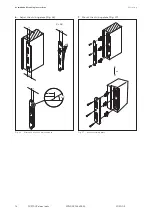
Страница 11: ...frame lock 1 Connect the cable Fig 15 TIPS AND RECOMMENDATIONS If a lock is being replaced a cable with a severed bridge can still be used Fig 15 SVP 2000 SVP 2000F SVP 4000 SVP 6000 SVZ 6000 SVP 5000 Connect cable 2 Insert the door lock into the door leaf recess Fig 16 Fig 16 Insert door lock 3 Screw the door lock tight Fig 17 Fig 17 Screw door lock tight 11 SVP SVZ door locks 2020 03 WN 059744 4...

Страница 12: ...5000 SVP 6000 Mount door handle and locking cylinder 5 Adjust the striking plate Fig 19 Fig 19 X 28 X X 28 X X 45 Dimensions of the adjustments 6 Mount the striking plate Fig 20 Fig 20 Mount striking plate 12 SVP SVZ door locks 2020 03 WN 059744 45532 dormakaba Mounting instructions Mounting ...

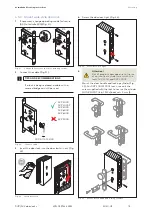
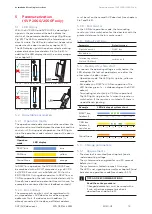
Страница 13: ...ck into the door leaf cut out Fig 23 Fig 23 C o m p r e s s e d a i r a i r c o m p r i m é D r u c k l u f t Insert door lock 4 Screw the door lock tight Fig 24 Fig 24 Screw door lock tight 5 Attention Risk of property damage due to the use of an incorrect cylinder screw with the locks SVP 2000 and SVP 2000F Mount the door handle and locking cylinder Fig 25 For SVP 2000 2000F locks use only the s...

Страница 14: ...g plate Fig 26 Fig 26 X 28 X X 28 X X 45 Dimensions of the adjustments 7 Mount the striking plate Fig 27 Fig 27 or Mount striking plate 14 SVP SVZ door locks 2020 03 WN 059744 45532 dormakaba Mounting instructions Mounting ...

Страница 15: ...es 1 to 4 If a door lock with address 1 is already connected to the door a different address must be set on the second SVP door lock see chapters 5 6 1 and 5 6 2 5 2 3 End resistor In the CAN bus operation mode the terminating resistor must be switched on for the door lock with the greatest distance to the bus center point 5 3 Default settings Parameter Default setting Operation mode DCW bus Bus a...

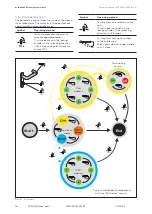
Страница 16: ...re for at least 10 s Symbol Operating method To jump from one selection to the next Turn the door key briefly in the locking cylinder in the unlocking direction until it stops To jump from setting to setting within a selection Briefly press down the door handle until it stops Fig 30 Operation mode DCW address CAN address Terminating resistor only with SafeRoute components with the Multi door licen...

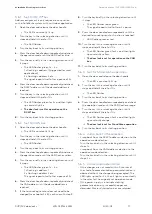
Страница 17: ... Turn the key briefly in the unlocking direction until it stops The LED flashes red or green The signal repeats itself after a 2 s pause 9 Press the door handle down repeatedly until the desired terminating resistor function is reached LED flashes green or red 10 Turn the key in the unlocking direction until it stops and hold it there for 10 s The LED flashes green for 2 s and then lights up const...

Страница 18: ... 2000 F SVP A 1100 2100 cable colors Operation mode DCW CAN Stand Alone PIN 1 bk GND GND GND PIN 2 rd Unlock 1 leaf pull input to GND via a switch PIN 3 wh 24V DC 24V DC 24V DC PIN 4 PIN 5 bn Unlock 2 leaf pull input to GND via a switch PIN 6 vio Locked output switches to GND max 30 mA Locked output switches to GND max 30 mA Locked output switches to GND max 30 mA PIN 7 rd bu PIN 8 bu External doo...

Страница 19: ...king devices added 3 Make sure that the locking points are not blocked 4 Use a force gauge to measure and record the actuating forces required to release the escape door lock The actuating forces may be max 70 N for escape doors according to EN 179 and max 80 N for escape doors according to EN 1125 5 This manual must be handed over to the facility operator and regular maintenance and recording dut...

Страница 20: ...lockcase 1 Check and operate all parts of the door lock Ensure that they are fully operational 2 Ensure all the parts provided have been mounted and that no subsequent modifications have been made or additional locking devices added 3 Make sure that the locking points are not blocked 4 Use a force gauge to measure and record the actuating forces required to release the escape door lock The actuati...

Отзывы: