FOR BACKSET
2
3
/
8
" (60 mm)
FOR BACKSET
2
3
/
4
" (70 mm)
2
1
/
8
" (54 mm)
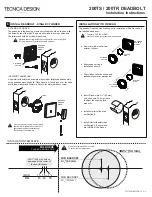
INSTALL DEADBOLT - SINGLE CYLINDER
5
EXTERIOR CYLINDER
Tapped holes in the housing of exterior cylinder should be lined up with
the screw holes of the latch. Key hole should be in down position and
the tailpiece should be horizontal as shown.
INTERIOR THUMBTURN
Align interior thumbturn base plate with cylinder tailpiece and assemble
using supplied mounting bolts. Place square or round rose over the base
plate, then washer and tumbturn. Secure thumbturn with set screw.
200TS / 200TR DEADBOLT
Installation Instructions
200TS-TR-INST 2018-03 2/2
INSTALLATION WITH FIRECAN
a. Remove cylinder collar from
exterior cylinder.
b. Ensure spacer ring is
installed as shown.
The deadbolt requires modifcation prior to installation with a firecan on a
fire labelled wood door:
c. Flip cylinder collar as shown and
reassemble exterior mechanism.
FOLD HERE
PLACE ON DOOR EDGE
1
3
/
4
45
INCH
MM
1
9
/
16
40
1
3
/
8
35
Drill 1" (25.4 mm) hole on
door edge at the center of
the door thickness
Do not use template if not to scale.
To verify, confirm dimensions.
INSTALLATION TEMPLATE
Do not use power tools when installing
door harware, excessive screw or bolt
tightening may affect installation or
functioning of the hardware.
CYLINDER
COLLAR
SPACER
RING
FLIP
CYLINDER
COLLAR
SPACER
RING
d. Insert Firecan into 2
1
/
8
" (54 mm)
hole as shown. You may have
to adjust the opening for a
proper fit.
e. Install exterior cylinder as
per Section 5.
f. Install interior thumbturn as
per Section 5. Ensure tabs
are INSIDE of the firecan.
ROUND OR
SQUARE
MODEL
ROUND OR
SQUARE
MODEL
ROUND OR
SQUARE
MODEL
Remove spacer ring inside the cylinder collar (see to the right).
It is only required for installations with a firecan.
TABS
CYLINDER
COLLAR
Firecan is NOT INCLUDED.
Must be ordered in conjunction with deadbolt.


