background image

NL

Reiniging en onderhoud

RM5310, RM5330, RM5380

90

10

Reiniging en onderhoud

!

A

Reinig het toestel binnen en buiten regelmatig met een vochtige doek.

Zorg ervoor dat de ventilatieopeningen van het toestel vrij zijn van stof en 
verontreinigingen, zodat de bij het gebruik ontstane warmte kan worden 
afgevoerd en het toestel niet beschadigd raakt.

11

Garantie

De wettelijke garantieperiode is van toepassing. Als het product defect is, 
neem dan contact op met uw handelaar of met de vestiging van de producent 
in uw land (voor adressen, zie garantieboekje).

Voor de behandeling van reparaties resp. garantiegevallen moeten volgende 
documenten worden meegestuurd:

een kopie van de rekening met datum van aankoop,

de reden van de klacht of een beschrijving van het defect

12

Afvoer

Laat het verpakkingsmateriaal indien mogelijk recyclen.

M

Als u het product definitief buiten bedrijf stelt, informeer dan bij het 
dichtstbijzijnde recyclingcentrum of uw speciaalzaak naar de 
betreffende afvoervoorschriften.

WAARSCHUWING! 

Scheid het toestel voor elke reiniging en verzorging van het net.

LET OP! Gevaar voor beschadiging!

Voorkom dat olie of vet in contact komt met de deurafdichting.

Gebruik voor het reinigen geen bijtende schoonmaakmiddelen 
of harde voorwerpen, aangezien het koeltoestel hierdoor 
beschadigd zou kunnen raken.

Содержание RM 5310

Страница 1: ...ng 12 Absorber refrigerator Installation Manual 29 Réfrigérateur à absorption Instructions de montage 44 Frigorifero ad assorbimento Indicazioni di montaggio 60 Absorptiekoelkast Montagehandleiding 76 DE EN FR IT NL RM5310 RM5330 RM5380 ...

Страница 2: ...RM5310 RM5330 RM5380 2 1 486 mm 474 mm 618 mm RM5310 2 486 mm 821 mm 474 mm RM5330 3 486 mm 821 mm 474 mm RM5380 ...

Страница 3: ...RM5310 RM5330 RM5380 3 1 2 4 3 RM5310 RM5330 4 4 3 3 RM5380 1 1 2 2 4 ...

Страница 4: ...RM5310 RM5330 RM5380 4 5 1 6 1 4 3 2 7 ...

Страница 5: ...RM5310 RM5330 RM5380 5 1 3 2 8 0 9 b 1 2 a ...

Страница 6: ...RM5310 RM5330 RM5380 6 c min 15 mm 1 2 3 4 5 6 7 8 9 10 d ...

Страница 7: ...RM5310 RM5330 RM5380 7 e f g h j i l k ...

Страница 8: ...RM5310 RM5330 RM5380 8 n m 1 o p 2 1 q ...

Страница 9: ...RM5310 RM5330 RM5380 9 SW 17 SW 14 r RM5310 RM5330 RM5380 s ...

Страница 10: ...wn Yellow Green Red Black FR Bleu Marron Jaune Vert Rouge Noir IT Blu Marrone Giallo Verde Rosso Nero NL Blauw Bruin Geel Groen Rood Zwart 1 2 3 4 8 10 10 12 13 13 13 N L G ge gn ge gn V85 bl bl 1a 1b 3a 3b 5a 5b 2b 2a 4b 4a 6b 6a br br br bl rt ge gn br br bl br br sw sw br br br F E 11 t ...

Страница 11: ...Black White FR Bleu Marron Jaune Vert Rouge Noir Blanc IT Blu Marrone Giallo Verde Rosso Nero Bianco NL Blauw Bruin Geel Groen Rood Zwart Wit 1 2 7 9 3 4 5 6 8 10 10 12 13 13 N L G ge gn ge gn V85 bl bl 1a 1b 3a 3b 5a 5b 2b 2a 4b 4a 6b 6a br br br bl rt ge gn br br bl br br sw sw br br ws ws ws ws sw sw br F E 11 13 u ...

Страница 12: ...iter I Inhaltsverzeichnis 1 Erklärung der Symbole 13 2 Sicherheitshinweise 13 3 Lieferumfang 16 4 Zubehör 16 5 Bestimmungsgemäßer Gebrauch 16 6 Kühlschrank einbauen 17 7 Türanschlag wechseln 22 8 Türdekor einsetzen 23 9 Kühlschrank anschließen 24 10 Reinigung und Pflege 27 11 Gewährleistung 27 12 Entsorgung 27 13 Technische Daten 28 HINWEIS Hinweise zur Bedienung finden Sie in der Bedienungsanleit...

Страница 13: ...Hersteller übernimmt in folgenden Fällen keine Haftung für Schäden Montage oder Anschlussfehler Beschädigungen am Produkt durch mechanische Einflüsse und Über spannungen Veränderungen am Produkt ohne ausdrückliche Genehmigung vom Hersteller Verwendung für andere als die in der Anleitung beschriebenen Zwecke WARNUNG Sicherheitshinweis Nichtbeachtung kann zu Tod oder schwerer Verletzung führen VORSI...

Страница 14: ...bsorberaggregat Es steht unter hohem Druck und kann Verletzungen verursachen wenn es geöffnet wird Achten Sie auf eine saubere und rückstandsfreie Verarbeitung wenn Silikon Dichtungsmasse o Ä verwendet wird Kommen Silikonfäden mit heißen Teilen oder offenen Flammen in Berührung besteht Brandgefahr Das Gerät niemals mit einer offenen Flamme auf Undichtigkeit prüfen Verwenden Sie nur Propan oder But...

Страница 15: ...chlusskabel aus der Steckdose Schließen Sie das Gerät nur mit dem zugehörigen Anschluss kabel an das Wechselstromnetz an Verwenden Sie nur Kabel mit dem entsprechenden Kabel querschnitt Das Kühlgerät ist nicht geeignet für den Transport ätzender oder lösungsmittelhaltiger Stoffe Schützen Sie das Gerät und die Kabel vor Hitze und Nässe Das Gerät darf nicht dem Regen ausgesetzt werden ...

Страница 16: ...lich zum Kühlen und Lagern von Lebensmitteln Die Kühlschränke sind nicht für die fachgerechte Lagerung von Medikamenten vorgesehen Die Kühlschränke sind für den Betrieb an einer 12 Vg Spannungsquelle und an einer Netzspannung von 220 240 Vw ausgelegt und können stromunabhängig mit Flüssiggas Propan oder Butan betrieben werden Die Kühlschränke dürfen nicht mit Erdgas oder Stadtgas betrieben werden ...

Страница 17: ...21 x 486 x 474 Abb 2 Seite 2 RM5380 821 x 486 x 474 Abb 3 Seite 2 In der Außenwand muss eine Belüftungsöffnung Abb 4 1 Seite 3 und eine Entlüftungsöffnung Abb 4 2 Seite 3 mit Lüftungsgitter vorgese hen werden damit die entstehende Wärme gut nach außen abgegeben werden kann Belüftungsöffnung Lüftungsgitter möglichst bündig zum Boden der Einbaunische mit einem Querschnitt von mindestens 250 cm Entlü...

Страница 18: ...ühlschrank zugdicht einbauen auf Seite 18 6 2 Kühlschrank zugdicht einbauen Gasbetriebene Kühlgeräte in Wohnwagen oder Wohnmobilen müssen nach EN 1949 zugdicht eingebaut werden Das bedeutet dass die Verbrennungs luft nicht dem Innenraum entnommen wird und die Abgase am direkten Ein tritt in den Wohnraum gehindert werden Zwischen Rückwand des Kühlschranks und dem Innenraum des Fahrzeugs muss eine g...

Страница 19: ...e Belüftungsöffnung im Fußboden einbauen Fertigen Sie hinter dem Kühlschrank im Bereich des Gasbrenners eine Belüftungsöffnung mit einem Durchmesser von mindestens 40 mm im Boden an Abb 4 4 Seite 3 Das Belüftungsrohr muss direkt nach außen führen So kann austretendes unverbranntes Gas nach außen entweichen Schirmen Sie das Ende der Öffnung mit einem Ablenker ab damit während der Fahrt kein Schlamm...

Страница 20: ...und schrauben Sie ihn fest Abb 0 Seite 5 Setzen Sie das Lüftungsgitter ein und verriegeln Sie es Abb a Seite 5 Nur bei LS 100 Setzen Sie den Einsatz für die Abgasführung ein Abb b Seite 5 Pos in Abb 7 Seite 4 Bezeichnung 1 Einbaurahmen 2 Lüftungsgitter 3 Einsatz für Abgasführung 4 Winterabdeckung Pos in Abb 8 Seite 5 Bezeichnung 1 Einbaurahmen 2 Lüftungsgitter 3 Winterabdeckung ...

Страница 21: ... Setzen Sie das Lüftungsgitter LS100 9 in den Einbaurahmen 6 ein und verriegeln Sie es Stecken Sie die Abdeckkappe 8 auf das Abgasrohr 7 Setzen Sie den Einsatz für die Abgasführung 10 in das Lüftungsgitter 9 ein 6 6 Kühlschrank befestigen I Bringen Sie den Kühlschrank in seine endgültige Lage Drehen Sie vier Schrauben durch die vier Kunststoffbuchsen in den Seitenwänden des Kühlschranks Abb d Seit...

Страница 22: ... Sie sie auf Abb f Seite 7 Heben Sie die Tür an und entnehmen Sie sie Abb g Seite 7 Lösen Sie die Kappe Abb h Seite 7 und stecken Sie sie auf der ande ren Seite der Tür auf Abb i Seite 7 Schrauben Sie den Scharnierstift Abb j Seite 7 heraus und setzen Sie ihn auf der anderen Seite ein Abb k Seite 7 Setzen Sie die Tür auf den Scharnierstift Abb l Seite 7 Befestigen Sie die Schraube am oberen Türsch...

Страница 23: ...der Unterseite des Türrahmens Abb o 1 Seite 8 Nehmen Sie die Türleiste ab Abb p Seite 8 Schieben Sie das neue Dekor in die Öffnung Abb q 1 Seite 8 Setzen Sie die Türleiste wieder ein Schrauben Sie die drei Schrauben wieder ein Setzen Sie die Tür wieder ein siehe Kapitel Türanschlag wechseln auf Seite 22 Falls Sie den Kühlschrank zum Einsetzen des Dekors auf die Seite gelegt haben Warten Sie einige...

Страница 24: ...ung ausstellen ACHTUNG Das Gerät darf nur von einer Fachkraft gemäß den geltenden Vorschriften und Normen an die Gasversorgung angeschlossen werden Verwenden Sie nur Propan oder Butangasflaschen kein Erdgas oder Stadtgas mit geprüftem Druckreduzierventil und passendem Kopfstück Vergleichen Sie die Druckangabe auf dem Typenschild mit der Druckangabe auf dem Druckregler der Propan oder Butangasflasc...

Страница 25: ...S Die Netzsteckdose muss gut erreichbar sein sodass Sie bei Bedarf den Netzstecker ziehen und das Gerät dadurch vom Netz trennen können Die Anschlusskabel müssen so verlegt sein dass sie nicht mit heißen Teilen des Aggregats Brenners oder mit scharfen Kanten in Berührung kommen Veränderungen an der internen elektrischen Installation oder der Anschluss anderer elektrischer Komponenten z B frem der ...

Страница 26: ...Anschluss 3 4 mit einer 16 A Sicherung und die Zuleitung zur Beleuchtung Anschluss 5 6 mit einer 2 A Sicherung ab Führen Sie die Zuleitung zum Heizelement Anschluss 3 4 über ein zündschlossgesteuertes Relais um zu verhindern dass die Batterie bei versehentlich abgeschaltetem Motor komplett entladen wird Abb s Seite 9 Pos Bezeichnung 1 Heizpatrone Batterie 2 Anschlusskabel 12 Vg 3 Masse Batterie He...

Страница 27: ...he Garantieheft Zur Reparatur bzw Gewährleistungsbearbeitung müssen Sie folgende Unterlagen mitschicken eine Kopie der Rechnung mit Kaufdatum einen Reklamationsgrund oder eine Fehlerbeschreibung 12 Entsorgung Geben Sie das Verpackungsmaterial möglichst in den entsprechenden Recycling Müll M Wenn Sie das Produkt endgültig außer Betrieb nehmen infor mieren Sie sich bitte beim nächsten Recyclingcente...

Страница 28: ...Anschlusswerte 125 W 230 Vw 120 W 12 Vg 18 3 g h Gas Frosterfach 5 l Energie verbrauch 2 5 kWh 24 h 230 V 12 V Gasverbrauch 270 g 24 h Klimaklasse SN Kühlleistung Kühlschrank 7 C Frosterfach bis 12 C Umgebungs temperatur 10 C bis 32 C Abmessungen H x B x T 618 x 486 x 474 mm Abb 1 Seite 2 821 x 486 x 474 mm Abb 2 Seite 2 821 x 486 x 474 mm Abb 3 Seite 2 Gewicht 20 kg 22 kg 24 kg Prüfung Zertifikat...

Страница 29: ... with it I Table of contents 1 Explanation of symbols 30 2 Safety instructions 30 3 Scope of delivery 32 4 Accessories 32 5 Intended use 32 6 Installing the refrigerator 33 7 Changing the door hinge 37 8 Inserting the door decoration 38 9 Connecting the refrigerator 39 10 Cleaning and maintenance 42 11 Warranty 42 12 Disposal 42 13 Technical data 43 NOTE For information on operating the device see...

Страница 30: ...he following cases Faulty assembly or connection Damage to the product resulting from mechanical influences and excess voltage Alterations to the product without express permission from the manu facturer Use for purposes other than those described in the operating manual WARNING Safety instruction Failure to observe this instruction can cause fatal or serious injury CAUTION Safety instruction Fail...

Страница 31: ...check the device for leaks with an open flame Use only propane or butane gas no natural gas The device may only be operated at the pressure specified on the type plate Use a DIN DVGW approved pressure regulator with permanent settings in line with DIN EN 12864 Dismantle all refrigerator doors when disposing of the old device and leave the grids in the refrigerator to prevent anyone from being lock...

Страница 32: ...signed solely for the cooling and storage of food The refrigerators are not designed for the proper storage of medication The refrigerators are designed for operation on a 12 Vg voltage source and on a 220 240 Vw mains supply and can be independently powered by liquefied petroleum gas propane or butane The refrigerators may not be operated with natural gas or town gas Description Item no Ventilati...

Страница 33: ...M5380 821 x 486 x 474 fig 3 page 2 Provide an air inlet fig 4 1 page 3 and an air outlet fig 4 2 page 3 with ventilation grilles in the exterior wall to allow generated heat to be dis sipated to the outside Air inlet The ventilation grille should be as flush as possible with the floor of the installation recess and have a cross section of at least 250 cm Air outlet preferably above the device It i...

Страница 34: ...ng the refrigerator in a draft proof manner Gas operated cooling appliances in caravans and motorhomes must be installed in a draft proof manner according to EN 1949 That means that the combustion air is not removed directly from the interior and the exhaust gases are prevented from entering the living space directly Suitable sealing must be provided between the back wall of the refrigerator and t...

Страница 35: ...n recess you must install an air inlet in the floor Behind the refrigerator in the area of the gas burner create an air inlet in the ground with a diameter of at least 40 mm fig 4 4 page 3 The air supply pipe must lead directly to the outside That allows escaping unburned gas to escape outside Protect the end of the hole with a deflector to prevent mud or dirt getting in while the vehicle is drivi...

Страница 36: ...ter 2 and the exhaust gas pipe 3 Fix the T piece adapter and exhaust gas pipe in place with a bolt 4 Make sure that the heat distributor 5 is in the correct position Push the exhaust gas pipe with the cover plate 7 through the opening in the installation frame provided for that purpose 6 Connect the exhaust gas pipe and the cover plate with the T piece 1 Shorten the exhaust gas pipe 7 to the right...

Страница 37: ... the door lock fig e page 7 and remove the bolt the door lock and the spacer Remove the bolt on the other side and keep it fig f page 7 Lift the door and remove it fig g page 7 Release the cap fig h page 7 and replace it on the other side of the door fig i page 7 Unscrew the hinge pin fig j page 7 and replace it on the other side fig k page 7 Place the door on the hinge pin fig l page 7 Fasten the...

Страница 38: ...page 37 Remove the three bolts on the bottom of the door frame fig o 1 page 8 Take off the door strip fig p page 8 Insert the new decoration in the opening fig q 1 page 8 Put the door strip back in Screw the three bolts back in again Put the door back in see chapter Changing the door hinge on page 37 If you placed the refrigerator on its side to insert the decoration Wait for an hour before puttin...

Страница 39: ...ted NOTICE This device may only be connected to the gas supply by a specialist in accordance with the applicable guidelines and standards Use only propane or butane gas cylinders no natural gas or town gas with an inspected pressure relief valve and suitable head piece Compare the pressure information on the type plate with the pressure information on the pressure regulator on the propane or butan...

Страница 40: ...t must be easily accessible so that you can unplug the mains plug if necessary and thereby disconnect the device from the mains The connection cable must be laid in such a way that it does not come into contact with hot parts of the cooling unit burner or with sharp edges Changes to the internal electrical installation or the connection of other electrical components e g additional fans by other m...

Страница 41: ...3 4 with a 16 A fuse and the power supply line for the lighting connection 5 6 with a 2 A fuse Lay the power supply line for the heating element connection 3 4 via a ignition controlled relay to prevent the battery from accidentally being discharged completely when the engine is switched off fig s page 9 Item Description 1 Heating cartridge battery 2 Connection cable 12 Vg 3 Earth battery heating ...

Страница 42: ...warranty claim to be processed you need to send the fol lowing documents a copy of the invoice with the date of purchase a reason for the complaint or description of the error 12 Disposal Place the packaging material in the appropriate recycling waste bins wherever possible M If you wish to finally dispose of the product ask your local recycling centre or specialist dealer for details about how to...

Страница 43: ... W 230 Vw 120 W 12 Vg 18 3 g h gas Freezer compartment 5 l Power consumption 2 5 kWh 24 h 230 V 12 V Gas consumption 270 g 24 h Climatic class SN Cooling capacity Refrigerator 7 C Freezer compartment up to 12 C Ambient temperature 10 C to 32 C Dimensions h x w x d 618 x 486 x 474 mm fig 1 page 2 821 x 486 x 474 mm fig 2 page 2 821 x 486 x 474 mm fig 3 page 2 Weight 20 kg 22 kg 24 kg Inspection cer...

Страница 44: ...ication des symboles 45 2 Consignes de sécurité 46 3 Pièces fournies 47 4 Accessoires 48 5 Usage conforme 48 6 Encastrement du réfrigérateur 49 7 Modification du côté d ouverture de la porte 54 8 Montage du décor de la porte 54 9 Raccordement du réfrigérateur 55 10 Entretien et nettoyage 58 11 Garantie 58 12 Retraitement 58 13 Caractéristiques techniques 59 REMARQUE Les consignes d utilisation se ...

Страница 45: ...e à un élément figurant sur une illustration dans cet exemple à la position 5 de l illustration 1 à la page 3 AVERTISSEMENT Consigne de sécurité le non respect de ces consignes peut entraîner la mort ou de graves blessures ATTENTION Consigne de sécurité le non respect de ces consignes peut entraîner des blessures AVIS Le non respect de ces consignes peut entraîner des dommages matériels et des dys...

Страница 46: ...t ou une personne de qualification similaire afin d éviter tout danger Seul un personnel qualifié est habilité à effectuer des réparations sur l appareil Toute réparation mal effectuée risquerait d entraîner de graves dangers N ouvrez jamais le module de l absorbeur Il est soumis à une forte pression et peut provoquer des blessures s il est ouvert Veillez à ce que le travail soit effectué propreme...

Страница 47: ...ation électrique dont vous disposez Ne tirez jamais sur le câble de raccordement pour sortir la fiche de la prise Pour raccorder l appareil au courant alternatif veuillez utiliser exclusivement le câble de raccordement correspondant Utilisez uniquement des câbles de la section correspondante N utilisez pas l appareil pour le transport de produits corrosifs ou de solvants Tenez l appareil et les câ...

Страница 48: ... conçus pour le stockage de médicaments dans les règles de l art Les réfrigérateurs sont conçus pour fonctionner sur une source de tension 12 Vg et sur une tension du secteur de 220 240 Vw et peuvent fonction ner au gaz liquide propane ou butane indépendamment du courant Les réfrigérateurs ne doivent pas être utilisés avec du gaz naturel ou du gaz de ville Désignation N d article Kit de ventilatio...

Страница 49: ...ge 2 La paroi extérieure doit comporter une ouverture de ventilation fig 4 1 page 3 et une ouverture d aération fig 4 2 page 3 équipée d une grille d aération afin que la chaleur formée puisse être évacuée correcte ment vers l extérieur Ouverture de ventilation placez la grille d aération autant que possible au même niveau que le plancher de l alcôve d encastrement avec une surface de découpe d au...

Страница 50: ...érateur doit être encastré sans passage d air selon la norme EN 1949 voirchapitre Encastrement du réfrigérateur sans passage d air page 50 6 2 Encastrement du réfrigérateur sans passage d air Les appareils de refroidissement fonctionnant au gaz dans des camping cars ou caravanes doivent être encastrés hermétiquement selon la norme EN 1949 Cela signifie que l air nécessaire à la combustion n est pa...

Страница 51: ...ouverture d aération ne peut pas être montée au même niveau que le plancher de l alcôve il faut prévoir en plus une ouverture d aération dans le plancher du véhicule derrière le réfrigérateur dans la zone du brûleur pratiquez une ouverture d aération d un diamètre d au moins 40 mm dans le plancher fig 4 4 page 3 Le tuyau de ventilation doit mener directement vers l extérieur Ainsi le gaz non brûlé...

Страница 52: ...tez l insert pour évacuation des gaz d échappement en place fig b page 5 6 5 Montage de l évacuation des gaz d échappement fig c page 6 Placez la pièce en T 1 sur l adaptateur 2 et sur le tuyau des gaz d échappement 3 Fixez la pièce en T l adaptateur et le tuyau des gaz d échappement avec une vis 4 Pos dans fig 7 page 4 Désignation 1 Cadre de montage 2 Grille d aération 3 Insert pour évacuation de...

Страница 53: ... Enfichez le cache 8 sur le tuyau des gaz d échappement 7 Placez l insert pour évacuation des gaz d échappement 10 dans la grille d aération 9 6 6 Fixation du réfrigérateur I Placez le réfrigérateur dans sa position définitive Faites passer quatre vis dans les quatre douilles en plastique des parois latérales du réfrigérateur fig d page 6 puis vissez les dans la paroi de l alcôve ATTENTION Percez ...

Страница 54: ...a vis sur la charnière supérieure de la porte fig m page 8 Fixez le verrouillage de la porte fig n page 8 8 Montage du décor de la porte A Le décor de la porte doit présenter les dimensions suivantes RM5310 532 1 x 453 1 x max 3 8 3 h x l x p en mm RM5330 740 x 453 5 x max 3 8 3 h x l x p en mm RM5380 740 x 453 5 x max 3 8 3 h x l x p en mm Procédez comme suit Démontez la porte voir chapitre Modif...

Страница 55: ...lisez uniquement des bouteilles de gaz propane ou butane pas de gaz naturel ou de gaz de ville dont la vanne de réduc tion de pression a été contrôlée et un embout correspondant Vérifiez que les données inscrites sur le régulateur de pres sion de la bouteille de propane ou de butane correspondent aux données inscrites sur la plaque signalétique Faites fonctionner l appareil uniquement avec une pre...

Страница 56: ...e ne doivent pas être raccordées l une avec l autre dans la caravane Dans le cas contraire des interférences électriques pourraient se produire ou des composants électriques pourraient être endommagés REMARQUE La prise secteur doit être facile d accès de telle sorte que vous puissiez débrancher la fiche secteur en cas de besoin et ainsi débrancher l appareil Les câbles de raccordement doivent être...

Страница 57: ... ligne d alimentation vers l éclairage raccordement 5 6 par un fusible de 2 A Faites passer la ligne d alimentation vers l élément de chauffage raccordement 3 4 par un relais commandé par la serrure de contact afin d éviter que la batterie ne se décharge complètement lorsque le moteur est éteint par inadvertance fig s page 9 Réf Désignation 1 Batterie cartouche de chauffage 2 Câble de raccordement...

Страница 58: ... du fabricant de votre pays adresses voir le livret de garantie Pour toute réparation ou autre prestation de garantie veuillez joindre à l appareil les documents suivants une copie de la facture comportant la date d achat un motif de réclamation ou une description du dysfonctionnement 12 Retraitement Jetez les emballages dans les conteneurs de déchets recyclables prévus à cet effet AVERTISSEMENT A...

Страница 59: ...703865 Tension de raccordement 230 Vw 12 Vg Capacité 60 l 70 l 80 l Capacité brute 55 l 65 l 75 l Valeurs de raccordement 125 W 230 Vw 120 W 12 Vg 18 3 g h gaz Compartiment freezer 5 l Consommation électrique 2 5 kWh 24 h 230 V 12 V Consommation de gaz 270 g 24 h Classe climatique SN Puissance frigorifique Réfrigérateur 7 C Compartiment congélation jusqu à 12 C Température ambiante De 10 C à 32 C ...

Страница 60: ...1 Spiegazione dei simboli 61 2 Indicazioni di sicurezza 62 3 Dotazione 64 4 Accessori 64 5 Conformità d uso 64 6 Montaggio del frigorifero 65 7 Cambio del lato di apertura della porta 70 8 Sostituzione del pannello decorativo della porta 70 9 Collegamento del frigorifero 71 10 Pulizia e cura 74 11 Garanzia 74 12 Smaltimento 74 13 Specifiche tecniche 75 NOTA Le indicazioni per l impiego sono riport...

Страница 61: ...na 3 questi dati si riferiscono ad un elemento in una figura in questo caso alla posizione 5 nella figura 1 a pagina 3 AVVERTENZA Avviso di sicurezza la mancata osservanza di questo avviso può causare ferite gravi anche mortali ATTENZIONE Avviso di sicurezza la mancata osservanza di questo avviso può essere causa di lesioni AVVISO La mancata osservanza di questa nota può causare danni mate riali e...

Страница 62: ...o dispositivo può essere riparato solo da personale specializzato Possono insorgere gravi pericoli in seguito a riparazioni non eseguite in maniera corretta Non aprire mai il gruppo assorbitore Si trova sotto pressione elevata e può causare lesioni se viene aperto Garantire una lavorazione pulita e priva di residui se viene utilizzato mastice al silicone o prodotti simili Se fili di silicone vengo...

Страница 63: ...isponibili Non estrarre mai la spina dalla presa tirando il cavo di collegamento Collegare l apparecchio alla rete di alimentazione in corrente alternata usando esclusivamente il cavo di collegamento previsto Utilizzare solo cavi con una sezione corrispondente Il frigorifero non è adatto per il trasporto di sostanze corrosive o solventi Proteggere l apparecchio e i cavi dal caldo e dall umidità No...

Страница 64: ...ntari I frigoriferi non sono previsti per la conservazione corretta di medicinali Questi frigoriferi sono stati progettati per essere collegati a una fonte di ten sione di 12 Vg e a una tensione di rete di 220 240 Vw e possono essere anche alimentati con gas liquido propano o butano a prescindere dalla cor rente I frigoriferi non possono essere alimentati con metano o gas indu striale Denominazion...

Страница 65: ...in mm RM5310 618 x 486 x 474 fig 1 pagina 2 RM5330 821 x 486 x 474 fig 2 pagina 2 RM5380 821 x 486 x 474 fig 3 pagina 2 La parete esterna deve essere provvista di un apertura di ventilazione fig 4 1 pagina 3 e di una di sfiato fig 4 2 pagina 3 con griglia di ventilazione per permettere al calore generato di essere ceduto correttamente all esterno Apertura di ventilazione griglia di ventilazione il...

Страница 66: ... 2 24 EN 1648 1 e EN 1648 2 L installazione del gas deve essere eseguita in conformità alle norme nazionali e locali Norma europea EN 1949 Il frigorifero deve essere montato in modo da essere indipendente dall aria circostante secondo EN 1949 vedi capitolo Montaggio del frigo rifero indipendente dall aria circostante a pagina 66 6 2 Montaggio del frigorifero indipendente dall aria circostante I fr...

Страница 67: ... attenersi alle indicazioni vedi capitolo Operazioni preliminari al montag gio a pagina 65 Se la griglia di ventilazione dell apertura di ventilazione non può essere montata a livello del pavimento della nicchia di montaggio l apertura di ventilazione deve essere montata nel pavimento Dietro al frigorifero in prossimità del bruciatore per gas creare nel pavi mento un apertura di ventilazione con u...

Страница 68: ...e serrarlo fig 0 pagina 5 Inserire la griglia di ventilazione e bloccarla fig a pagina 5 Solo per LS 100 Inserire l inserto per il condotto fumi fig b pagina 5 Pos alla fig 7 pagina 4 Denominazione 1 Telaio di montaggio 2 Griglia di aerazione 3 Inserto per il condotto fumi 4 Copertura invernale Pos in fig 8 pagina 5 Denominazione 1 Telaio di montaggio 2 Griglia di aerazione 3 Copertura invernale ...

Страница 69: ...alla lunghezza giusta Inserire la griglia di ventilazione LS100 9 nel telaio di montaggio 6 e bloccarlo Inserire il cappuccio di protezione 8 sul tubo del gas di scarico 7 Inserire l inserto per il condotto fumi 10 nella griglia di ventilazione 9 6 6 Fissaggio del frigorifero I Portare il frigorifero nel luogo di installazione definitivo Ruotare le quattro viti attraverso le quattro prese in plast...

Страница 70: ... superiore della porta fig m pagina 8 Fissare il bloccaggio della porta fig n pagina 8 8 Sostituzione del pannello decorativo della porta A Il pannello decorativo della porta deve avere le seguenti dimensioni RM5310 532 1 x 453 1 x max 3 8 3 H x L x P in mm RM5330 740 x 453 5 x max 3 8 3 H x L x P in mm RM5380 740 x 453 5 x max 3 8 3 H x L x P in mm Procedere come segue Smontare la porta vedi capi...

Страница 71: ...o specialista in conformità alle prescrizioni e alle norme vigenti Impiegare solo bombole di gas propano o butano non metano o gas industriale con valvola di riduzione della pressione certificata e con un cappuccio appropriato Confrontare i dati della pressione riportati sulla targhetta con quelli indicati sul regolatore di pressione della bombola di gas propano o butano L apparecchio deve essere ...

Страница 72: ...o i rispettivi cavi di collegamento negativi e positivi dei collegamenti da 12 V per l elemento riscaldante e l illumina zione Altrimenti possono verificarsi interferenze elettriche o danni ai componenti elettrici NOTA La presa di rete deve essere facilmente accessibile affinché in caso di necessità possa essere possibile estrarre la spina di rete e staccare quindi il dispositivo dalla rete I cavi...

Страница 73: ...l illuminazione collegamento 5 6 con un fusibile 2 A Collegare la rete di alimentazione all elemento riscaldante collegamento 3 4 tramite un relè comandato dal blocchetto dell accensione per impedire che la batteria venga completamente scaricata se il motore viene spento inavvertitamente fig s pagina 9 Pos Denominazione 1 Batteria riscaldatore a cartuccia 2 Cavo di collegamento da 12 Vg 3 Massa ba...

Страница 74: ...disbrigo delle condizioni di garanzia è necessario inviare la seguente documentazione una copia della fattura con la data di acquisto del prodotto un motivo su cui fondare il reclamo oppure una descrizione del guasto 12 Smaltimento Raccogliere il materiale di imballaggio possibilmente negli appositi contenitori di riciclaggio M Quando il prodotto viene messo fuori servizio definitivamente informar...

Страница 75: ...di collegamento 125 W 230 Vw 120 W 12 Vg 18 3 g h gas Freezer 5 l Consumo energetico 2 5 kWh 24 h 230 V 12 V Consumo di gas 270 g 24 h Classe climatica SN Capacità di raffreddamento Frigorifero 7 C Freezer fino a 12 C Temperatura ambiente da 10 C a 32 C Dimensioni H x L x P 618 x 486 x 474 mm fig 1 pagina 2 821 x 486 x 474 mm fig 2 pagina 2 821 x 486 x 474 mm fig 3 pagina 2 Peso 20 kg 22 kg 24 kg ...

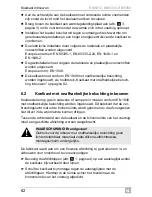
Страница 76: ...pgave 1 Verklaring van de symbolen 77 2 Veiligheidsinstructies 78 3 Omvang van de levering 80 4 Toebehoren 80 5 Gebruik volgens bestemming 80 6 Koelkast inbouwen 81 7 Deuraanslag vervangen 85 8 Deurdecor aanbrengen 86 9 Koelkast aansluiten 87 10 Reiniging en onderhoud 90 11 Garantie 90 12 Afvoer 90 13 Technische gegevens 91 INSTRUCTIE Aanwijzingen voor bediening staan in de bedieningshandleiding ...

Страница 77: ...pagina 3 deze aanduiding wijst u op een element in een afbeel ding in dit voorbeeld op positie 5 in afbeelding 1 op pagina 3 WAARSCHUWING Veiligheidsaanwijzing Het niet naleven kan leiden tot overlijden of ernstig letsel VOORZICHTIG Veiligheidsaanwijzing Het niet naleven kan leiden tot letsel LET OP Het niet naleven ervan kan leiden tot materiële schade en de werking van het product beperken INSTR...

Страница 78: ...oor de klantenservice van de fabrikant of een gelijkwaardig gekwalificeerde persoon worden vervan gen Reparaties aan dit toestel mogen uitsluitend door vakmonteurs uitgevoerd worden Door onvakkundige reparaties kunnen grote gevaren ontstaan Open het absorptieaggregaat nooit Dit staat onder hoge druk en kan letsel veroorzaken als het wordt geopend Zorg voor een schone verwerking zonder resten als b...

Страница 79: ...Trek de stekker nooit aan de aansluitkabel uit het stopcontact Sluit het toestel enkel met de bijbehorende aansluitkabel op het wisselstroomnet aan Gebruik alleen kabels met passende kabeldiameter Het koeltoestel is niet geschikt voor transport van bijtende of oplosmiddelhoudende stoffen Bescherm het toestel en de kabels tegen hitte en vocht Het toestel mag niet aan regen worden blootgesteld ...

Страница 80: ...voor het koelen en bewaren van levensmiddelen De koelkasten zijn niet bedoeld voor professionele opslag van medicamenten De koelkasten zijn geschikt voor gebruik met een 12 Vg spanningsbron en een netspanning van 220 240 Vw en kunnen stroomonafhankelijk met vloeibaar gas propaan of butaan worden gebruikt De koelkasten mogen niet met aardgas of stadsgas worden gebruikt Omschrijving Artikelnr Ventil...

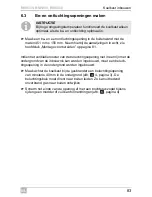
Страница 81: ... afb 3 pagina 2 In de buitenwand moeten een beluchtingsopening afb 4 1 pagina 3 en een ontluchtingsopening afb 4 2 pagina 3 met ventilatierooster voorhanden zijn om de warmte die ontstaat goed naar buiten te kunnen leiden Beluchtingsopening Beluchtingsrooster moet indien mogelijk in een lijn met de ondergrond van de inbouwnis zijn en een diameter hebben van hooguit 250 cm Ontluchtingsopening indie...

Страница 82: ...onafhankelijke beluch ting inbouwen op pagina 82 6 2 Koelkast met onafhankelijke beluchting inbouwen Koeltoestellen op gas in caravans of campers in moeten conform EN 1949 met onafhankelijke beluchting worden ingebouwd Dit betekent dat de ver brandingslucht niet uit de binnenruimte wordt genomen en de afvoergassen niet direct in de woonruimte kunnen dringen Tussen de achterwand van de koelkast en ...

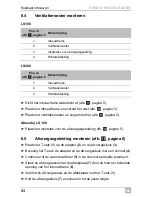
Страница 83: ...uwnis kan worden ingebouwd moet een beluch tingsopening in de ondergrond worden ingebouwd Maak achter de koelkast bij de gasbrander een beluchtingsopening van minstens 40 mm in de ondergrond afb 4 4 pagina 3 De beluchtingsbuis moet direct naar buiten leiden Zo kan uittredend onverbrand gas naar buiten ontwijken Scherm het einde van de opening af met een bochtstuk zodat tijdens rijden geen modder o...

Страница 84: ... 1 op de adapter 2 en de afvoergasbuis 3 Bevestig het T stuk de adapter en de afvoergasbuis met een schroef 4 Controleer of de warmteverdeler 5 in de hiervoor bedoelde positie zit Steek de afvoergasbuis met de afdekplaat 7 door de hiervoor bedoelde opening van het inbouwframe 6 Verbind de afvoergasbuis en de afdekplaat met het T stuk 1 Kort de afvoergasbuis 7 eventueel in tot de juiste lengte Pos ...

Страница 85: ...rendeling en de afstandsschijf eruit Verwijder de schroef aan de andere zijde en bewaar deze afb f pagina 7 Til de deur op en eruit afb g pagina 7 Maak de kap afb h pagina 7 los en steek deze op de andere deur afb i pagina 7 Schroef de scharnierpen afb j pagina 7 eruit en bevestig deze in de andere zijde afb k pagina 7 Plaats de deur op de scharnierpen afb l pagina 7 Bevestig de schroef in de bove...

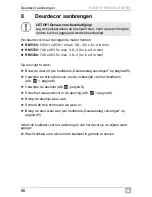
Страница 86: ...hroeven van de onderzijde van het deurframe afb o 1 pagina 8 Verwijder de deurlijst afb p pagina 8 Schuif het nieuwe decor in de opening afb q 1 pagina 8 Breng de deurlijst weer aan Schroef de drie schroeven we weer in Breng de deur weer aan zie hoofdstuk Deuraanslag vervangen op pagina 85 Indien de koelkast voor het aanbrengen van het decor op de zijkant werd gelegd Wacht enkele uren alvorens de ...

Страница 87: ...ET OP Het toestel mag alleen door een vakman volgens de geldende voorschriften en normen op de gasvoorziening worden aangesloten Gebruik uitsluitend propaan of butaangasflessen geen aardgas of stadsgas met gekeurd drukreduceerventiel en passend kopstuk Vergelijk de drukwaarden op het typeplaatje met de drukwaarden op de drukregelaar van de propaan of butaangasfles Het toestel mag uitsluitend met d...

Страница 88: ...De netcontactdoos moet goed bereikbaar zijn zodat de netstekker indien nodig kan worden uitgetrokken en het toestel daardoor van het net kan worden gescheiden De aansluitkabels moeten zodanig zijn gemonteerd dat ze niet met hete delen van aggregaat brander of met scherpe randen in contact kunnen komen Wijzigingen van de interne elektrische installatie of de aansluiting van andere elektrische compo...

Страница 89: ... 3 4 met een 16 A zekering en de toevoerleiding naar de verlichting aansluiting 5 6 met een 2 A zekering Leid de toevoerleiding naar het verwarmingselement aansluiting 3 4 via een contactslotgestuurd relais om te voorkomen dat de accu door onbedoeld uitgeschakelde motor compleet ontladen wordt afb s pagina 9 Pos Omschrijving 1 Verwarmingspatroon accu 2 Aansluitkabel 12 Vg 3 Massa accu verwarmingse...

Страница 90: ... de behandeling van reparaties resp garantiegevallen moeten volgende documenten worden meegestuurd een kopie van de rekening met datum van aankoop de reden van de klacht of een beschrijving van het defect 12 Afvoer Laat het verpakkingsmateriaal indien mogelijk recyclen M Als u het product definitief buiten bedrijf stelt informeer dan bij het dichtstbijzijnde recyclingcentrum of uw speciaalzaak naa...

Страница 91: ... 75 l Aansluit waarden 125 W 230 Vw 120 W 12 Vg 18 3 g h gas Vriesvak 5 l Energieverbruik 2 5 kWh 24 h 230 V 12 V Gasverbruik 270 g 24 h Klimaatklasse SN Koelvermogen Koelkast 7 C Vriesvak tot 12 C Omgevings temperatuur 10 C tot 32 C Afmetingen h x b x d 618 x 486 x 474 mm afb 1 pagina 2 821 x 486 x 474 mm afb 2 pagina 2 821 x 486 x 474 mm afb 3 pagina 2 Gewicht 20 kg 22 kg 24 kg Keurmerk certific...

Страница 92: ...NY Dometic WAECO International GmbH Hollefeldstraße 63 D 48282 Emsdetten 49 0 2572 879 195 49 0 2572 879 322 Mail info dometic waeco de Internet www dometic waeco de www dometic waeco com 821 2690 95 02 2015 ...

Отзывы: