background image

installation as well as the connect flue oulets are to be
checked every two years by an expert (this has to be
arranged by the person responsible).

SOME USEFUL HINTS

Make sure that:

The refrigerator is not operating on 12 V when the ve-
hicle is parked, otherwise you will drain the car battery in
a short time.

Defrosting is carried out periodically.

The refrigerator is clean and dry with the door left open
when it is not to be used for some time.

Liquids or items with a strong odour are well packa-ged.

The ventilation openings are unobstructed.

The door is secured by means of the travel catch when
the caravan is on the move.

Only one mode of operation at a time is used to run the
refrigerator.

GUARANTEE

The refrigerator is guaranteed for one full year on condition
that it is used in a correct manner and in accordance with
these operating and installation in-structions.

It is also embraced by a European guarantee as described
in the brochure supplied with the refrigerator.

SERVICE AND SPARE PARTS

Service and spare parts are obtainable from your dealer or
DOMETIC - consult the yellow pages of the telephone
directory.

TECHNICAL DATA RM 4203

Overall dimensions

Height (incl. controls) . . . . . . . . . . . . . 606 mm
Width

. . . . . . . . . . . . . . . . . . . . . . . . . 486 mm

Depth (incl. cooling unit)

without door. . . . . . . . . . . . . . 440 mm
with door. . . . . . . . . . . . . . . . . 480 mm

Build-in dimensions

Height

. . . . . . . . . . . . . . . . . . . . . . . . . 610 mm

Width

. . . . . . . . . . . . . . . . . . . . . . . . . 490 mm

Depth

. . . . . . . . . . . . . . . . . . . . . . . . . 460 mm

Capacity

gross

. . . . . . . . . . . . . . . . . . . . . . . . . . . . 60 lit

net

. . . . . . . . . . . . . . . . . . . . . . . . . . . . 51 lit

frozen food compt.. . . . . . . . . . . . . . . . . . . . 6 lit
Weight (whithout packaging). . . . . . . . . 21 kg

Electrical data

Input 230 V . . . . . . . . . . . . . . . . . . . . . 105 watt
12 V

. . . . . . . . . . . . . . . . . . . . . . . . 100 watt

Energy consumption/24 hours . . . . .2.3 kWh

Lp gas data

Input (max) . . . . . . . . . . . . . . . . . . . . . 186 watt
ditto, low flame . . . . . . . . . . . . . . . . . . . 86 watt
Energy consumption/24 hours

max . . . . . . . . . . . . . . . . . . . . . .0.35 kg

mid . . . . . . . . . . . . . . . . . . . . . . .0,24 kg
min . . . . . . . . . . . . . . . . . . . . . . .0.16 kg

Cooling medium . . . . . . . . . . . . . . Ammonia (R 717)

INSTALLATION INSTRUCTIONS

REPOSITIONING THE HINGES

The door hinges can be moved to the opposite side in the
following way:

Unscrew the upper hinge pin, taking care not to lose the
set of washers and bushes.

Lift the door from the lower hinge pin.

Unscrew the pin and mount it on the opposite side hinge.

Unscrew the travel catch and mount it on the opposite
side.

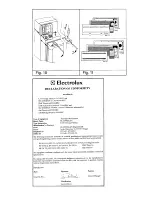
Carefully prise out and exchange the plastic inserts in the
holes for the tarvel catch in the upper door frame. (fig.
10)

Fit the door on the pin and reassemble the pin with
washers and bushes in its new position.

Check that the door closes properly and seals all round.

DOOR PANEL

The door panel can easily be mounted or changed. The
dimensions of the panel must be:

Height

. . . . . . . . . . . . . . . . . . . . . . . . . 532 mm

Width

. . . . . . . . . . . . . . . . . . . . . . . . . 453 mm

Thickness. . . . . . . . . . . . . . . . . . . . max 3,8 mm

Remove the door, see REPOSITIONING THE HINGES.

Remove the lower trim moulding and then withdraw the
panel by sliding it downwards.

Fit the new panel in place and slide it up as far as
possible.

Fit the trim moulding back in place.

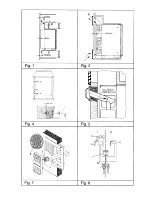
INSTALLATION/BUILDING-IN

Installation in open air applications.

(Under an awning, on a veranda, etc.)

Place the refrigerator protected from rain, direct sun
exposure and strong draught.

The location should be cool and with good air circulation
to avoid concentration of the flue gases. The ventilation
opening at the top of the refrigerator must not be co-
vered.

Place the refrigerator on a sturdy base so that it does not
tipp over when its door is opened.

The base must be level. Check with a water level and
adjust if necessary.

Installation indoors

The room should have a capacity (lenght x width x height)
of at least 20 m

3

and have a window (wich can be opened)

or a door to the outside.

It is important that the refrigerator is not subject to heat
radiation from a stove etc.

10

Содержание RM 4203

Страница 1: ... 1 English Page 7 Svenska Sida 31 Dansk Side 37 Norsk Side 43 Français Page 13 Italiano Pagina 19 Español Pagina 25 Nederlands Pag 49 Suomi Sivu 55 RM 4203 Typ C60 70 821 2652 01 T B Rev 09 2005 MANUAL World Fridge ...

Страница 2: ...STUNGSSCHILD Kontrollieren Sie am Leistungsschild siehe unten daß Sie das richtige Modell bekommen haben und daß Netzspan nung und Gasanschlussdruck den vorgeschriebenen Wer ten entsprechen in BRD 230 Volt 30 bzw 50 mbar Das Leistungsschild ist im Inneren des Kühlschrankes angebracht und enthält u a folgende Angaben Modellbezeichnung Produktnummer Seriennummer Diese Daten werden bei evtl Kontakten...

Страница 3: ...opf C noch 10 15 Sekunden einge drückt 7 Danach loslassen und kontrollieren daß die Flamme weiterbrennt Der Gasbetrieb wird ausgeschaltet indem man den Knopf C auf stellt 230 V Betrieb Bevor Sie den Kühlschrank in Betrieb nehmen prüfen Sie bitte daß die Spannung des Hausanschlusses oder des Campingplatzes mit der auf dem Typenschild angegebenen Spannung übereinstimmt Dann gehen Sie wie folgt vor G...

Страница 4: ...mit einem Tuch aufgenommen werden Nach dem Abtauen wird der Schrank mit einem Lappen trocken gewischt wieder angeschaltet und die Lebensmittel hinein gelegt Mit der Eiswürfelbereitung sollten Sie jedoch bis zum nächsten Tag warten PFLEGEANLEITUNG Den Kühlschrank zuerst ausschalten und abtauen wie zuvor beschrieben Lose Teile Etageren Tragroste usw ausbauen spülen und trocknen Einen Lappen mit lauw...

Страница 5: ...ng Innerhalb der gesetzlichen Garantiezeit 6 Monate werden Schäden und Mängel am Gerät unentgeltlich behoben Ab dem 7 Monat wird jedoch eine Anfahrpauschale erhoben Der Kühlschrank hat zusätzlich eine Europagarantie ge mäß der im Schrank eingelegten Drucksache KUNDENDIENST UND ERSATZTEILE Kundendienst und Ersatzteile können vom Händler oder einer Kundendienststelle der Fa Electrolux europaweit bez...

Страница 6: ...ftungsgitter angebracht werden kleinster freier Quer schnitt 250 cm2 Gitter die für diese Anwendung speziell entwickelt wurden können von DOMETIC bezogen werden Modell A 1620 In den Seitenwänden des Kühlschrankes sind vier Kunstoff buchsen mit Schrauben zur Befestigung des Kühlschrankes vorgesehen Fig 4 Die Seitenwände der Nische und oder zur Kühlschrankbefestigung angebrachte Leisten müssen entsp...

Страница 7: ... des Gas und Wasserfaches DVGW und vom Deut scher Verband Flüssiggase DVFG herausgegeben Es wird empfohlen den Kühlschrank mit Sicherheits schlauch und stecker nach DIN 3383 Teil 3 anzuschlies sen Installation in Fahrzeugen Der Gasanschluß zum Kühlschrank muß starr erfolgen Schlauchanschluß ist unzulässig Er darf nur von einem zugelassenen Fachmann ausgeführt werden Der Anschluß erfolgt mittels ei...

Страница 8: ...ed DATA PLATE Check the data plate inside the refrigerator to ensure that you have received the right model The right gas pressure is 30 mbar The right voltage is 230 volts The data plate contains e g the following details Model designation Product number Serial number Since these details will be needed if you have to get in touch with service personnel it is a good idea to make a note of them her...

Страница 9: ...unning otherwise your battery will soon be discharged If applicable turn off the gas operation Depress the voltage selector A to position 12 V WINTER OPERATION Please check that the ventilation grilles or the flue outlet are not blocked by snow leaves etc DOMETIC ventilation grilles A 1620 fig 11 can be fitted with winter covers modell WA 120 to protect the cooling unit against cold air The covers...

Страница 10: ...ty of deter gent But not the door gasket which should only be cleaned with soap and water and then thoroughly dried The cooling unit behind the refrigerator should be cleaned with a brush from time to time but make sure that the refrigerator is switched off when doing this TURNING OFF THE REFRIGERATOR If the refrigerator is not to be used for some time Shut off any on board valve in the gas line t...

Страница 11: ...g min 0 16 kg Cooling medium Ammonia R 717 INSTALLATION INSTRUCTIONS REPOSITIONING THE HINGES The door hinges can be moved to the opposite side in the following way Unscrew the upper hinge pin taking care not to lose the set of washers and bushes Lift the door from the lower hinge pin Unscrew the pin and mount it on the opposite side hinge Unscrew the travel catch and mount it on the opposite side...

Страница 12: ...which simplifies the installation If there is no outer grille at floor level where leaking gas can escape a 40 mm hole should be made in the floor of the recess to drain the gas The hole should be fitted with wire mesh and an angled plate to protect it from stones mud etc LP GAS CONNECTION The refrigerator is designed for operation on liquified petro leum gas LPG the pressure of which must be for ...

Страница 13: ...your plug in the United Kingdom proceed as follows The wire which is coloured GREEN AND YELLOW must be connected to the terminal in the plug which is marked with the letter E or by the earth symbol or coloured green or green and yellow The wire which is coloured BLUE must be connected to the terminal which is marked with the letter N or coloured black The wire which is coloured BROWN must be conne...

Страница 14: ......

Страница 15: ......

Страница 16: ......

Отзывы: