


EN
Installing and connecting the refrigerator
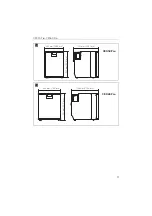
CRX50 Pro, CRX65 Pro
18
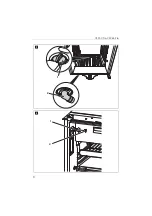
➤
Push the refrigerator into the recess.
➤
Fix the refrigerator in place using suitable screws (fig.
➤
Press the blanking plugs (fig.
2, page 6) into the openings.
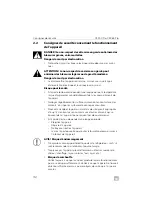
7.4
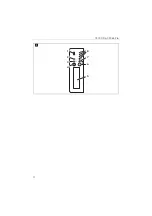
Changing the door hinge
You can also change the hinge of the door, so that it opens to the left rather than the
right.
➤
Proceed as shown (fig.
7.5
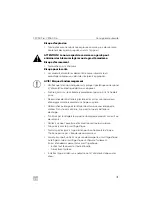
Connecting the refrigerator to DC voltage
A
The refrigerator can be operated with a 12 V or a 24 V DC voltage supply.
For safety reasons, the refrigerator is equipped with an electronic system to prevent
the polarity being reversed. This protects the refrigerator against reversed polarity
when connecting to a battery and against short circuiting.
The use of a load dump board installed on the compressor control module electron-
ics is mandatory. If one of the components has to be replaced handle them as one
unit. Always replace both components together.
To protect the battery, the refrigerator switches off automatically if the voltage is
insufficient (see table below):
➤
Determine the required cross section of the cable in relation to the cable length
according to fig.
NOTICE! MATERIAL DAMAGE
•
To avoid voltage drops and loss of performance, keep the
connection cable as short as possible and directly connected from
the power source to the DC wire connection of the unit. Therefore
avoid additional switches, plugs or power strips.
•
Disconnect the cooling device and all power source connections
from the battery before you connect the battery to a quick charging
device. Overvoltage can damage the electronics of the device.
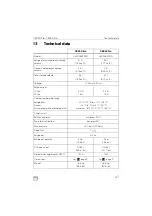
12 V
24 V
Cut-off voltage
10.4 V
22.8 V
Cut-in voltage
11.7 V
24.2 V
Содержание CRX0050TPRO
Страница 3: ...CRX50 Pro CRX65 Pro 3 CRX50 Pro 1 2 3 4 5 6 1 CRX65 Pro 1 2 3 4 5 6 2 ...
Страница 4: ...CRX50 Pro CRX65 Pro 4 3 1 2 3 4 8 7 6 5 3s ...
Страница 6: ...CRX50 Pro CRX65 Pro 6 2 1 5 1 2 6 ...
Страница 7: ...CRX50 Pro CRX65 Pro 7 7 8 9 ...
Страница 67: ...ES CRX50 Pro CRX65 Pro Datos técnicos 67 ...