background image

EN

CRX50 Pro, CRX65 Pro

Installing and connecting the refrigerator

17

Key for fig.

4

, page 5

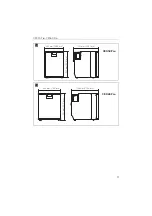
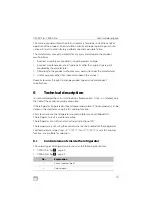
Observe the following installation dimensions:

Keep objects clear of openings in the housing or installation structure (such as 
ventilation slots, etc.).

Condensate is produced when the refrigerator is operating normally. You can 
either wipe up the condensate on the floor of the refrigerator in regular intervals, 
or drain it through a water drain outlet in the floor of the refrigerator (see chapter 
“Mounting the water drain outlet (optional)” on page 17).

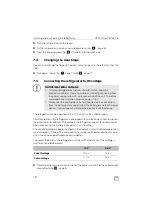
7.2

Mounting the water drain outlet (optional)

Connect a hose with an inside diameter of 10 mm (0.4 inch) (not included) to the 
water drain outlet.

Lay the refrigerator on its side in order to access the bottom side.

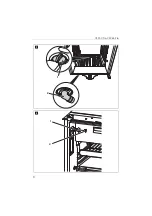
Mount the water drain outlet (fig.

5

2, page 6) aligned to the front or to the 

back according to the desired direction.

Remove the water drain plug (fig.

5

1, page 6) inside the refrigerator.

7.3

Installing the refrigerator

Proceed as follows to install the refrigerator:

If you wish to drain the condensate through a hose:
Mount the water drain port (see chapter “Mounting the water drain outlet 
(optional)” on page 17)

Open the refrigerator door.

Remove the blanking plugs (fig.

6

2, page 6).

No.

Explanation

1

Exhaust air

2

Cold intake air

3

Condenser

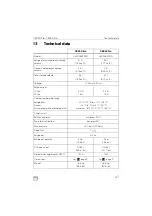
Model

Dimensions W x H x D (mm)

Dimensions W x H x D (inch)

CRX50 Pro

390 x 541 x 556

15.4 x 21.3 x 21.9

CRX65 Pro

458 x 531 x 571

18.0 x 20.9 x 22.5

Содержание CRX0050TPRO

Страница 1: ... Compressor refrigerator Installation and Operating Manual 10 Réfrigérateur à compression Instructions de montage et de service 29 Nevera con compresor Instrucciones de montaje y de uso 48 EN FR ES REFRIGERATION COOLMATIC ...

Страница 2: ...his manual is protected by copyright and design law The underlying technical design and the products contained herein may be protected by design patent or be patent pending The trademarks mentioned in this manual belong to Dometic Sweden AB All rights are reserved ...

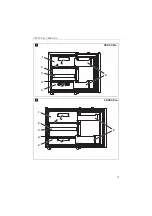
Страница 3: ...CRX50 Pro CRX65 Pro 3 CRX50 Pro 1 2 3 4 5 6 1 CRX65 Pro 1 2 3 4 5 6 2 ...

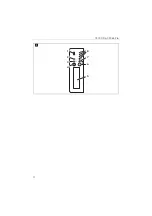
Страница 4: ...CRX50 Pro CRX65 Pro 4 3 1 2 3 4 8 7 6 5 3s ...

Страница 5: ...CRX50 Pro CRX65 Pro 5 ca 50 mm 2 inch ca 50 mm 2 inch ca 50 mm 2 inch ca 50 mm 2 inch ca 50 mm 2 inch ca 50 mm 2 inch ca 50 mm 2 inch ca 50 mm 2 inch A B C D 2 2 2 2 1 1 3 3 3 3 1 1 4 ...

Страница 6: ...CRX50 Pro CRX65 Pro 6 2 1 5 1 2 6 ...

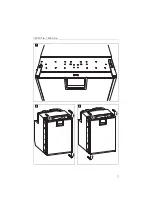
Страница 7: ...CRX50 Pro CRX65 Pro 7 7 8 9 ...

Страница 8: ...CRX50 Pro CRX65 Pro 8 Ø mm l m 12V 24V 0 2 4 6 8 10 12 14 16 18 20 22 24 26 28 0 2 6 10 14 0 1 rd bk a ...

Страница 9: ...CRX50 Pro CRX65 Pro 9 380 mm 14 96 inch 531 mm 20 91 inch 531 mm 20 91 inch CRX50 Pro b CRX65 Pro 448 mm 17 64 inch 521 mm 20 51 inch 546 mm 21 50 inch c ...

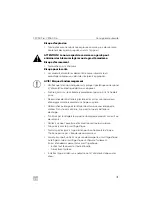
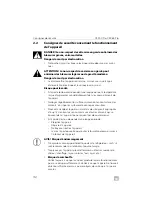
Страница 10: ...and follow the instructions and warnings set forth herein may result in an injury to yourself and others damage to your product or damage to other property in the vicinity This product manual including the instructions guidelines and warnings and related documentation may be subject to changes and updates For up to date product information please visit kampaoutdoors com Contents 1 Explanation of s...

Страница 11: ...may cause serious hazards Health hazard This device can be used by children aged from 8 years and above and persons with reduced physical sensory or mental capabilities or lack of experience and knowledge if they have been given supervision or instruction concerning use of the device in a safe way and understand the hazards involved Children shall not play with the device Cleaning and user mainten...

Страница 12: ...e Otherwise you may discharge the battery The device is not suitable for storing substances which are caustic or contain solvents Keep the drainage outlet clean at all times Do not open the refrigerant circuit under any circumstances Never transport the device in a horizontal position so that no oil can leak out of the compressor Make sure that the refrigerant circuit is not damaged during transpo...

Страница 13: ...ld developing within the device A NOTICE Damage hazard Do not use electrical devices inside the cooling device unless they are recommended by the manufacturer for that purpose Donotplaceitnearnakedflamesor otherheatsources heaters direct sunlight gas ovens etc Danger of overheating Always ensure sufficient ventilation so that the heat generated during operation can dissipate Make sure that the dev...

Страница 14: ...toring medications Storing corrosive substances or substances that contain solvents Quick freezing food This product is only suitable for the intended purpose and application in accordance with these instructions Quantity Description 1 Refrigerator with shelves 1 Water drain outlet 1 Installation and operating manual Description Explanation Ref no Mounting Frames Flush mount and standard mounting ...

Страница 15: ...nce and product specifications 6 Technical description It is recommended the unit is installed into a fixed position Once it is installed only the front of the appliance may be accessible If the refrigerator is operated without a freezercompartment frozen products can be stored in the short term using the fast cooling function All materials used in the refrigerator are compatible for use with food...

Страница 16: ...oduced can easily flow away fig 4 page 5 3 Wire shelf folding so that bottles can be put in the refrigerator 4 Shelf 5 Crisper compartment 6 Bottle restraint to hold bottles in the door No in fig 3 page 4 Explanation 1 IR sensor for switching the interior light 2 LED Service display 3 LED Blue Compressor is running LED Orange Compressor is off 4 On off button 5 Inner lighting 6 Temperature selecti...

Страница 17: ... diameter of 10 mm 0 4 inch not included to the water drain outlet Lay the refrigerator on its side in order to access the bottom side Mount the water drain outlet fig 5 2 page 6 aligned to the front or to the back according to the desired direction Remove the water drain plug fig 5 1 page 6 inside the refrigerator 7 3 Installing the refrigerator Proceed as follows to install the refrigerator If y...

Страница 18: ...g The use of a load dump board installed on the compressor control module electron ics is mandatory If one of the components has to be replaced handle them as one unit Always replace both components together To protect the battery the refrigerator switches off automatically if the voltage is insufficient see table below Determine the required cross section of the cable in relation to the cable len...

Страница 19: ... terminal of the battery 8 Using the refrigerator The refrigerator conserves fresh foodstuffs The freezer compartment conserves frozen foodstuffs and freezes fresh foodstuffs A Coordinate axis Meaning Unit l Cable length m Cable cross section mm NOTICE MATERIAL DAMAGE Make sure the polarity is correct NOTICE MATERIAL DAMAGE Ensure that food or liquids in glass containers are not excessively refrig...

Страница 20: ...efrigerator on by pressing the button I 8 8 3 Setting the temperature Press the button repeatedly until the desired temperature level is set The lower largest LED is the coldest setting The upper smallest LED is the warmest setting To switch from the coldest level to the warmest level press the button again NOTE Before starting your new refrigerator for the first time you should clean it inside an...

Страница 21: ... C 68 F set the refrigerator to at least level 2 NOTICE MATERIAL DAMAGE Only use the fast cooling function when the removable freezer com partment is not being used Otherwise there is a risk that the freezer compartment becomes too cold and condensate cannot be pre vented from forming on the outside of the refrigerator The energy consumption will also increase dramatically Note that bottles and ot...

Страница 22: ... aromas the shape and the freshness will be better con served 8 6 Defrosting the freezer A This is how to defrost the refrigerator Empty the contents If necessary put them in another cooling device to keep them chilled Press the button until the refrigerator switches off Close the door properly 8 7 Switching off and storing the refrigerator If you do not intend to use the refrigerator for a long t...

Страница 23: ...pport in the US Canada and all other regions 10 1 United States and Canada LIMITED WARRANTY AVAILABLE AT DOMETIC COM WARRANTY IF YOU HAVE QUESTIONS OR TO OBTAIN A COPY OF THE LIMITED WARRANTY FREE OF CHARGE CONTACT DOMETIC CORPORATION CUSTOMER SUPPORT CENTER 5155 VERDANT DRIVE ELKHART INDIANA 46516 1 800 544 4881 customersupportcenter dometic com 10 2 All Other Regions The statutory warranty perio...

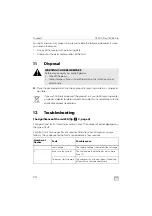
Страница 24: ...he significance of the red LED fig 3 2 page 4 For operational faults it illuminates several times The number of pulses depends on the type of fault Each flash lasts for one quarter of a second After the series of impulses a pause follows The sequence for the fault is repeated every four seconds WARNING CHILDREN BEWARE Before disposing of your old refrigerator Take off the doors Leave storage surfa...

Страница 25: ...ective Problem Possible cause Remedy UTerm 0 V There is an interruption in the battery electronics connection Establish a connection Main switch faulty if installed Replace the main switch Additional supply line fuse has blown if installed Replace the supply line fuse UTerm UCON Battery voltage is too low Charge the battery Start attempt with UTerm UOFF Loose cables Poor contact corrosion Establis...

Страница 26: ...he electronics UOFF Cut off voltage of the electronics Problem Possible cause Remedy Compressor runs for a long time continuously Ambient temperature too high Insufficient ventilation Move the refrigerator to another location Condenser is dirty Clean the condenser Faulty fan Replace the fan Compressor does not run often Battery capacity exhausted Charge the battery Problem Possible cause Remedy Lo...

Страница 27: ...Vg 24 Vg 4 0 A 1 6 A 4 5 A 1 9 A Cooling temperature range Refrigerator Freezer Fast cooling without dividing wall 3 C 37 F to 12 C 54 F 15 C 5 F to 5 C 23 F maximum 6 C 21 F 2 C 36 F Climatic class T Relative humidity maximum 90 Short term inclination maximum 30 Max pressure LP 11 bar HP 25 bar Propellant C5H10 Refrigerant R134a Refrigerant quantity 44 g 1 55 oz 45 g 1 58 oz CO2 equivalent 0 063 ...

Страница 28: ...EN Technical data CRX50 Pro CRX65 Pro 28 This product contains fluorinated greenhouse gases The cooling unit is hermetically sealed ...

Страница 29: ...lesser ou de blesser d autres personnes d endommager votre produit ou d endommager d autres biens à proximité Le présent manuel produit y compris les instructions directives et avertissements ainsi que la documentation associée peuvent faire l objet de modifications et de mises à jour Pour obtenir des informations actualisées sur le produit veuillez consulter le site kampaoutdoors com Sommaire 1 S...

Страница 30: ...s réparations sur l appareil Toute réparation mal effectuée risquerait d entraîner de graves dangers Risque pour la santé Cet appareil peut être utilisé par des enfants âgés de 8 ans et plus et des personnes ayant des capacités physiques sensorielles ou men tales réduites ou un manque d expérience et de connaissances s ils sont sous surveillance ou ont reçu des instructions sur l utilisation de l ...

Страница 31: ...fiche de la prise Débranchez de la batterie la glacière et les autres consommateurs d énergie avant de raccorder un chargeur rapide Débranchez ou éteignez le réfrigérateur lorsque vous éteignez le moteur Dans le cas contraire il se pourrait que la batterie se décharge N utilisezpasleréfrigérateurpourlestockagedeproduitscorrosifsou de solvants Veillez à ce que l ouverture d évacuation soit toujours...

Страница 32: ...ntact avec les aliments ainsi que les systèmes de drainage accessibles Stockez la viande et le poisson crus dans des récipients appropriés afin qu ils n entrent pas en contact avec d autres aliments qui se trouvent dans l appareil ou ne risquent pas de couler dessus Si l appareil reste vide pendant une longue période Éteignez l appareil Dégivrez l appareil Nettoyez et séchez l appareil Laissez la ...

Страница 33: ...à ce que la carte de répartition de charge et le module de commande soient toujours remplacés ensemble 3 Contenu de la livraison 4 Accessoires Disponibles comme accessoires non compris dans la livraison En cas de questions veuillez contacter directement le revendeur ou votre fournis seur de service après vente 5 Usage conforme Le réfrigérateur est adapté à ce qui suit Installation dans des camions...

Страница 34: ...tions apportées au produit sans autorisation explicite du fabricant des usages différents de ceux décrits dans le manuel Dometic se réserve le droit de modifier l apparence et les spécifications produit 6 Description technique Il est recommandé d installer l appareil dans une position fixe Une fois le montage effectué seul l avant de l appareil doit pouvoir être accessible Sileréfrigérateurestutil...

Страница 35: ...élateur 2 Panneau de commande 3 Clayette type grille repliable pour pouvoir placer des bouteilles dans le réfrigérateur 4 Clayette 5 Compartiment du bac à légumes 6 Blocage de bouteilles pour maintenir les bouteilles dans le balconnet de la contre porte No dans fig 3 page 4 Explication 1 Capteur IR pour la commutation de l éclairage intérieur 2 Tableau d affichage de service à LED 3 LED bleue le c...

Страница 36: ...Vous pouvez essuyer régulièrement l eau de condensation au fond du réfrigéra teur ou l évacuer par une sortie d évacuation au fond du réfrigérateur voir cha pitre Montage de la sortie d évacuation d eau en option page 36 7 2 Montage de la sortie d évacuation d eau en option Raccordez un tuyau d un diamètre interne de 10 mm 0 4 pouce non fourni à la sortie d évacuation d eau Allongez le réfrigérate...

Страница 37: ...e la porte Vous pouvez modifier le côté d ouverture de la porte de sorte que la porte s ouvre vers la gauche plutôt que vers la droite Procédez comme indiqué fig 7 page 7 à fig 9 page 7 7 5 Raccordement du réfrigérateur à la tension continue A Les réfrigérateurs peuvent être branchés sur une tension continue de 12 V ou 24 V AVIS DOMMAGES MATÉRIELS Pour éviter les chutes de tension et les pertes de...

Страница 38: ...nt lorsque la ten sion n est plus suffisante voir tableau suivant Déterminez la section nécessaire du câble en fonction de sa longueur selon fig 0 page 8 Légende de la fig 0 page 8 A Avant de mettre l appareil en service vérifiez que la tension de service et celle de la batterie sont identiques voir la plaque signalétique Raccordez le réfrigérateur à une prise femelle protégée par un fusible de 15...

Страница 39: ... poussière et les salissures AVIS DOMMAGES MATÉRIELS Veillez à ce que les boissons ou aliments placés dans des récipients en verre ne soient pas soumis à des températures trop basses En gelant levolumedesboissonsetalimentsliquidesaugmente cequi peut détruire les récipients en verre Les aliments doivent être conservés dans leur emballage d origine ou dans des récipients appropriés Veillez à ne dépo...

Страница 40: ...touche de la température s allume REMARQUE Après la mise en marche le réfrigérateur a besoin d un certain temps avant que le compresseur ne se mette en marche REMARQUE La puissance frigorifique peut être affectée par la température ambiante la quantité des aliments à conserver la fréquence de l ouverture de la porte Si la température ambiante est comprise entre 16 C 61 F et 20 C 68 F placez le réf...

Страница 41: ...des produits en cours de décongélation ou déconge lés consommez les au plus vite Enveloppez les aliments dans une feuille d aluminium ou un film plastique et placez les dans un récipient à couvercle De cette façon les arômes la subs tance et la fraîcheur se conservent mieux 8 6 Dégivrage du freezer A Procédez de la manière suivante pour dégivrer le réfrigérateur Retirez les aliments AVIS DOMMAGES ...

Страница 42: ...r voir chapitre Nettoyage et maintenance page 42 La porte reste entrouverte et empêche ainsi que de mauvaises odeurs ne se for ment 9 Nettoyage et maintenance A Avant toute opération de nettoyage ou d entretien de l appareil veillez à débrancher celui ci du secteur Nettoyez le réfrigérateur régulièrement et dès qu il est sale avec un chiffon humide Veillez à ce que de l eau ne goutte pas sur les j...

Страница 43: ...ions Le délai légal de garantie s applique Si le produit s avérait défectueux veuillez vous adresser à la filiale du fabricant située dans votre pays dometic com dealer ou à votre revendeur spécialisé Veuillez y joindre les documents suivants pour la gestion des réparations et de la garantie une copie de la facture avec la date d achat le motif de la réclamation ou une description du dysfonctionne...

Страница 44: ...ossible 1 Sous tension La tension d alimentation est en dehors de la plage définie 2 Surintensité du ventila teur La charge du ventilateur sur l unité électro nique est supérieure à 1 A Tentatives de démar rage trop nombreuses Le compresseur ou le ventilateur a démarré trop souvent dans un bref délai 3 Le moteur ne démarre pas Le rotor est coincé La pression différentielle dans le système de refro...

Страница 45: ...n Capacité de batterie trop faible Changement des piles Section du câble trop petite Changerlecâble fig 0 page 8 Tentative de démarrage avec UTerm UON Température ambiante trop élevée Ventilation par aspiration et aération insuffisante Déplacer l appareil Le condenseur est sale Nettoyer le condenseur Interruption électrique dans le compresseur entre les broches Compresseur défectueux Contactez le ...

Страница 46: ...eur Le compresseur fonc tionne rarement Batterie à plat Charger la batterie Problème Cause possible Solution Fort ronflement Les mouvements d un élément du cir cuit de refroidissement sont bloqués l élément est coincé contre la paroi Redresser l élément avec précaution Corps étranger coincé entre l unité de réfrigération et la paroi Retirer le corps étranger Le ventilateur fait du bruit Changer le...

Страница 47: ...ans cloison 3 C 37 F à 12 C 54 F 15 C 5 F à 5 C 23 F 6 C 21 F 2 C 36 F maximum Classe climatique T Humidité de l air maximum 90 Inclinaison à court terme maximum 30 Pression max BP 11 bar HP 25 bar Fluide moteur C5H10 Réfrigérant R134a Quantité de réfrigérant 44 g 1 55 oz 45 g 1 58 oz Équivalent CO2 0 063 t 138 8 lbs 0 064 t 141 1 lbs Potentiel d effet de serre GWP 1430 1430 Dimensions fig b page ...

Страница 48: ...nstrucciones y advertencias aquí expuestas puede causarle lesiones a usted o a terceros daños en el producto o daños en otras propiedades cercanas Este manual del producto incluyendo lasinstrucciones directrices y advertencias y la documentación relacionada pueden estar sujetos acambios y actualizaciones Para obtener información actualizada sobre el producto visite la página kampaoutdoors com Índi...

Страница 49: ...lizado puede realizar reparaciones en el aparato Las reparaciones que se realicen incorrectamente pueden dar lugar a situaciones de considerable peligro Riesgo para la salud Este aparato puede ser utilizado por menores a partir de 8 años y per sonas con capacidad física sensorial o mental reducida o con falta de experiencia y conocimientos siempre que lo hagan bajo supervisión o hayan recibido ins...

Страница 50: ...e de conexión tirando de él desconecte de la batería la nevera u otros aparatos conectados si va a conectar un cargador rápido desenchúfela o apáguela cuando apague el motor De lo contrario podría descargarse la batería Esta nevera no es apta para almacenar sustancias corrosivas o que contengan disolventes Mantenga siempre limpias las aberturas de descarga No abra nunca el circuito de refrigeració...

Страница 51: ...elacarneyelpescadocrudosenrecipientesadecuadosdentro del aparato para que no entren en contacto con otros alimentos ni goteen sobre estos Si el aparato va a estar vacío durante un período prolongado Desconéctelo Descongélelo Límpielo y séquelo Deje la puerta abierta para evitar que se forme moho en el aparato A AVISO Peligro de ocasionar daños materiales No utilice ningún aparato eléctrico dentro ...

Страница 52: ...ón de carga y el módulo de control 3 Volumen de entrega 4 Accesorios Disponibles como artículos opcionales no incluidos en el volumen de entrega Si tiene preguntas diríjase directamente a su distribuidor o socio de servicio 5 Uso adecuado La nevera solo es adecuada para Ser instalada en camiones Refrigerar congelar y almacenar alimentos La nevera no es adecuada para Almacenar medicamentos Cantidad...

Страница 53: ...n el producto sin el expreso consentimiento del fabri cante Uso con una finalidad distinta de la descrita en las instrucciones Dometic se reserva el derecho de cambiar la apariencia y las especificaciones del producto 6 Descripción técnica Es recomendable que la unidad esté instalada en una posición fija Tras haberla mon tado únicamente la parte frontal puede ser libremente accesible Si se utiliza...

Страница 54: ...plicación 1 Congelador 2 Panel de control 3 Estante de rejilla plegable para permitir la colocación de botellas 4 Estante 5 Compartimento de verduras 6 Retenedor de botellas para mantener fijas las botellas en el compartimento de la puerta N º en fig 3 página 4 Explicación 1 Sensor IR para conmutar la luz interior 2 Indicador LED de funcionamiento 3 LED azul compresor en marcha LED en naranja El c...

Страница 55: ...ada en el suelo de la nevera se puede eliminar pasandoregularmenteunpañooatravésdeldesagüehabilitadoparaello véase capítulo Montaje de la salida del desagüe opcional en la página 55 7 2 Montaje de la salida del desagüe opcional Conecte una manguera con un diámetro interior de 10 mm 0 4 in no incluida a la salida del desagüe Tumbe la nevera sobre un lado para acceder a la parte inferior Monte la sa...

Страница 56: ... Proceda como se muestra defig 7 página 7 a fig 9 página 7 7 5 Conexión de la nevera a tensión continua A Las neveras pueden funcionar con una tensión continua de 12 o 24 V Por razones de seguridad la nevera está equipada con un sistema electrónico para evitar que se invierta la polaridad que la protege si no se respeta la polaridad al conectarla a la batería y también si se produce un cortocircui...

Страница 57: ...namiento el aparato compruebe si la tensión de funcio namiento y la tensión de la batería coinciden véase la placa de características Conecte la nevera a un enchufe protegido con fusible de 15 A para 12 voltios o de 7 5 A para 24 voltios fig a 1 página 8 Conecte el cable rojo fig a rd página 8 al polo positivo de la batería Conecte el cable negro fig a bk página 8 al polo negativo de la batería 8 ...

Страница 58: ...S Asegúrese de que los líquidos o alimentos envasados en recipientes decristalnoseenfríendemasiado Loslíquidosseexpandencuando se congelan y esto podría provocar que los recipientes de vidrio estallen Los alimentos solo se pueden almacenar con su envase original o en recipientes adecuados Asegúrese de que en la nevera solo se encuentren objetos o produc tos que puedan enfriarse a la temperatura se...

Страница 59: ...tener pulsado el botón durante más de 3 segundos NOTA La potencia de refrigeración puede verse afectada por la temperatura ambiente la cantidad de alimentos a refrigerar la frecuencia con la que se abre la puerta de la nevera Con una temperatura ambiente de entre 16 C 61 F y 20 C 68 F ajuste la nevera como mínimo al nivel 2 AVISO PELIGRO DE DAÑOS MATERIALES La función de enfriamiento rápido solo s...

Страница 60: ... plástico y guárdelos en envases con tapa De esta manera conseguirá conservar mejor el aroma la sustancia y la frescura de los alimentos 8 6 Descongelar el congelador A Para descongelar la nevera proceda como se indica a continuación Extraiga los productos En caso necesario coloque los productos en otro frigorífico para mantenerlos fríos Presione la tecla hasta que se apague la nevera AVISO PELIGR...

Страница 61: ...e el aparato de la red de corriente antes de proceder a la lim pieza o al mantenimiento de la misma Con un paño húmedo limpie la nevera de forma regular y también en cuanto se ensucie Preste atención a que no gotee agua en las juntas Ello puede dañar el sistema electrónico Después de haberla limpiado seque la nevera con un paño Elimine regularmente el polvo y la suciedad del condensador 10 Garantí...

Страница 62: ...lecimiento especializado Para la tramitación de la reparación y de la garantía debe enviar también los siguientes documentos una copia de la factura con fecha de compra el motivo de la reclamación o una descripción de la avería 11 Gestión de residuos Deseche el material de embalaje en el contenedor de reciclaje correspondiente M Cuando vaya a desechar definitivamente el producto infórmese en el ce...

Страница 63: ...lador sobre el sistema elec trónico es superior a 1 A Demasiadosintentosde arranque El compresor o el ventilador se han puesto en marcha con demasiada frecuencia en poco tiempo 3 El motor no se enciende El rotor está bloqueado La diferencia de presión en el sistema de refri geración es demasiado alta 5 bar 4 Número de revolucio nes demasiado bajo El régimen mínimo del motor de 1 850 rpm no se pued...

Страница 64: ...ería Sección del cable insuficiente Cambie el cable fig 0 página 8 Intento de encendido con UTerm UON La temperatura ambiente es dema siado alta La ventilación es insuficiente Cambiela ubicación de la nevera Suciedad en el condensador Limpie el condensador Interrupción eléctrica entre los pernos del compresor El compresor está averiado Contacte con el servicio de atención al cliente No hay tensión...

Страница 65: ...a Batería agotada Cargue la batería Problema Posible causa Solución Fuerte zumbido El componente del circuito de refri geración no puede vibrar libremente contacto con la pared Doble el componente con cuidado para sepa rarlo de la superficie obs tructora Cuerpo extraño atrapado entre la nevera y la pared Retire el cuerpo extraño Ruido del ventilador Sustituya el ventilador CRX50 Pro CRX65 Pro Mode...

Страница 66: ... C 37 F a 12 C 54 F 15 C 5 F a 5 C 23 F máximo 6 C 21 F 2 C 36 F Clase climática T Humedad relativa máximo 90 Inclinación a corto plazo máximo 30 Presión máx BP 11 bares AP 25 bares Agente espumante C5H10 Refrigerante R134a Cantidad de refrigerante 44 g 1 55 oz 45 g 1 58 oz Equivalente de CO2 0 063 t 138 8 lb 0 064 t 141 1 lb Índice GWP Global warming potential 1430 1430 Dimensiones fig b página 9...

Страница 67: ...ES CRX50 Pro CRX65 Pro Datos técnicos 67 ...

Страница 68: ...L SALES OFFICE dometicĶ ű0 0Ŗ s YOUR LOCAL DEALER dometic com dealer YOUR LOCAL SUPPORT dometic com contact dometic com 1 01 1 0ķ 4 0 1 1 2 ķ 2 1 2 9 0 ĸ DOMETIC GROUP AB 3E 0 1 ĉč ŖĉďĉčČ 4 4445103471 2021 05 03 ...

Отзывы: