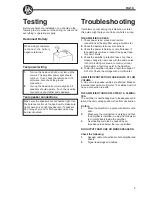
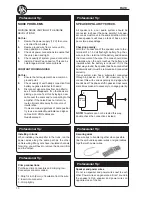
background image

Wiring

Power connections

Ground Terminal ( GND )

Remote terminal ( REM )

Use only four 30 ampere ATC
blade type fuses.

4

Power terminal ( +12V)

Connect the battery cable from the fuse holder to
the +12 Volt terminal on the amplifier.
Be sure to use a rubber grommet or a plastic
insulating tube where the cable passes the firewall
or other places when it can easily be jammed.
Use ty-wraps to secure to existing cables in the
engine compartment.

DLS FH2B
fuse holder

Connect to a good chassis ground. The ground
connection should be clean, unpainted metal to
provide a good electrical connection. Use a wire
brush, a scraper or a piece of an abrasive sheet to
clean the metal. Use a lock washer or two to secure
contact. Protect with silicon grease or by paint
applied afterwards.

Power
(Green)

Protect
(Red)

Power Light / Protect light

The power light (green ) comes on when
the amplifier is turned on.

The protect light ( red ) comes on
when the amplifier shuts down from
overheating, DC-offset or a short
circuit ( speaker failure)

Fuses on amplifier

For RCA cable signal input:

Set the input selector switch to position ”

Low level

”.

Connect the radio power antenna lead = remote
turn on/off from the car stereo to the amplifier
remote connection. This turns on the amplifier
whenever the car stereo is turned on.
You can either use the built in remote cable in the
RCA cable itself or use a separate cable.
Sometimes a small disturbance may enter the
amplifier coming from the remote voltage , through
the built in remote wire and into the RCA cable.
Thus we recommend to use a separate remote wire
and run the RCA lead separate from remote wire,
power cables and speaker cables.
Insert the cable directly into the amplifier terminal.
If there is no remote voltage available from the ste-
reo, you must connect to the ignition key through
the radio or any accessories fuse.

Set the 

”High level auto

start” 

switch to position

OUT

.

For High Level input:

Set the input selector switch to position ”

High level

”.

We recommend you to connect the remote wire as
described above. The amplifier will produce soft
on / soft off operation this way.  If you use a remote
wire, set the switch ”

High level auto start

” to posi-

tion 

OUT

.

In the case that there is no remote voltage available
from the car stereo, or you want to simplify the in-
stallation, the amplifier can be turned on/ turned
off by the high level input  voltage. This is done
when the ”

High level auto start

” switch is set to 

IN

- position.

DLS

Connect with ring
terminal to
b terminal

Connect with ring
terminal to
chassis ground

Connect to head
unit remote start
terminal or power
antenna lead

Connect the fuse holder as close to the vehicle
b as possible, using 4 AWG = 21 mm

or

heavier cable. Use ring crimp terminal cable to
connect to b. Apply silicon grease to the
fuse to prevent corrosion.
Use a 100 Amp fuse for cable
4 AWG (21 mm

2

).

RA10 accepts 4 AWG
(21 mm

2

) in the power

terminal.

RA10

30 A

Содержание RA10

Страница 1: ...rranty depending on the conditions in the country where it is sold If the amplifier is returned for service please include the original dated receipt with the product Technical Assistance For technical assistance ask the shop where the product was sold or the distributor in your very coun try You can always phone the DLS Helpdesk in Sweden 46 31 84 00 60 or send an e mail to info dls se Informatio...

Страница 2: ...you select a location do remember that the amplifier generates a lot of heat Choose a location where air can circulate freely around the amplifier Do not cover the amplifier with carpets or hide behind trim panels Do not mount the amplifier in an inverted or upside down position The amplifier has a built in fan in the bottom plate Mount the amplifier on spacers to allow the air to circulate inside...

Страница 3: ... from radio 20 feet or 5 meter for trunk installations 12 feet or 2 3 meter for under seat installations Two ring crimp terminals one for connection to the battery plus and one for the amplifier ground connection Four splicers to connect speaker cables to high level input cable if high level input is used Wire ties Insulating grommet or insulating tube Stereo head unit 3 Routing wires RA10 Profess...

Страница 4: ...e a separate cable Sometimes a small disturbance may enter the amplifier coming from the remote voltage through the built in remote wire and into the RCA cable Thus we recommend to use a separate remote wire and run the RCA lead separate from remote wire power cables and speaker cables Insert the cable directly into the amplifier terminal If there is no remote voltage available from the ste reo yo...

Страница 5: ...High Low level input switch Hi level auto start switch Low level input Use a pair of shielded stereo audio cables with RCA type jack Most trunk mount amplifiers need a 20 feet RCA cable appr 5 6 meters Most under the seat installations require 12 feet 2 3 meters RCA cables Avoid placing the RCA cable close to speaker cables power cables and remote control cable Connect to RCA input sockets Both in...

Страница 6: ...ume with a center frequency of 40 HZ You can select the amplification between 0 dB no amplification and 18 dB full amplification The phase control can be set continuously from 0 180 degrees This is very useful when you want to adjust the bass sound for best front stage image Start on 0 and turn the control slowly clockwise until you experience that the bass sound is coming from the front If you do...

Страница 7: ... parallel to get more power from the amplifier 7 Speaker wiring RA10 RA10 is a mono amplifier made for use with subwoofers only The amplifier has two output connectors These are internally connected in parallel and are doubled for easier connection when you have more than one subwoofer It is not possible to connect in bridge mode between the speaker terminals The typical setting is around 60 80 Hz...

Страница 8: ...8 Battery 12V RA10 FM1 107 3 Subwoofer 4 ohm Subwoofer 4 ohm Fuse 100 A RCA out Remote Remote bass level and phase control Wiring example of RA 10 with two subwoofers ...

Страница 9: ...ti meter The cables must not have a connection to earth THE AMPLIFIER TURNS OFF AFTER 10 30 MINU TES The amplifier is overheating due to inadequate venti lation Check mounting position is free from obstruction Do this 1 Move the amplifier to a place with better ventil ation 2 Make sure the internal fan is working and that the amplifier is installed in a way that allows air to circulate freely insi...

Страница 10: ...t battery Tap the wire on to the terminal of the battery and observe the movement of the cone The cone should move outwards when the wire touches the battery and inwards when the battery is removed If it is the other way around the speaker has been connected backwards and it must be removed and connected correctly If your system also has a subwoofer connected through a passive 6 or 12 dB crossover...

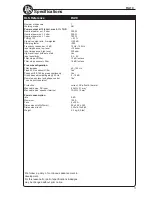
Страница 11: ...evel 10 kohm Input impedance high level 330 ohm High level input with auto start Yes Input sensitivity 0 5 8V Filter slope LP filter 12 dB octave Filter slope subsonic filter 18 dB octave Pre amp configuration Filter lowpass 40 125 Hz Fixed 25 Hz subsonic filter Yes Phase shift 0 180 degrees continously Yes Grand bass adjustable gain 40 Hz 0 18 dB Remote bass level and phase control Yes can be swi...

Страница 12: ...DLS Svenska AB P O Box 13029 SE 40251 Göteborg Sweden Tel 46 31 840060 Fax 46 31 844021 E mail info dls se www dls se ...

Отзывы: