background image


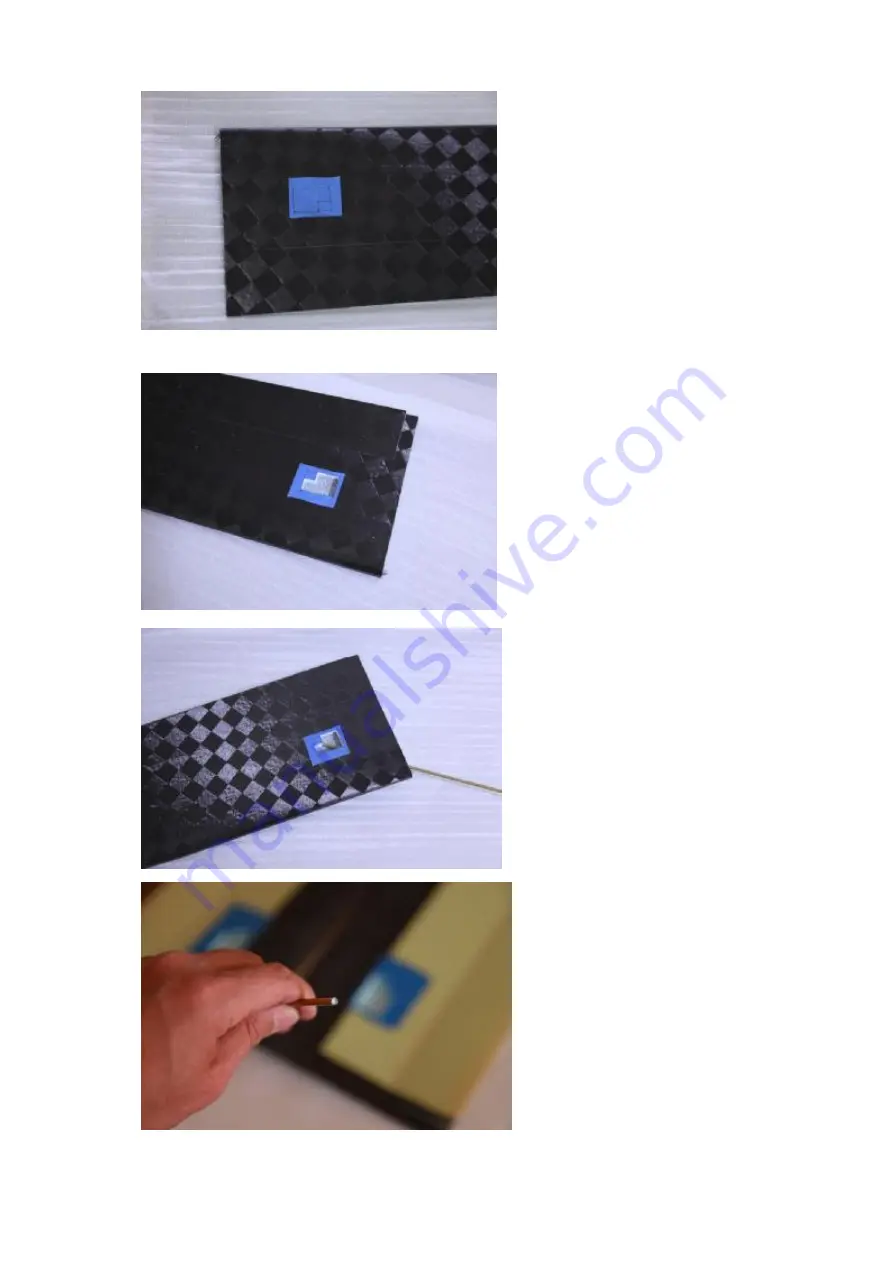
1.  Locate  servo  position,  we 

don't  recommend  installing  the 

servos  under  the  carbon  front, 

that'll result in weakling the wing, 

you can find a carbon thread tow 

was  embedded  as  spar,  use  a 

servo  as  a template  to  draw  the 

outline of the servo


2. Remove the skin and foam


3. Drill tunnel for servo wire


4.  use  4mm  brass  tube  as  a 

drilling  tool,  file  the  top  as  the 

picture shown


Содержание Top Soaring 3

Страница 1: ...Discus Launch Glider Top Soaring 3 Installation Manual ...

Страница 2: ...ront that ll result in weakling the wing you can find a carbon thread tow was embedded as spar use a servo as a template to draw the outline of the servo 2 Remove the skin and foam 3 Drill tunnel for servo wire 4 use 4mm brass tube as a drilling tool file the top as the picture shown ...

Страница 3: ...ors 6 Test fit and find the right position Mark the place of the screws connecting the wing and fuselage and mark the foam in 30mm wide 7 Mark the place of the screws 8 Remove the form with mark to form a space for epoxy and micro balloon ...

Страница 4: ... pice of tape on the bottom side to connect 2 panels together 11 Connect 2 panels and place the wing tips on 2 chairs the weight help 2 panels join together wait for curing 12 Carefully make 2 panels in correct position we recommend using 6 3 degree dihedral it s about 82mm high measure from every tip not 168mm as show in this photos while laying other panel on the desk ...

Страница 5: ...d the joining area 14 Reinforce the joining with carbon cloth and resin 15 Remove the extra carbon cloth 16 Drill hole for the bolt use small size drill bit first to test the position then use M4 bit finish the hole ...

Страница 6: ...ng tips and the end of the boom are same 18 Begin aileron servos installation by guide the wire through the slot 19 Terminate the connector with the wire 20 connect servo with radio and trim the horn to the central position then glue the servos with epoxy ...

Страница 7: ...21 Glue the control horn in place 22 Install the aileron horn glue with epoxy 23 Sand the edge of the throwing peg to fit your finger 24 Cut through the wing tip for fixing the launch peg ...

Страница 8: ... launch peg be sure to inject enough epoxy into the gap 26 Reinforce the wing tip with carbon cloth on both sides 27 Finished 28 Use the stabilizer mount as a template draw the outline on 3mm plywood cut and sand ...

Страница 9: ...29 Glue 2 plywood pieces together 30 Drill 2mm hole 31 Use screw tap to create thread drop CA to reinforce the thread then tap again 32 Remove the top 6mm foam of the mount ...

Страница 10: ...essary then glue it with epoxy 34 Cut 20mm piece from 2mm carbon rod sand to fit the rear of the mount drill a hole and glue the rod with the mount leave 5mm out of the plywood cover 35 Cut the mount to 15mm height 36 Sand the bottom of the mount ...

Страница 11: ...l After it cured use a piece of 2oz FG cloth to reinforce the connection make sure the FG cloth to wrap around whole pylon include the top surface this can help increase strength and avoid unexpected failure 39 Drill a 3mm hole in the center of the horizontal stabilizer another 2mm hole for the location pin 40 Use a small screw and nipper to remove the foam around the hold ...

Страница 12: ...it for curing 42 Drill the hole again and make sure the right alignment 43 Plan for cutting the width equals to the diameter of the rear end of the boom 44 Use a razor saw to cut 2 slots and don t remove the center part it can help fix the fin to the boom ...

Страница 13: ...e the epoxy cure now you have enough time to make sure the fin is perpendicular to the stabilizer 46 Lightly sand the joining area 47 Use 2 small FC pieces to reinforce the joining area 48 Wet up with finishing resin and wait for cure ...

Страница 14: ...rence to ensure the right alignment 50 Cut a thin hot shrink tube to sheathe the Teflon tube 51 Heat to tighten the tube but don t overheat to add too much pressure to teflon 52 Drill a hole at the rear of the pod to let the Teflon tube go smoothly out and fit good with the boom ...

Страница 15: ...to the inside of the boom use CA 54 Move the tube along the boom and ensure it go straight to the horizontal stabilizer horn use tape to fix the tube on the boom 55 Connect the boom with the horn 56 Prepare the servo and the tray ...

Страница 16: ...57 Glue the servo tray to the pod 58 Power the radio find the right position of the hone and connect the steel wire to it I drill a 0 5mm hole to remove any slope 59 All finished ...

Отзывы: