32
CEILING INSTALLATION
This type of installation is used when the unit cannot be adequately fastened or recessed into a wall or whenever the wall is made
of glass (for example display windows, etc.). In this case, the unit is anchored to the ceiling by chain or threaded bars and the
strength and construction of the ceiling must be carefully checked in order to employ expansion bolts adequate to the weight.
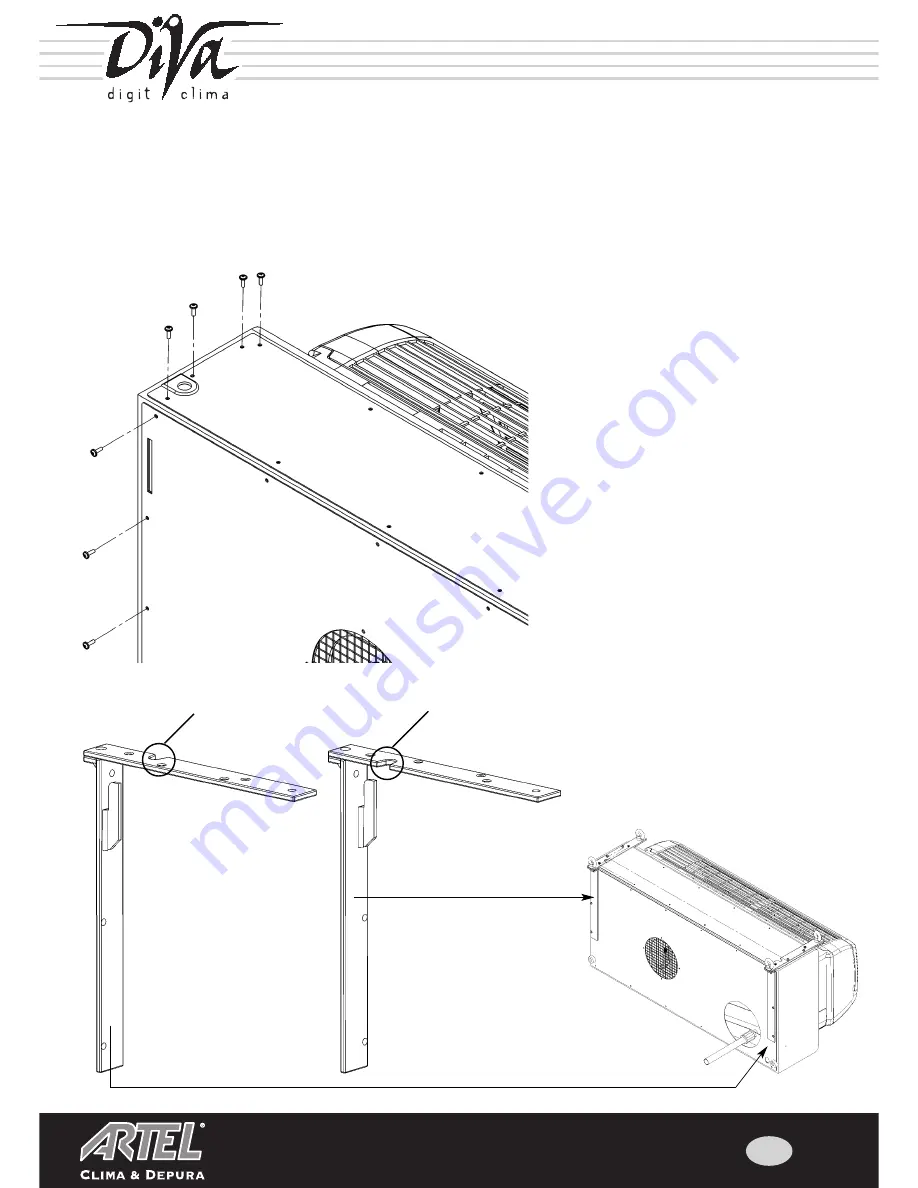
Continue ceiling installation by assembling the brackets contained in the respective kit on the unit..
Right bracket (seen
from rear)
Facing the inside of
the unit
Facing the inside of
the unit
Left bracket (seen
from rear)
fig. 2
fig. 1
SSEMBLY PROCEDURE
Whenever auxiliary condensate drainage
must be performed, read the paragraphs
provided on Page 18 immediately.
a. Remove the screws indicated in Figure 1 from
both the right and left parts of the air conditio-
ner (see drawing) and put them carefully aside in
order to avoid confusing them with the longer
screws supplied with the ceiling installation.
b. The brackets must be assembled as shown in
the drawing in Figure 2.
Be careful to avoid inverting the right and left
brackets, because if this mistake is made the air
conditioner fixing holes will no longer fit and the
screws supplied cannot be used.
Содержание RDW 9RN
Страница 20: ...40 Cod 000495 NOTE ...


