background image

MPDU User Manual


27 


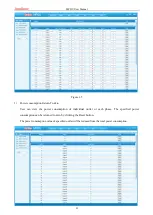
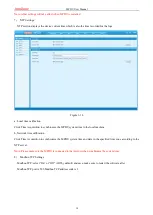
Figure 1-12 

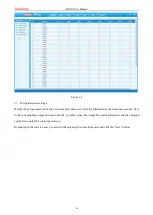
Note: When DHCP is On, the device automatically obtains the router to assign an IP address and will not allow you 

to manually modify the network settings. 

4)


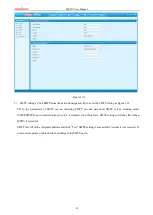
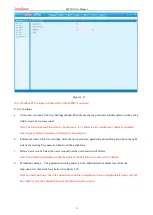
SNMP settings 

a. SNMP V1/V2c settings: 

SNMP v1/v2c is disabled by default, get community and set community is public and private respectively. 

Trap address: can set 2 trap addresses. Fill in the trap address of SNMP management platform, Trap information 

will be sent directly to the addresses. 

b. SNMP v3 Settings: 

SNMP v3 is enabled by default.    Username, Password and Key are required before you use it.   

Note: After save of the SNMP setting, software must be restarted. 


Содержание Excellent Series

Страница 1: ...MPDU User Manual 1 MPDU User Manual ...

Страница 2: ...s 15 5 4 Daisy Chain 15 5 5 RJ45 terminal PIN instruction of RS485 port 17 5 6 Sensor Box Optional 18 6 MPDU SOFTWARE INTRODUCTION 18 6 1 Software overview 18 6 2 Access method 18 6 2 1 Web interface 19 6 2 2 SNMP access 34 6 2 3 Telnet Command Line Interface 34 6 2 4 MODBUS RTU access 40 7 FREQUENTLY ASKED QUESTIONS FAQS 40 7 1 Q FORGET IPADDRESS 40 7 2 Q FAILED TO LOGIN 40 7 3 Q FAIL TO SEND EMA...

Страница 3: ... Maximum load must not exceed MPDU rating Maintenance requirements Change the main control module and excellent series output module and must be operated by professional and technical personnel Because the MPDU output module base is strongly charged in order to ensure personal safety in the maintenance of equipment please do a good job of insulation protection Before disassembling the output modul...

Страница 4: ...e and Maintainable for data center operation 2 Scope of Application 2 1 MPDU can be applied to server rack network cabinet and etc 2 2 Outlet types IEC320 C13 IEC320 C19 GB1002 GB2099 3 NEMA 5 15R NAMA 5 20 and outlet quantity 8 outlets 24 outlets 36 outlets 42 outlets can be selected according to the actual needs 2 3 MPDU complies with RoHS requirements It is applicable for single phase 100 240VA...

Страница 5: ...tched PDU D Per port Monitored Switched PDU Main functions Product Series A Series B Series C Series D Series Energy consumption monitoring of each phase Input voltage monitoring of each phase Input current monitoring of each phase Apparent Power monitoring of each phase Power factor monitoring of each phase Temperature Humidity monitoring Current monitoring of individual outlet Power monitoring o...

Страница 6: ...f the breaker set up the power on off delay Return to zero for power consumption at phase or individual outlet level 4 1 3 Keep the former status A B series not included keep the former state of each outlet after restart 4 1 4 User defined alarm when thresholds of total current individual current A C series not included or temperature and humidity are exceeded 4 1 5 System default alarm when the t...

Страница 7: ... A B series not included switching on off each individual outlet or all outlets set up the power on off delay reset power consumption at input or outlet level 3 Keeping the former state Keeping the former status A B series not included keep the former state of each outlet after restart 4 User defined alarm User defined alarm when thresholds of the input voltage total current or individual current ...

Страница 8: ...er Manual 8 4 2 1 Vertical MPDU 0U Vertical Excellent series Modular Vertical Flyover series integration Vertical transcendence series Multi Standard 2 3 17 16 18 18 18 3 18 18 2 17 16 18 18 2 17 16 3 1 1 1 1 ...

Страница 9: ...MPDU User Manual 9 2 3 17 16 18 18 18 3 18 18 2 17 16 18 Excellent series High density Modular Excellent series High density Modular ...

Страница 10: ...p to the previous page 7 DOWN Scroll down to the next page 8 CONTROL Confirm and flip button 9 RESET Reset button 10 NET 10 100M Ethernet port 11 SER Serial port MODBUS Supported 12 IN Daisy Chain port Connect to the OUT port of previous PDU 13 OUT Daisy Chain port Connect to the IN port of next PDU 14 T H1 Ttemperature and humidity sensor port 1 T H2 Ttemperature and humidity sensor port 2 15 Ala...

Страница 11: ...MPDU User Manual 11 4 3 Installation 4 3 1 Vertical mounting 0U 4 3 2 horizontal mounting 1U ...

Страница 12: ...ton then press RESET button to restore to factory settings UP Page UP Scroll up to the previous page DOWN Page Down Scroll down to the next page RESET RESET button Restart system LCD screen View the data status Display the power data and alarm status T H Temperature humidity sensor port Connect to temperature humidity sensors 5 2 System initialization When power on the MPDU boot animation starts t...

Страница 13: ...he CONTROL button to view the current power power consumption of individual outlet A C series not included 5 2 3 Press and hold the CONTROL button for 4 seconds to back to the input voltage current power power consumption of each phase ...

Страница 14: ...MPDU User Manual 14 ...

Страница 15: ...ou can press the DOWN button to select the digit of the Modbus address and press UP button to set digit value from 0 to 9 Pree CONTROL button to save the settings and PDU will restart 5 4 Daisy Chain 5 4 1 Ethernet Daisy Chain Support daisy chain up to 4 PDUs 1 master and 3 slaves so the user can manage multiple PDUs from one IP address through web interface Daisy chain schema is as following Mast...

Страница 16: ...p to unlimited MPDU through a HUB No limitation for the PDU quantity MPDU1 MPDU2 MPDU3 MPDU4 5 4 3 Serial Connection settings The Modbus RTU protocol is used here for the Star connection The MODBUS Serial Server connect to the Bus arbiter the RS485 port from the Bus arbiter connect to the SER port from each PDU Serial connection can support up to 32 PDUs together See figure as below MPDU1 MPDU2 MP...

Страница 17: ...ure above Serial connection can support up to 32 PDUs together See figure as below MPDU1 MPDU2 MPDU3 MPDU32 Serial connection settings 1 Log on to Web interface of each MPDU to configure the serial communication code from the Modbus address code on Device Manage page 2 The Slave1 unit collects the data from the IN port through the RS 485 serial communication cable Please refer to the MPDU MODBUS R...

Страница 18: ...available 6 MPDU Software introduction 6 1 Software overview MPDU is equipped with embedded software system which provides lots of network services like WEB server SNMP Telnet SMTP SMTPS MODBUS NTP and etc User can access MPDU through the Web Interface or other methods at the same time it provides rich ports of secondary development and integration so the user can manage the device more easily 6 2...

Страница 19: ... ENTER The popup will require creating a new account on first login as figure 1 1 Figure 1 1 The Username and Password can be between 6 to 16 characters and contains any letters and numbers The login popup appears as figure 1 2 when account has been created Figure 1 2 Enter your Username and Password to log on to the system Note You will have to wait for 10 seconds to login if you have tried 5 tim...

Страница 20: ... After enter Figure 1 3 you can view the monitoring information as below 1 Input monitoring The input current voltage Power power consumption power factor of each phase and On Off status of circuit breaker 2 Outlet Monitoring The current power power consumption and ON OFF status of individual outlet 3 Environment monitoring The Temperature humidity status of 2 sensors B Device Settings Click the S...

Страница 21: ...hreshold range 0 40 for temperature 0 99 for humidity Figure 1 4 2 Individual outlet threshold settings a The individual outlet current threshold range 0 16A b User defined power On Off delay for individual outlets or all outlets range 0 10 seconds Note The low load and overload threshold should be within the threshold range ...

Страница 22: ...To Zero User can view the power consumption of individual outlet or each phase The specified power consumption can be returned to zero by clicking the Reset button The power consumption value of specified outlet will be reduced from the total power consumption ...

Страница 23: ...each phase to switch ON OFF the outlets from the specified phase c Click All ON All OFF button to switch ON OFF all outlets at the same time Figure 1 7 5 Switch Group a Tick off the box from the Outlet Groups listed b Select Enable from the dropdown list and click Save button c By clicking the ON or OFF button you can switch on off the outlets this outlet group at one time ...

Страница 24: ...st select the administrator or normal user account Next to the corresponding output bit name click the symbol to have the output bit control permission and the unsigned symbol is no output bit control permission Depending on the selected user you can edit the output rights of multiple users and click the Save button ...

Страница 25: ... User Manual 25 Figure 1 9 C Device Management Device Settings To configure the device name mute the buzzer alarm Sensor Box IN OUT port cascade mode Work mode Modbus address code and baud rate Figure 1 10 ...

Страница 26: ...ress for example IP address 192 168 1 163 factory default IP Subnet mask 255 255 255 0 Gateway 192 168 1 1 DNS address 0 0 0 0 by default Please enter a correct DNS address in order to send the E mail Figure 1 11 3 DHCP settings The default state of DHCP setting is Off User can select On from the DHCP drop down list and click Save to enable it After restarting the software device will get the IP a...

Страница 27: ...ngs SNMP v1 v2c is disabled by default get community and set community is public and private respectively Trap address can set 2 trap addresses Fill in the trap address of SNMP management platform Trap information will be sent directly to the addresses b SNMP v3 Settings SNMP v3 is enabled by default Username Password and Key are required before you use it Note After save of the SNMP setting softw...

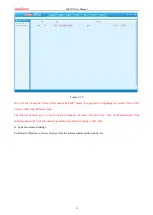
Страница 28: ...P service including SMTP account password SMTP server working mode SMTP SMTPS and e mail recipients up to 5 recipients then Click Save SMTP settings will take effect when MPDU is restarted SMTP test fill in the recipients address and click Test SMTP setting is successful if test email was received If not received please double check and configure the SMTP again ...

Страница 29: ...re 1 14 6 Telnet Settings Telnet select Enable or Disable Enable by default and save make sure to restart the software after modification Telnet account and password is the same one used for login Telnet port is 23 Figure 1 15 ...

Страница 30: ...onize the MPDU system time to the local machine b Network time calibration Click Time Acquisition to synchronize the MPDU system time and date to the specified time zone according to the NTP server Note Please make sure the MPDU is connected to the internet when synchronize the system time 8 Modbus TCP Settings Modbus TCP select On or Off Off by default and save make sure to restart the software a...

Страница 31: ...er settings fill in the new user name password and confirm password in the right side of the existing User name and Password then click Save c Delete User account Select the user account from the user list and click Delete Note The default Administrator cannot be deleted The default user Admin can t be deleted d Permission settings Click permission setting and select the Administrator or normal us...

Страница 32: ... 1500 logs To view the logs Click a page number to open a specific page of the log Every page display 25 logs and maximum support to 60 pages the initial pages will be deleted when over 60 pages To delete the log Click Delete on the web page at the prompt check OK to delete all the logs To export the log The logs from the current page can be exported via log xls format through IE Google Firefox br...

Страница 33: ...level of IE browser following the below steps The internet Explorer goes to Tools Internet Options Security Custom Level Tick off Enable unsafe from Initialize and script ActiveX controls not marked as safe for scripting OK OK G System command settings To Restart or Restore to factory settings from the system command drop down list ...

Страница 34: ...software is required to be installed Please refer to protocol instruction for the OID information of the SNMP 6 2 3 Telnet Command Line Interface User can use the Telnet command line interface to view configure and manage the Rack PDU remotely and easily Telnet does not support the Daisy chain connection user can only access and manage the Master unit 6 2 3 1 To open the Telnet client by Start Run...

Страница 35: ...MPDU User Manual 35 Figure 2 1 Press ENTER At the prompts enter your user name and password to log in to the command line interface as figure 2 2 Figure 2 2 A PHASE command ...

Страница 36: ... voltage power power factor power consumption on each phase Command line format PHASE as figure 2 3 Figure 2 3 B OUTPUT command Use the OUTPUT command to view the current power power consumption and ON OFF status at individual outlet level Command line format OUTPUT See figure as 2 4 ...

Страница 37: ...ne format SENSOR see figure as 2 5 Figure 2 5 D ON OFF command Use the ON OFF command to switch On Off the individual outlet outlets from each phase or all outlets Command line format ON OFF index operation see as figure 2 6 index Individual outlets Group Phase operation Serial number 1 means the outlet 1 from phase 1 see details as below ...

Страница 38: ...witch on the outlet 1 Enter command line OFF OUTPUT 1 to switch Off the outlet 1 OUTPUT command can switch ON OFF only one outlet at one time GROUP Enter command line on group 1 to switch on outlet from branch circuit 1 Enter command line off group 1 to switch off outlet from branch circuit 1 ...

Страница 39: ...mand Use the REBOOT command to restart the device as figure 2 8 Figure 2 8 F RESET Command Use the RESET command to restore to factory settings as figure 2 9 Figure 2 9 G QUIT Command Use the QUIT command to logout the current Telnet command line interface See figure 2 10 Figure 2 10 H Help Command Use the HELP command to shows general help see figure 2 11 Figure 2 11 ...

Страница 40: ...etwork segment the default IP address of the MPDU is 192 168 1 163 Subnet mask 255 255 255 0 gateway 192 168 1 1 so the PC network will be like following IP address 192 168 1 2 Subnet mask 255 255 255 0 gateway 192 168 1 1 7 2 2 Open a browser and enter the IP address and login to the Web interface with user name and password 7 2 3 Click Network Setting from the web interface and change the IP add...

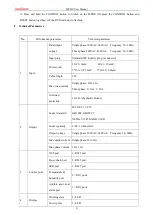
Страница 41: ...6mm 63A 3 16mm 3 16A 5 2 5mm 3 32A 5 6 0mm Cable length 3M Max load current Single phase 32A 63A Three phase 3 16A 3 32A Overload protection 16A 32A hydraulic breaker 2 Output Socket standard IEC320 C13 C19 GB1002 GB2099 3 NEMA 5 15R NAMA 5 20R Socket quantity 8 24 36 42outlets Output voltage Single phase 100VAC 240VAC Frequency 50 60Hz Max output current Single phase 32A 63A Max phase current 16A...

Страница 42: ...e 400ms 7 Product size L W D Vertical produt Excellence flying series 1829 56 52mm 24 bits 1829 56 62mm 36 42 bits Beyond series X 66 6 44 4mm X length depending on the number of socket outlets Horizontal produt 482 4 216 44 4mm 8 bits Mounting option Excellent flying series behind the nail installation installation hole center distance 1555 75mm Beyond the series hanging ear installation fine adj...

Страница 43: ...roper use 9 1 3 The device are not used in the stipulate physical environment 9 1 4 Problem in consequence of any Force Majeure incidents 9 2 Repair notice 9 2 1 Please make sure to use protective hard carton when arrange the shipment to repair the problem occurred during the shipment is not covered by the warranty 9 2 2 Please make a short note about the problem and the operation process 9 2 3 Pl...

Отзывы: