Assembly Instructions
NOTE:
Unpack the recliner in an area with sufficient
room to work. Do not allow residents near the
recliner until it has been completely set up and the
work area has been cleared of all debris.
1
. Remove back assembly (C) from unassembled
chair and set aside momentarily.
2
. Slide the one-piece back assembly (C) into the
square tubes of the lower frame assembly (B)
so the holes in the backrest line up with the
holes located on the horizontal brace to the
lower frame assembly (B).
3
. Raise recliner Lock Bar (F), adjust position of
Back Assembly (C) until Lock Release Button (G)
positively engages middle slot lock bar when chair
is in storage position.
4
. Insert screws through holes of the horizontal
brace and tighten all screws with screwdrivers.
NOTE:
Make sure that the top screws on both sides
of the coated square tubing from the back assembly
are secure before using recliner.
Operating Instructions
To Place Unit in Reclining Position
By Occupant:
Place hands on armrests and push against seat
back. Legrest will automatically adjust to each
recline position.
NOTE:
The table can only be used in upright
sitting position.
By Caregiver:
1.
Ensure that the recliner Lock Bar is in stored
position.
See fig. (1)
2
. Stand at either side of the recliner.
3
. Grasp armrest with one hand, and PVC push
bar (J) with other.
4
. Push down on push bar to recline the back to the
first recline position. To achieve second recline
position, push on push bar again.
5
. To raise upright, pull forward on push bar.
6
. Set recliner Lock Bar (F).
Reclining Lock Operation
To Lock Recliner
1
. Place recliner into desired position.
2
. Pull out Lock-Release Pull Button (G) to release Lock
Bar (F) from stored position.
3
. Rotate recliner Lock Bar (F) down until notches are
fully engaged over Locking Pins (H).
To Unlock Recliner:
1
. Lift recliner Lock Bar (F) up to disengage from
locking pins.
2
. While holding Lock-Release Pull Button (G) out, rotate
recline Lock Bar (F) all the way up until completely
against seat back.
3
. Release Lock-Release Pull Button (G) to hold recliner
Lock Bar in stored position (F).
NOTE
: Do not attempt to change position of chair with
recliner Lock Bar engaged. This could cause damage to
mechanism.
Assembly & Operating Instructions
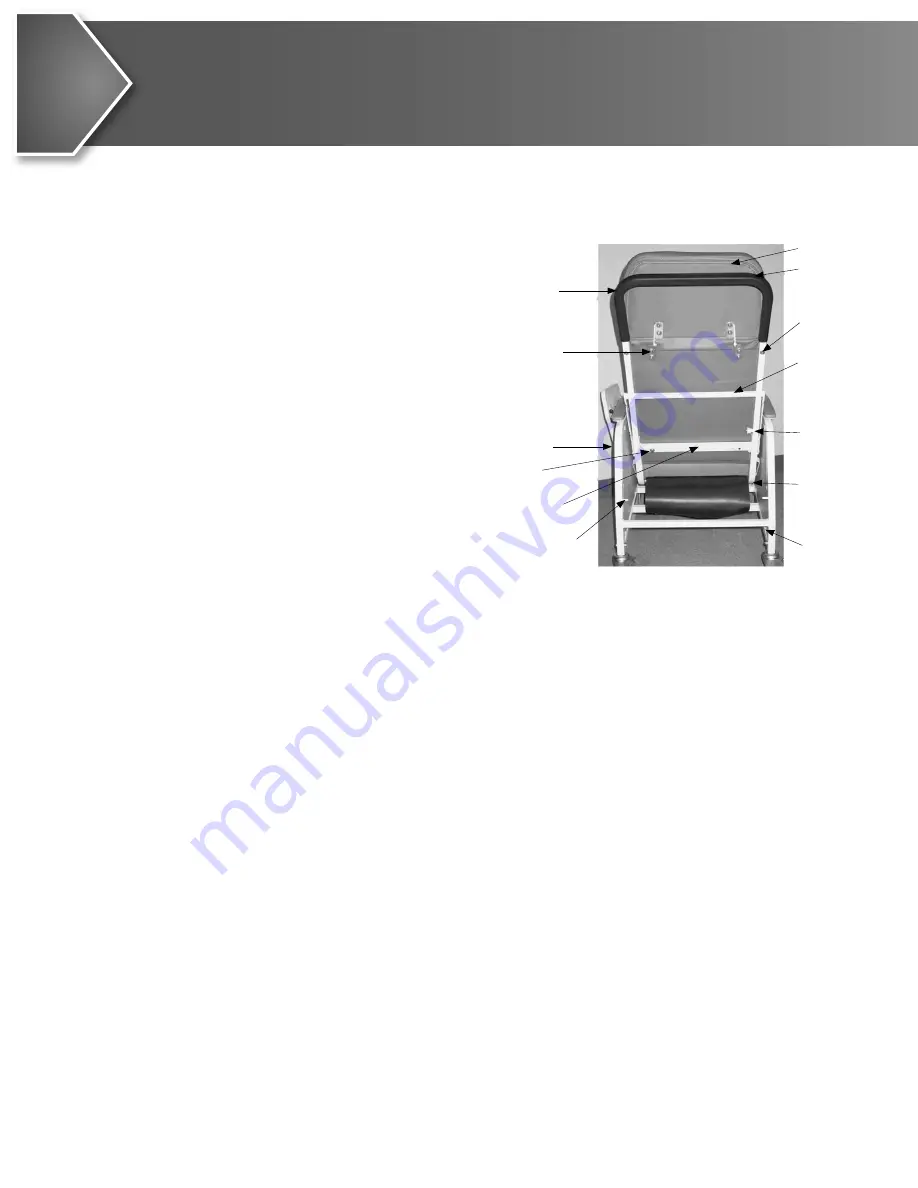
PVc Push Bar (J)
Holes in Backrest
table storage
Holes in
Horizontal Brace
label specifying
Date of Manufacturer
locking Pins (H)
lower rear
support tube (e)
lower Frame (B)
lock-release
Pull Button (G)
recliner lock
Bar storage (F)
Holes with screws
Back Assembly (c)
Upholstered Back
Figure 1


