background image

5

  Wiring diagram

  Hydraulic diagram

  Meaning of graphic symbols on 

machine

2101H964

2104F387

4

5

6

7

2

3

1

4

5

6

7

2

3

1

•IL

 Depth gauge 

•IN

 Torch outlet (red) 

•M

 Electric pump 

•OUT

 Torch intake (blue) 

•R

 Radiator 

•S

 Tank 

•T

 Tank cap with microvalve 

•V

 Fan 

•W

 Pressure switch

•1

 Fuse 

•2

 Cold water outlet 

•3

 Hot water intake for cooling in the unit 

•4


Grounding 

•5

 Warning! 

•6

 Before using the equipment you should careful-

ly read the instructions included in this manual 

•7

 Product suitable for free 

circulation in the European Community

•CA

 Power supply connector 

•F

 Fuse 

•M

 Electric pump 

•W

 Pressure switch

Bl

 Blue

Gg

 Grey

GV

  Yellow Green

Mr

 Brown

Nr

 Black

Содержание DIX CM 141.M

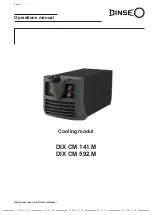
Страница 1: ...DIX CM 141 M DIX CM 592 M BA 0104 Cooling modul S C H W E I S S E N W E L D I N G W E L D I N G S C H W E I S S E N S C H W E I S S E N Keep in secure area for future reference Operations manual ...

Страница 2: ...icult welding operations and consists mainly of A single phase electric pump A plastic tank A cooler A pressure monitor A fuse The cooling module is particularly compact and lightweight It is designed as part of a welding power source For other appli cations please contact your DINSE consultant Technical data The general technical data of the cooling module are summa rized in table 1 Table 1 Model...

Страница 3: ... Usage norms CONTROL APPARATUS Fig A Pos 1 Red snap in connector for water intake Pos 2 Blue snap in connector for water outlet Pos 3 Cap with microvalve for filling of the tank with coolant Pos 4 Cable for electric connection of the device to the gen erator cooling connector Pos 5 Level indicator for presence of coolant in the tank the level of the liquid must never be inferior to the notch indic...

Страница 4: ...ximately 30 seconds so that the cooling device can allow the liquid to circulate D Wait for the exit of the liquid The operation will be termi nated when the liquid exits in a constant way and without any traces of air bubbles E Upon the completion of the operation turn the welding pow er source off F After that screw the tank s cap shut and connect the weld ing power source prior to beginning ope...

Страница 5: ...cap with microvalve V Fan W Pressure switch 1 Fuse 2 Cold water outlet 3 Hot water intake for cooling in the unit 4 Grounding 5 Warning 6 Before using the equipment you should careful ly read the instructions included in this manual 7 Product suitable for free circulation in the European Community CA Power supply connector F Fuse M Electric pump W Pressure switch Bl Blue Gg Grey GV Yellow Green Mr...

Отзывы:

Похожие инструкции для DIX CM 141.M