6
www.renewables.dimplex.com
Site Selection and Preparation
1. Place the heater flat on the ground with arrows
printed on the base of the carton pointing
upwards. Open the carton at the bottom, slide
the heater out of the carton exposing the
feet and the hardware kit located within the
packaging on the right hand side. Remove the
feet and the hardware kit.
2. Secure the feet to the heater, using the screws
provided in the hardware kit.
!
NOTE:
For models QSH-70 and QSH-100
two locations are possible for mounting each
foot. They are indicated by an “X” and “Y”
marking visible on the base of the heater.
3. Ensure the feet are secured at the location
holes marked with an “X”, see Figure 3.
4. Stand the heater on its feet before removing
the packaging.
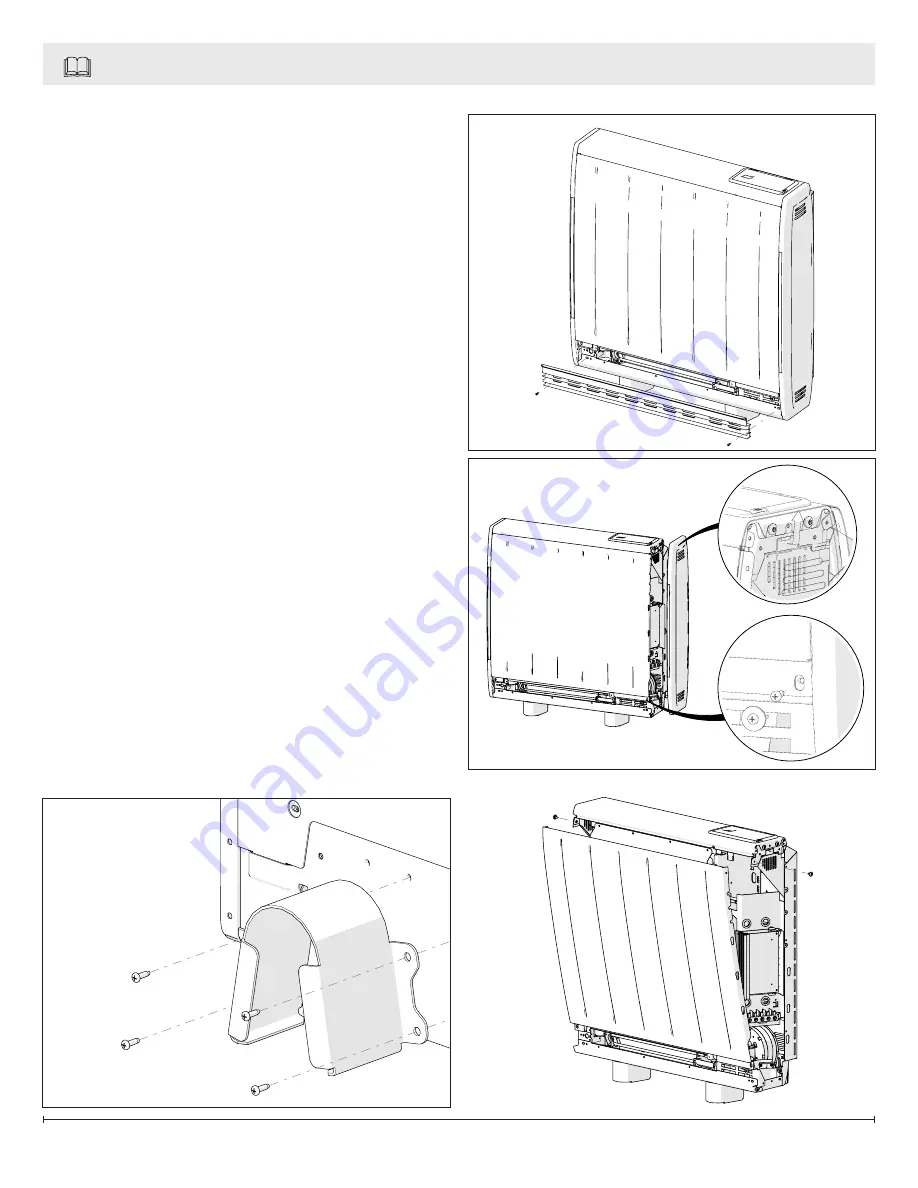
5. Once the feet have been secured and the unit
has been turned upright, remove the grille from
the side of the unit. (Figure 4)
6. Remove the two screws located towards the
bottom at each end of the heater, which retain
the heater sides. (Figure 5A)
7. Push the end panels vertically upwards to
release each side from its securing points.
(Figure 5B)
8. Remove the two screws securing the front
panel, located at the upper sides of the heater,
and swing the upper edge of the front panel
forwards and unhook it from along the heater
base. (Figure 6)
Figure 4
Figure 5
A
B
Figure 6
Figure 3


