background image

Operation

ON/OFF

After the power is turned on, the device will beep twice and enter standby state. In 
standby state, all functions and displays will be off, and all buttons aside from the 
On/Off button are invalid. In standby state, pressing the On/Off button once will 
turn on the device. By default the power indicator light and the fan LED display 
showing 10 levels of wind speed will turn on. All other functions remain off. To turn 
the device off or back into standby state, press the On/Off button once more. If the 
left/right function is turned on, the device will automatically return to centre point 
before switching off. 

SPEED DIAL

When the device is switched on, you can set the wind speed between 1-32 by 
adjusting the speed dial. By rotating the dial to the right, the wind speed will 
gradually increase. When the maximum wind speed is reached (32), a buzzer will 
beep. If you keep rotating to the right after reaching max speed, the speed will no 
longer increase and the buzzer will beep continuously. By turning the dial to the 
left, the wind speed will gradually decrease. Once you reach the minimum wind 
speed, the device will beep, and do so continuously. 5 Seconds after setting your 
desired speed, the display will show the current wind speed. The default operation 
of the speed dial is to change wind speed, however if you press the Timer button, 
and enter the desired timer setting, the speed dial is also used to adjust the timer 
setting. 

TIMER SETTING

Press the Timer button to begin setting the timer on your device. When you press 
this button, 'h' will light up on the LED display. Use the speed dial to choose the 
timer setting between 0-12 hours. When adjusting the timer, rotating the dial to the 
right will gradually increase the time length. When it reaches the maximum value (12 
hours) the device will beep, and will do so continuously. Rotating the dial to the left 
will gradually decrease the time length, and the device will beep, when you reach 
the minimum timer setting. After entering the timer setting mode, the previous timer 
setting will not yet be changed. The timer will only be reset when the timer value 
is changed by the speed dial, and will take effect after pressing the timer button to 
exit the function. After 5 seconds, the desired time setting will be displayed on the 
LED screen. Once the timer is finished, the device will immediately enter standby 
state. You can also use this function to schedule the device to turn on. Press the 
Timer button when the device is in standby state, and follow the above process to 
set a time to activate this function.

10

Содержание DCAC20T

Страница 1: ...For domestic household use only INSTRUCTION MANUAL DC Air Circulator Model DCAC20T...

Страница 2: ...l angled surfaces Never operate the appliance if a cable or connector has been damaged after appliance malfunction or if the appliance was dropped or is otherwise damaged If the mains lead is damaged...

Страница 3: ...pour sprays on or around the unit Always switch off the unit and take the plug out of the socket If you are not using the unit Before you clean or carry out maintenance on the unit If a fault occurs I...

Страница 4: ...s not secure Dispose of used button batteries immediately and safely Flat batteries can still be dangerous Do not ingest battery Chemical Burn Hazard This product contains a coin button cell battery I...

Страница 5: ...xtension leads or power boards Where there is risk of fire or close to a naked flame Where the power cable may be damaged On a slope or uneven surface Where it may be damaged by chemicals If there is...

Страница 6: ...ngs 32 Timer 12 hours Air speed 6 5m s Vertical oscillation 80o Horizontal oscillation 360o Noise level MAX 56dB A Weight net 2 5kg Dimensions w x d x h 255 x 237 x 374mm Specification For greater pre...

Страница 7: ...air with fresh air from an open window Air circulators are the safe all year round temperature regulation solution you ve been looking for Where To Position During Summer pointing the air circulator...

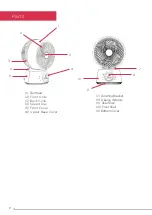
Страница 8: ...Parts 1 FanHead 2 Front Grille 3 Back Grille 4 Speed Dial 5 Front Cover 6 Upper Base Cover 7 RotatingBracket 8 DisplayWindow 9 RearShell 10 FrontShell 11 BottomCover 3 5 4 2 1 6 9 7 8 10 11 8...

Страница 9: ...Wind Mode Screen Off Left Right Swing Up Down Swing Timer On Off Decrease Fan Speed Increase Fan Speed Left Right Swing Up Down Swing Mode Timer Display On Off Fan Timer Vertical Swing Sleep Wind Hor...

Страница 10: ...desired speed the display will show the current wind speed The default operation of the speed dial is to change wind speed however if you press the Timer button and enter the desired timer setting th...

Страница 11: ...t off the vertical swing functionality This device will oscillate up to 80 vertically When this function is switched on the LED display will show the vertical arrow symbol HORIZONTAL SWING Press the L...

Страница 12: ...ace of the unit with a soft damp cloth Mild detergent can be used for any stubborn marks IMPORTANT The control panel and other parts must not come into contact with water or any other liquids Storage...

Страница 13: ...ormation regarding the collection systems available If electrical appliances are disposed of in landfills or dumps hazardous substances can leak into the ground water polluting the food chain and dama...

Страница 14: ...14...

Страница 15: ...15...

Страница 16: ...Supplied by Glen Dimplex Australia 8 Lakeview Drive Scoresby Victoria 3179 Glen Dimplex Australia All rights reserved Material contained in this publication may not be reproduced in whole or in part...

Отзывы: