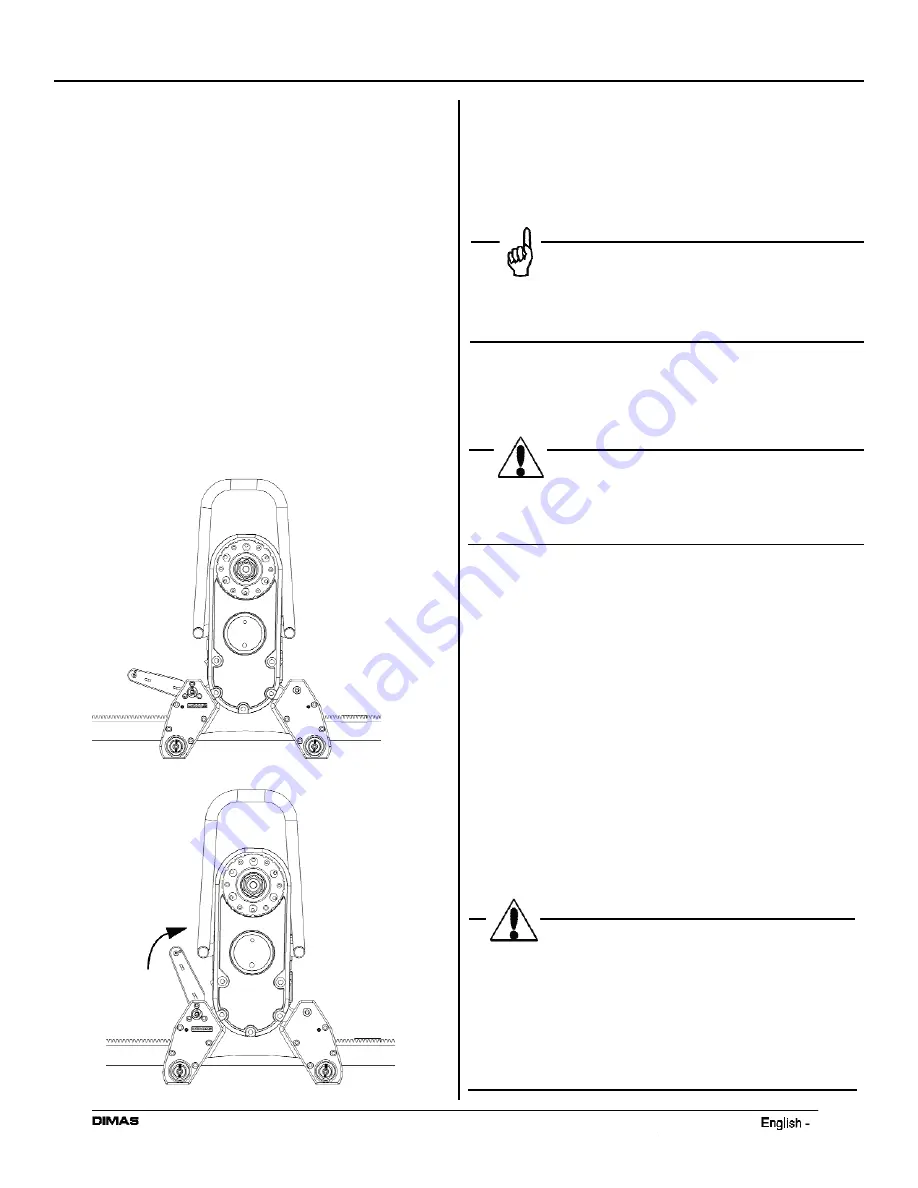
Assembling The Saw
1. Push retention rollers outward to the release position.
This allows the saw to be placed on the track with
no interference.
2. Place saw carriage at any location on track. Make
sure that the pinion gear meshes properly with the
track rack and that the saw is down firmly on the
track. Then push retention rollers inward to the lock
position.
3. Make sure that locking handle is parallel with the
track and ready to receive the saw head. In
vertical cuts it is recommended to place the saw
carriage with the locking handle pointing towards
the ceiling to help hold the weight of the head
when connecting.
Operator’s Manual WS 460
11
3. Fit the saw body in the saw carriage by lifting the
saw body into position. When the saw is placed in
position, the locking handle moves up into an
intermediate position. In this position the saw
remains in the saw carriage without it needing to
be held. However, it is not sufficiently held to begin
cutting.
Remark
With a vertical cut it is usually easier to
assemble the saw carriage with the handle
upwards on the track.
4. To secure the saw, lift the locking handle towards the
saw until the handle locks in the upright position.
WARNING
Cutting without the saw securely assembled
in the saw carriage could cause significant
injuries and / or could be fatal.
5. When the saw unit is mounted in the saw carriage,
the hydraulic hoses should be fitted. There are two
types of hydraulic hoses for the saw:
The four thin hoses control the feed motors, i.e. the
saw's travel feed on the track and the 360°
rotation of the cutting arm. The two thick hoses
drive the blade.
The couplings should be wiped clean to reduce the
risk of contamination before the hoses are fitted.
Both the thin and thick hoses are locked by turning
the outer sleeve on the female coupling so that the
groove in the sleeve moves away from the ball.
6. Connect the incoming water hose and the hydraulic
hoses to a hydraulic unit.
WARNING
This machine is only intended for use
together with a DIMAS PP 345, DIMAS
PP 2325 D, DIMAS PP 2525 D, DIMAS RC 345
and DIMAS Smartbox. All other use is
forbidden. The DIMAS Smartbox must be
used with the PP 2325 D and PP 2525 D to
utilize the power travel feature.
Содержание Dimas WS 460
Страница 1: ......


