11
AP Dynamometer Service Manual
Clean the bezel with a soft cloth dampened using ordinary glass cleaner.
You can remove the bezel-retaining ring to clean the reverse side of the
bezel. Remove the ring by removing the Phillips screws that secure it to the
housing. The bezel edging material need not be removed for this cleaning.
Take care not to bend or damage the max pointer during cleaning. Reas-
semble in reverse order from disassembly.
Shackle-pin bearings should be cleaned if grease, grime or dirt is apparent
in the bearings. With the shackles and pins removed, apply a universal
cleaning degreaser (such as Blue Shower, CRC Heavy Duty Degreaser,
Safety-Kleen Solvent, etc.) directly to the bearings. Manually turn the bear-
ings and continue applying cleaner until traces of dirt disappears. Sparingly
apply a light lubricant (such as Ace LPS2, Exxon Handy Oil, 3 in 1 oil, etc.)
to coat all moving surfaces.
The gearing works or mechanical mechanisms within the dynamometer
housing can be cleaned with a cleaning degreaser and then sparingly
lubricated with a light lubricant.
The remainder of the dynamometer may be cleaned with a light-duty,
general purpose cleaner.
In service, the pressure bar should not be permitted to contact or otherwise
sustain impression or impact
loads.
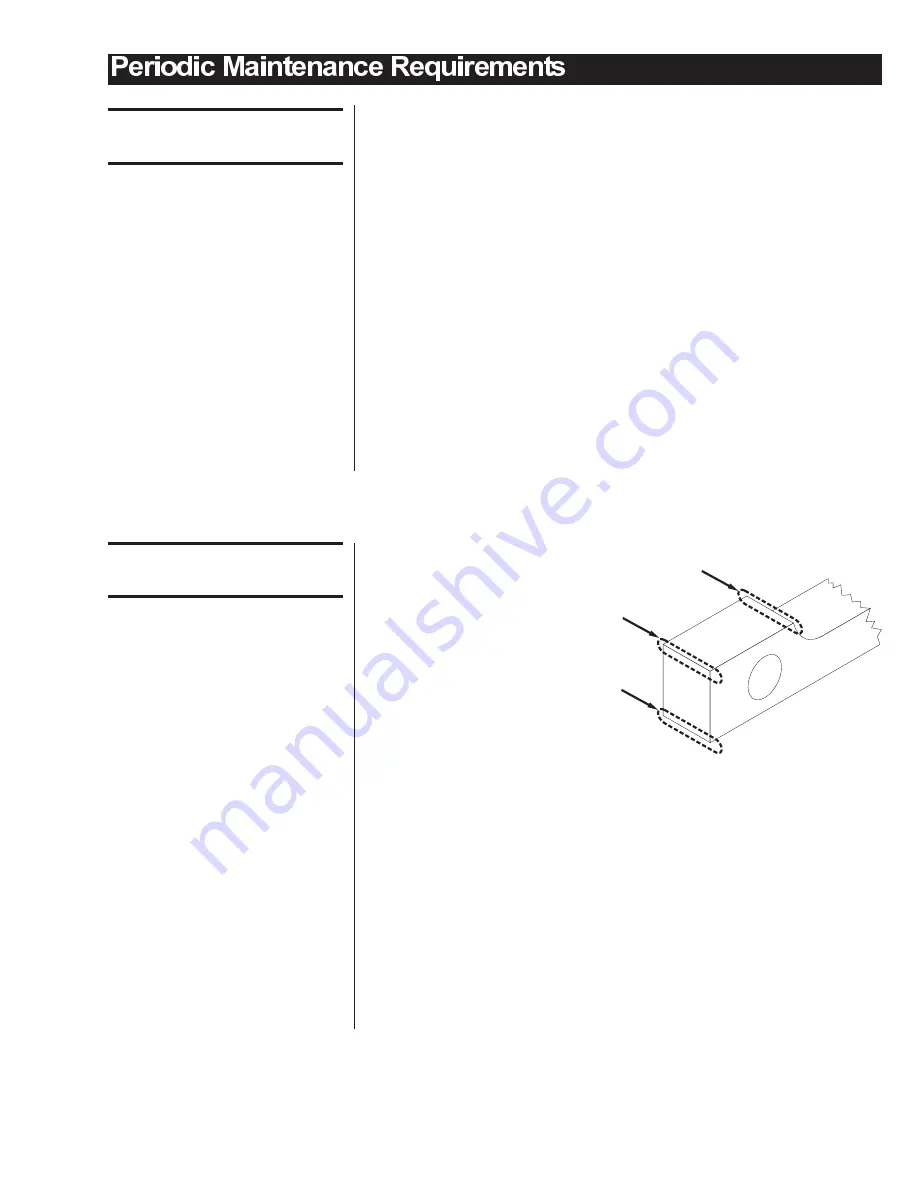
Any pressure bar with cracks or
sharp gashes should be immedi-
ately removed from service. Any
pits, impressions, or other surface
inconsistencies larger than 0.031
(1/32) inch are cause for replace-
ment. Smooth or rounded imper-
fections with depths less than
0.062 (1/16) inch are permissible
on the corners indicated in the illustration at right.
Scratches across the bearing hole greater than 0.005 inch in depth are
cause for replacement. Machining marks running the circumference of the
bearing hole are not cause for rejection.
Under no circumstances should any surface of the pressure bar be sub-
jected to grinding. The pressure bar cannot be repaired by welding.
For organizations that perform periodic nondestructive testing of the pres-
sure bar, relevancy checks may be performed using a Dremmel type tool
and fine grit drum, flexible disc, or buffer type attachments, such that the
resulting finish is no worse than 63 micro inches and the depth is not greater
than 0.005 inches. Any one location may only be relevancy checked once
during the lifetime of the pressure bar. Relevancy checks may not be
performed in the area of the stamped traceability numbers.
Cleaning And
Lubrication
Inspection of the
Pressure Bar


