background image

D2-927G User Manual | 11 


*Note: The Digital2™ Tablet recognizes Wi-Fi networks that it has connected to before. Once Wi-Fi is 
turned on and a known connection is detected, the device automatically connects to that network.  

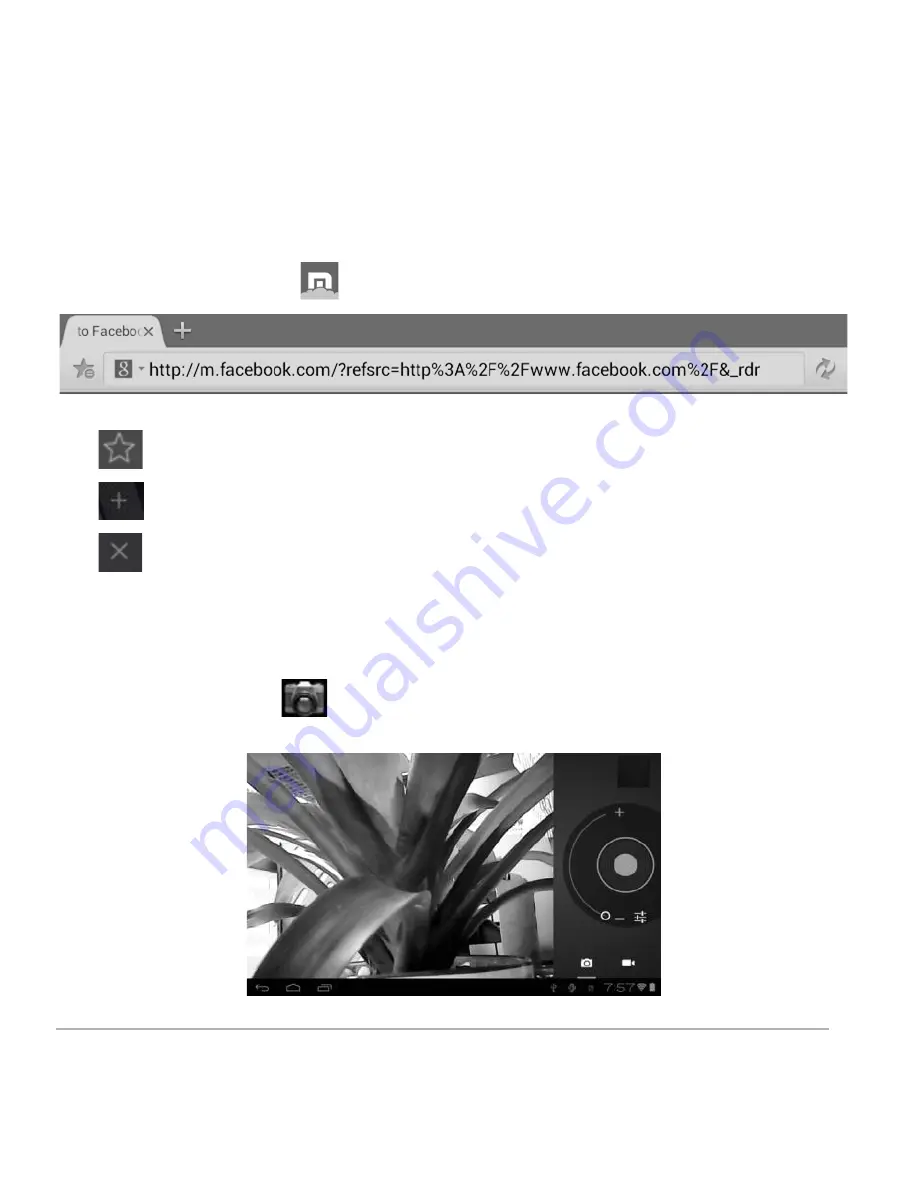
2.2 Browser


From your Application list, click 

 to open the web browser. 


Touch the URL input area to display the soft keyboard to type site address. 

Click 

 to add site to Bookmarks 

Click 

 to add new browser tab 

Click 

 to close the browser tab 

Chapter Three: Applications


3.1 Camera 

From your homescreen, click 

 to enter the camera app. 


Содержание 9" PAD PREMIER

Страница 1: ......

Страница 2: ...ode 6 1 4 Home Screen 6 1 5 Lock and Unlock Screen 7 1 6 Status Bar 7 1 7 Text Input 8 1 8 Reset 8 1 9 USB Connection Connect between Tablet Computer 8 1 10 Accessories 9 Chapter Two Internet 9 2 1 Wi...

Страница 3: ...contained in the product described herein shall not be distributed modified reverse engineered or reproduced in any manner without the prior written consent of Digital2 or of other third parties All...

Страница 4: ...Rules These limits are designed to provide reasonable protection against harmful interference in a residential installation This equipment generates uses and can radiate radio frequency energy and if...

Страница 5: ...e product To avoid accident please be sure to read the manual carefully prior to use the product Keep the product away from high temperature moisture or dust Do not expose the product to high temperat...

Страница 6: ...surface of the product Do not operate device where the use of electronic equipment is prohibited such as on airplanes To avoid any accidents please do not use the product when driving or walking on th...

Страница 7: ...n to see charging notification Power off While the unit is on press and hold the power button until a dialogue window appears to confirm power off Press OK to continue 1 3 Enter and Exit Standby Mode...

Страница 8: ...screen displays an X Drag the application icon towards the X until it turns red and then release the hold to remove the application shortcut 1 5 Lock and Unlock Screen Lock You may set an idle timefra...

Страница 9: ...onnection status Tap the icons to view the date and time and other information 1 7 Text Input When using the tablet you may use its virtual keyboard to enter text numbers and symbols directly by touch...

Страница 10: ...to disconnect your tablet from the PC Otherwise you might be able to operate some of the apps properly on your tablet 1 10 Accessories Item Function Adapter 5V 2A Provides power to the tablet by char...

Страница 11: ...nually input your wireless network if it does not appear on the list but is within range Other Wi Fi Options Tap the Advanced icon on the upper right corner of the screen to display advanced options a...

Страница 12: ...device automatically connects to that network 2 2 Browser From your Application list click to open the web browser Touch the URL input area to display the soft keyboard to type site address Click to a...

Страница 13: ...enter video mode Press the red button to record Click to set white balance and time lapse interval 3 2 Gallery From your homescreen click to view all pictures saved onto the tablet Click to display t...

Страница 14: ...yer You may adjust video play settings on the bottom menu bar by slightly tap the screen while playing 3 4 Music From your Application list click to open the music player The song list may be displaye...

Страница 15: ...new event Week View Press and hold to an event to view edit or delete it Press and hold a blank area to add a new event Month View Click on a date then press and hold to an event to view edit or delet...

Страница 16: ...ess and hold the file to display multiple options Click Copy then click to return home to choose the new location then click to paste 3 7 E mail Network support is needed to use E mail If you experien...

Страница 17: ...o fill in the subject and E mail content Add Attachment To add attachment s while composing an E mail click on the three squares icon on the top right corner of the screen Select Attach file Reply and...

Страница 18: ...ownloads Click the box next to an item then click the trash can icon to delete its contents 3 9 Clock From your Application list click to enter the clock interface Under the time and date click Set al...

Страница 19: ...as mute all sounds 4 3 Display Settings Display settings include Brightness Wallpaper Sleep and Font Size Brightness Adjust the brightness of the screen by sliding left or right Wallpaper Change the w...

Страница 20: ...rdware Warranty Digital2 offers a ONE YEAR limited warranty covering the hardware of Digital2 Tablets Product limited to those residing in the 48 continental United States and Canada Digital2 warrants...

Страница 21: ...e in color texture or finish wear and tear scrapes dents cracks or gradual deterioration e Damage to the Product caused by war terrorism fire accident natural disaster intentional or accidental misuse...

Страница 22: ...MODIFICATION EXTENSION OR ADDITION TO THIS WARRANTY IF ANY TERM S IS HELD ILLEGAL OR UNENFORCABLE THE LEGALITY AND ENFORCEABILITY OF THE REMAINING TERMS SHALL NOT BE AFFECTED OR IMPAIRED EXCEPT AS PRO...

Страница 23: ...Designed In USA Assembled In China...

Отзывы: