DIGITAL YACHT
WL410 Quick Start Guide
4. Operating the WL410 on Windows
The WL410 can be operated in two ways;
1)
Using the standard Windows Wireless Connection Manager
– simplest method under Windows Vista and 7
2)
Using the Realtek Wireless LAN Utility
– best method for older Windows XP systems (prior to Service Pack
The Realtek utility does provide some benefits over the Windows Wireless Manager that Microsoft provided, but in
general most people prefer to use the standard Windows Wireless Manager which they know and are familiar with.
IMPORTANT NOTE
- It is always best to turn off (disable) the internal wireless adaptor on your laptop before using the
WL410. The exact method to do this, varies from PC to PC, but some laptops have a dedicated button in or around the
keyboard area or a special keyboard combination e.g. pressing the Fn + F8 keys.
Operating the WL410 on Windows Vista and Windows 7
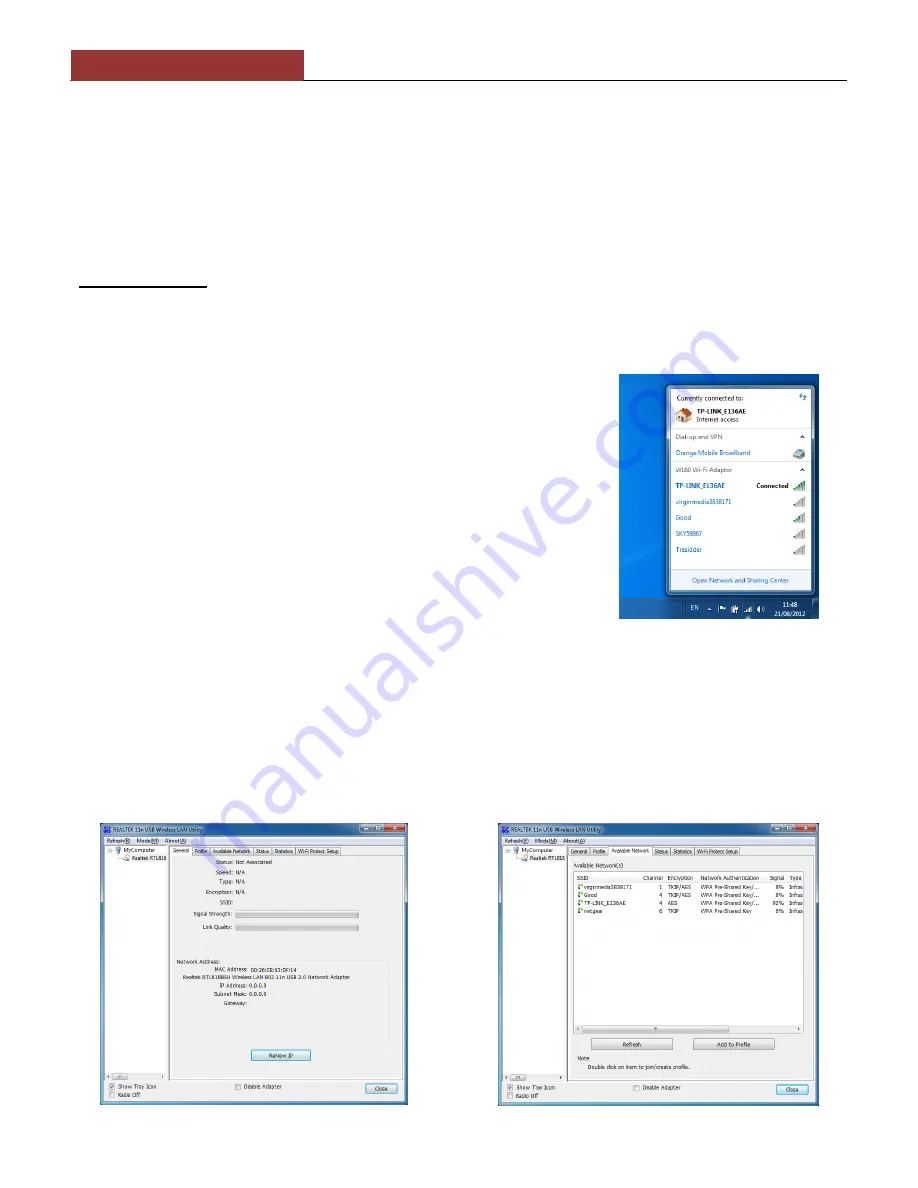
Click on the Wireless Networks icon in the task bar (lower right hand side of
the screen) and a list of the available wireless networks (hotspots) will be
displayed. Your laptops internal wireless adaptor is usually named “Wireless
Network Connection” and the WL410 will automatically be named “Wireless
Network Connect
ion 2” or possibly another number if other adaptors have
been used previously.
It is possible to rename this connection to something more meaningful by
going in to the “Network and Sharing Center” and renaming the Network
Adaptor to “WL410 Wi-Fi Adaptor” or similar, so that you can be certain of
which wireless adaptor you are using
– as shown in Fig 17.
Click on the wireless network you wish to connect to and click the “Connect”
button that will appear. You may be asked to enter a password or confirm if
the network is a Public, Work or Private network (to set security levels) and
then the wireless connection should be made and you will be able to connect
to the internet.
Operating WL410 on Windows XP - Using the Realtek Utility
To connect to a wireless network, you must run the “Realtek USB Wireless LAN Utility” which will now be one of the
programs listed in the Start>All Programs menu. The first time you run this program, you will see the window displayed in
Figure 18 which shows that you are not connected to a wireless network.
Figure 18
Figure 19
Figure 17


