DIGITAL YACHT
WL410 Quick Start Guide
4. Installing the WL410 on Windows
The WL410 is supplied with Windows compatible drivers that allow it to be used as a second Wireless Network Adaptor
on your laptop. You can either; install the drivers and use the normal Windows Wireless Connection function to scan,
select and connect to a wireless hotspot or you can use the free Realtek Wireless Lan Utility software which is also
supplied on the CD-Rom.
It is very important that you do not plug the WL410 in to a USB port on your computer unless you have the WL410 Drivers
CD-Rom inserted in your PC. By plugging in the WL410
you will initiate the Windows “Found New Hardware Wizard”
which will not be able to complete correctly without the Drivers on the CD-Rom being present. The installation process
varies depending upon which Operating System your computer has, so please ensure that you follow the correct
procedure.
Installation for Windows Vista and Windows 7 (On-Line)
By far the easiest method of installation, if your PC is running
Windows Vista or Windows 7, is to connect the PC to the internet, as
you would normally do, using the internal wireless adaptor and then
plug the WL410 in to a spare USB port on the laptop.
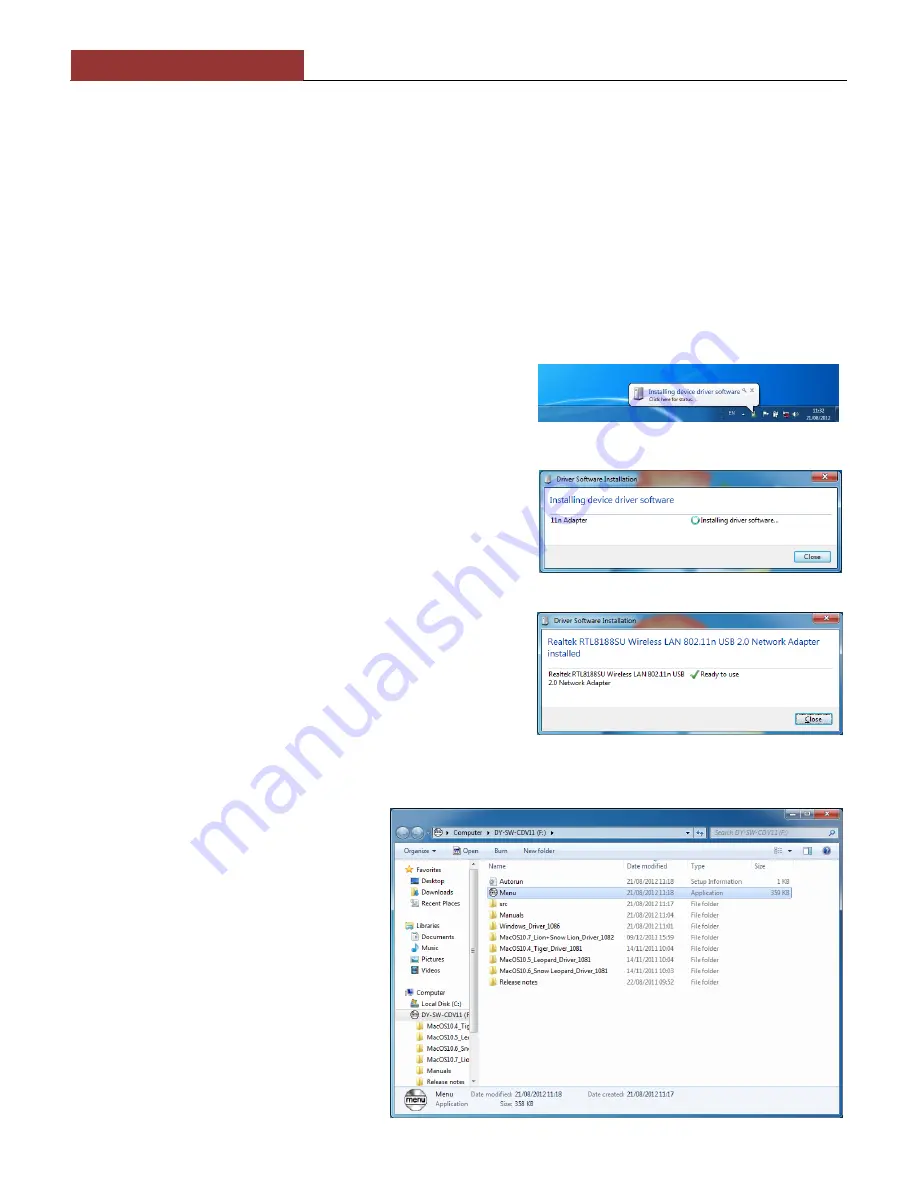
Windows will detect the new hardware and display the message
shown in Figure 1. It will then automatically search the on-line
Windows Update server for the correct drivers. Depending upon the
speed of your PC and internet connection this should take between 20
seconds and a couple of minutes to complete.
You can click on the message and the Window in Figure 2 will be
displayed giving you the status of the driver installation.
After the correct driver has been found, downloaded and installed the
Window in Figure 3 should be displayed. The drivers are now installed
correctly and you are ready to use the WL410 to find and connect to a
wireless hotspot. Proceed to the “Operating WL410 on Windows Vista
and Windows 7” section.
Installation for Windows XP, Vista and Windows 7 (Off-Line)
If you cannot connect to the internet, you can
install the drivers from the supplied Digital
Yacht CD-Rom. If you do not have a CD-Rom
drive on your computer, you will need to copy
the contents of the CD to a USB memory
stick.
Insert the CD-Rom (or memory stick) in to the
PC. The CD should Autorun but if it does not,
open the CD and double click on the
Menu.Exe file as shown in Fig 4.
You should now see the Installation Menu
shown in Fig 5. Click the
“Install” button and
the driver installation should start.
Figure 1
Figure 2
Figure 3
Figure 4


