Rev A October 2010
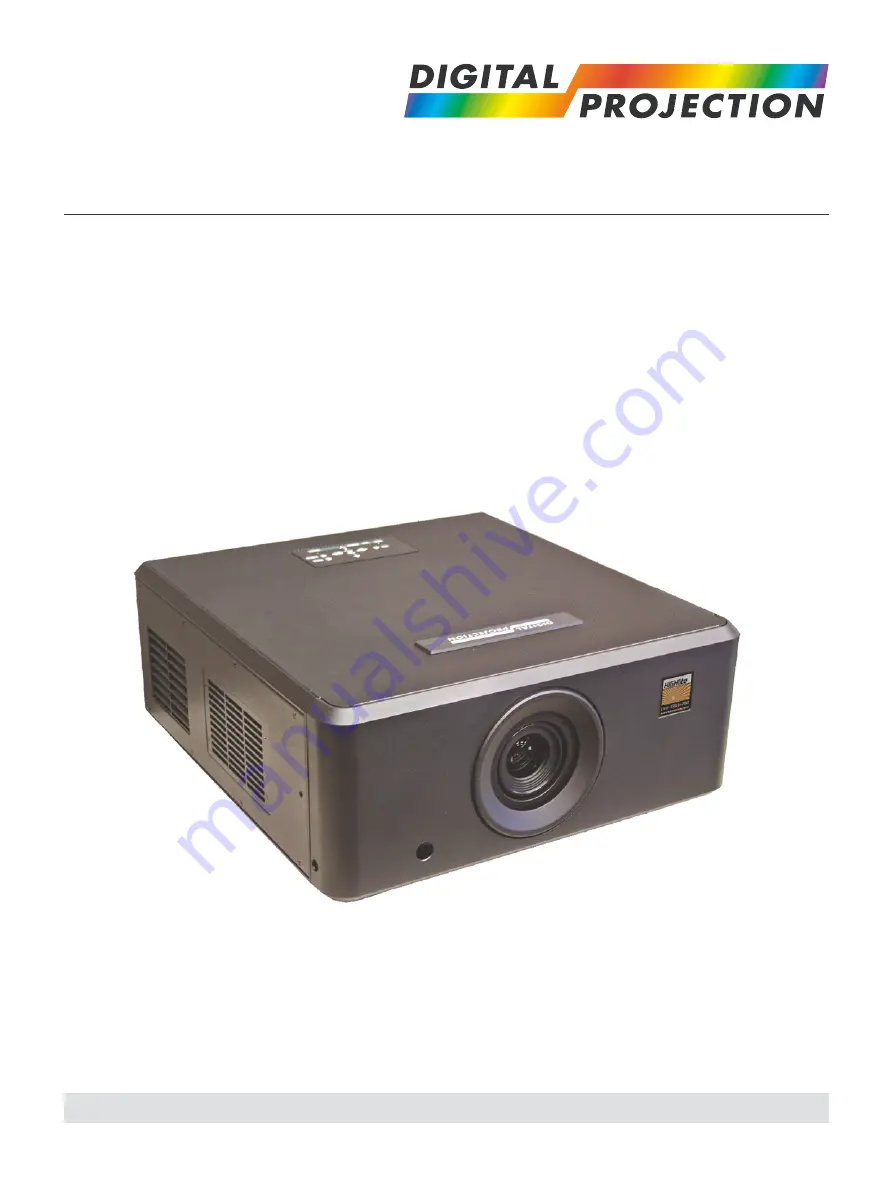
HIGHlite 6000
High Brightness Digital Video Projector16:9 widescreen display
111-339A
Страница 1: ...Rev A October 2010 HIGHlite 6000 High Brightness Digital Video Projector 16 9 widescreen display 111 339A...
Страница 2: ...Digital Projection HIGHlite 6000 User Manual...
Страница 3: ...Limits and Methods of Measurement of Immunity Characteristics of Information Technology Equipment EN 609501 2001 Speci cation for Safety of Information Technology Equipment including Electrical Busin...
Страница 4: ...Digital Projection HIGHlite 6000 User Manual...
Страница 5: ...NOTE this symbol indicates that there is some important information that you should read Trademarks IBM is a registered trademark of International Business Machines Corporation Macintosh and PowerBook...
Страница 6: ...nd intended for this projector should be used Fitting any other lamp could damage both projector and lamp and will invalidate the warranty Take care when removing the lamp module NEVER touch the lamp...
Страница 7: ...rojectors When stacking projectors the stack MUST be vertical to ensure that the stresses are distributed to all four chassis corners Before installation make sure that the surface ceiling or rigging...
Страница 8: ...or a Class B digital device pursuant with Part 15 of the FCC Rules These limits are designed to provide reasonable protection against harmful interference when the equipment is operated in a residenti...
Страница 9: ...egistered in England No 2207264 Registered Of ce as above Tel 44 0 161 947 3300 Fax 44 0 161 684 7674 Email enquiries digitalprojection co uk service digitalprojection co uk Web Site www digitalprojec...
Страница 10: ...ce viii European Waste Electrical and Electronic Equipment WEEE Directive viii Digital Projection Contact details ix 1 Introduction What s in the box 1 2 Key features of the projector 1 3 Getting to k...
Страница 11: ...hing the projector on 3 2 Inserting batteries into the remote control 3 2 Selecting an input signal or test pattern 3 3 Input 3 3 Test pattern 3 3 Adjusting the lens 3 3 Zoom 3 3 Focus 3 3 Shift 3 3 A...
Страница 12: ...4 Brightness Contrast sliders 5 4 Test pattern 5 4 Lens page 5 5 Lens Controls 5 5 MCGD page 5 6 The MCGD measurement procedure 5 6 MCGD values 5 7 Download 5 7 Write 5 7 Read 5 7 Save 5 7 Open 5 7 TC...
Страница 13: ...ations 7 5 Part numbers 7 5 Optical 7 5 Electrical 7 6 Physical 7 6 Dimensions 7 7 Video formats supported 7 8 Input connections 7 10 HDMI 1 2 inputs 7 10 Control connections 7 11 Serial control input...
Страница 14: ...Rev A October 2010 Page 1 1 1 Introduction Contents What s in the box 1 2 Key features of the projector 1 3 Getting to know the projector 1 4 Front view 1 4 Rear view 1 4...
Страница 15: ...you ever need to ship your Projector Notes For more detailed information about lenses see Screen size vs throw distance in section 2 Installation Only one power cable dependent on the destination ter...
Страница 16: ...ct and lightweight chassis design and extraordinary lens shift range of 30 horizontal and 120 vertical Multiple lens options provide further flexibility with a throw range from 77 to 6 76 Connectivity...
Страница 17: ...see section 2 Installation For information about how to change the lamp or the lter see section 6 Maintenance For information about controls and indicators see section 4 Controlling the projector Lam...
Страница 18: ...Calculating screen width and throw distance 2 3 Fitting and Removing a Lens 2 4 Shifting the Image 2 5 Mounting the projector 2 6 Ceiling mounting 2 6 Level adjustment 2 6 Rear projection 2 7 Stackin...
Страница 19: ...be at least twice the screen height and the distance between the back row and the screen should be a maximum of 8 times the screen height The screen viewing area should be within a 60 range from the f...
Страница 20: ...er For 4 3 images the throw ratio is increased by a factor of 1 33 The effect of this can be seen on the lens charts on the following pages Rev A October 2010 Page 2 3 Digital Projection HIGHlite 6000...
Страница 21: ...e front cover down to remove Insert the lens ensuring you push firmly fully into the projector then rotate the lens clockwise until the lens locks onto the catch at the top of the lens mount To remove...
Страница 22: ...The normal position for the projector is at the centre of the screen However you can set the projector above or below the centre or to one side and adjust the image using the Lens shift controls on t...
Страница 23: ...en adjustment of projector level should be made by turning the four feet under the chassis Ideally the projector should be positioned perpendicular to the screen and the lens shift controls used to al...
Страница 24: ...capable of supporting the weight of up to three other projectors safely The stack should be positioned vertically and perpendicular to the screen and the lens shift controls used to align the image w...
Страница 25: ...tion about pin connections see section 7 Appendix Connecting the projector Signal Inputs The following inputs are available HDMI 1 2 HDCPcompliant digital video inputs from HDMI or DVI sources Only HD...
Страница 26: ...le RS232 connection All of the projector s features can be controlled via a serial connection The RS232 connection can also be used to download the rmware updates issued from time to time by Digital P...
Страница 27: ...lock up push the mains connector in rmly then push the lock down to secure the cable Notes Use only the power cable provided Ensure that the power outlet includes a Ground connection as this equipment...
Страница 28: ...the projector on 3 2 Inserting batteries into the remote control 3 2 Selecting an input signal or test pattern 3 3 Input 3 3 Test pattern 3 3 Adjusting the lens 3 3 Zoom 3 3 Focus 3 3 Shift 3 3 Adjus...
Страница 29: ...stallation For more detailed information about using the control keys on the remote control or the projector control panel see section 5 of the User Manual Controlling the projector If the red ISSUE i...
Страница 30: ...required position Rev A October 2010 Page 3 3 Digital Projection HIGHlite 6000 User Manual 3 Getting Started Selecting an input signal or test pattern Input Connect an HDMI video source to the project...
Страница 31: ...lue for approximately 30 seconds until the lamp has cooled down Wait until the power indicator has switched off and the standby indicator on the projector control panel shows amber The projector will...
Страница 32: ...4 Controlling the projector Contents Overview 4 3 Controlling the projector 4 3 The control panel 4 4 LED status indicators 4 4 The remote control 4 5 Layout 4 5 Timeout 4 5 Using the control keys 4 6...
Страница 33: ...ates and Protocol Commands the RJ45 input Protocol Commands Userware Application For more information about controlling the projector using the RS232 or RJ45 input see Remote communications protocol i...
Страница 34: ...jector ON or twice to switch it to STANDBY mode SOURCE This button has no function LED status indicators The indicators on the control panel are as follows POWER off NO POWER steady blue normal RUNNIN...
Страница 35: ...the lens navigation keys Transmit indicator Notes In most situations you can simply point the remote control at the screen which will re ect the IR signal from the remote back toward the receiver on t...
Страница 36: ...e control to switch the projector to STANDBY mode Press the button a second time to con rm your intention to switch to STANDBY mode The lamp will switch off and the power indicator on the control pane...
Страница 37: ...4 Test pattern 5 4 Lens page 5 5 Lens Controls 5 5 MCGD page 5 6 The MCGD measurement procedure 5 6 MCGD values 5 7 Download 5 7 Write 5 7 Read 5 7 Save 5 7 Open 5 7 TCGD page 5 8 TCGD values 5 8 Sele...
Страница 38: ...ance can be running at one time More than one computer can be used to control more than one projector on the same network Introduction The Why I Userware provides an intuitive interface to enable cont...
Страница 39: ...en the computer connects to the projector To return to the Info page at any time click on Info PWR Click PWR to switch the projector On The button will turn green Click PWR to switch the projector int...
Страница 40: ...op down menu For more information about test patterns see Setup menu in section 4 Controlling the Projector Test Pattern Image page The Info page gives access to Brightness Contrast and Test Patterns...
Страница 41: ...ober 2010 Page 5 5 Digital Projection HIGHlite 6000 User Manual 5 Userware Notes Lens page To see the Lens page click on Lens Lens controls Click on the buttons to Move Focus and Zoom the lens Hold th...
Страница 42: ...record the following values Red x y 5 Continue this process for the Green and Blue measurements 6 Enter all the values into the MCGD page as described on the next page Notes on MCGD TCGD and ColorMAX...
Страница 43: ...o save the values on screen to the projector Read Click on Read to show the values currently saved on the projector Save Click on Save to save the values on screen to a MCGD le on the computer When pr...
Страница 44: ...ch a speci cation from the lm maker To see the TCGD page click on TCGD TCGD values To enter TCGD values manually click on each box in turn and enter the x and y values for each colour x and y are the...
Страница 45: ...CGD values click on Open When prompted enter a lename or browse to the le that is to be opened Write Click on Write to save the values on screen to the selected drop down list location N B Not all loc...
Страница 46: ...er page To see the Discover page click on Discover If any projectors are found on the network then its LAN IP address will be listed in the panel and marked Online The first projector in the list will...
Страница 47: ...projector in order to make changes The IP configuration page will open in a Web Browser Notes The Userware can be used to control only one projector at a time and only one instance can be running at...
Страница 48: ...Rev A October 2010 Page 6 1 6 Maintenance Contents Changing the lamp module 6 2 Cleaning the fans 6 3...
Страница 49: ...no user serviceable parts inside the lamp module The whole module should be replaced Only lamps supplied by Digital Projection and intended for this projector should be used Fitting any other lamp cou...
Страница 50: ...tlet fans as shown below Notes Always switch the projector OFF before cleaning the fans Always allow the lamp to cool for 5 minutes before disconnecting the power moving the projector changing the lam...
Страница 51: ...cal 7 6 Dimensions 7 7 Video formats supported 7 8 Input connections 7 10 HDMI 1 2 inputs 7 10 Control connections 7 11 Serial control input 7 11 Nullmodem cable 7 11 Serial port settings 7 11 Remote...
Страница 52: ...clear of any obstruction See section 6 Maintenance Cleaning the fans It is possible to increase the speed of the fans for use in a high altitude environment See section 4 Controlling the projector Sys...
Страница 53: ...control commands from a computer Check that the serial cable is connected correctly Check that the baud rate is set correctly See this section 7 Appendix Connections Check that the correct control cod...
Страница 54: ...ual Error codes If the projector detects an error the red Issue indicator will ash as shown in the chart below For example if the lamp door is left open the red indicator will ash twice followed by a...
Страница 55: ...100 Optical Digital Light Processor 3 x 0 65 Texas Instruments DMD resolution 1920 x 1080 pixels Contrast Ratio 2000 1 10 Colour temperature Native 7500K 1500K adjustable 5500K 9300K Pixel ll factor 8...
Страница 56: ...ingle phase Power consumption 110V 500W in Running mode 2W in Standby 240V 450W in Running mode 2W in Standby International Regulations Meets FCC Class B requirements Meets EMC Directives EN 55022 EN...
Страница 57: ...Rev A October 2010 Page 7 7 Digital Projection HIGHlite 6000 User Manual 7 Appendix Dimensions All dimensions in mm unless otherwise stated...
Страница 58: ...SA CVT 1024x768 60 x VESA DMT 1024x768 75 03 x VESA DMT 1024x768 85 03 x VESA DMT 1024x768 70 1 x VESA DMT 1280x720 47 95 x VESA GTF 1280 x 768 60 0 x VESA DMT 1280 x 768 60 0 x VESA DMT Reduced Blank...
Страница 59: ...D SDTV 576i 50 x x x x ITU R BT 601 CEA 861 D 480p 59 94 x x x x SMPTE 293M CEA 861 D EDTV 576p 50 x x x x ITU R BT 1358 CEA 861 D 1035i 60 x x x x SMPTE 260M 1080i 50 x x x x SMPTE 274M CEA 861 D 10...
Страница 60: ...onnector 1 TMDS Data 2 2 TMDS Data 2 Shield 3 TMDS Data 2 4 TMDS Data 1 5 TMDS Data 1 Shield 6 TMDS Data 1 7 TMDS Data 0 8 TMDS Data 0 Shield 9 TMDS Data 0 10 TMDS Clock 11 TMDS Clock Shield 12 TMDS C...
Страница 61: ...ed 7 unused 8 unused 9 unused Null modem cable used to connect the projector to a modem RX 2 3 TX TX 3 2 RX GND 5 5 GND Serial port settings Baud rate 38400 bps Data length 8 bits Stop bits one Parity...
Страница 62: ...ands end with an ascii Carriage Return character Key Commands Key commands are used to simulate remote control key presses and use the following format ky keyname CR Example ky pow on CR simulates the...
Страница 63: ...e Decrement Subtracts 1 from the current value Execute none Performs an action Example op bright CR increments the brightness setting op model name CR returns the model name of the projector The comma...
Страница 64: ...Near LFF Lens Focus Far LZI Lens Zoom In LZO Lens Zoom Out LPD Lens Shift Down LPU Lens Shift Up LPL Lens Shift Right LPR Lens Shift Left LS Lens Stop Movement Page 7 14 Rev A October 2010 7 Appendix...