Getting Started Guide
(continued)
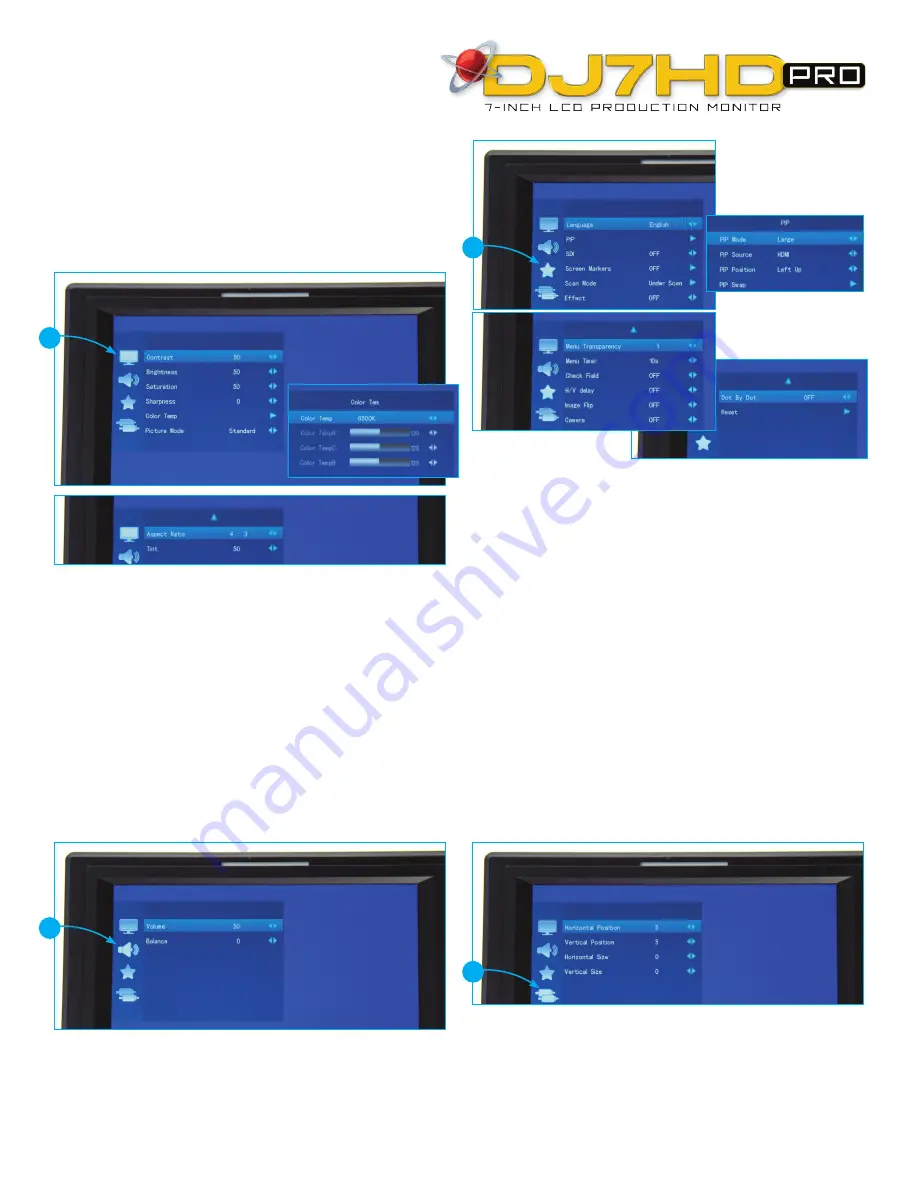
Menu Functions
Press the MENU key to enter the OSD menu and then use the up and down
arrow keys to choose from DISPLAY, SOUND, SYSTEM or SCAN POSITION
ADJUSTMENT menu options in main menu. Press the left or right arrow keys
to confirm your selection and then choose your desired adjustment option by
pressing the up or down arrow keys. Next, use the left or right arrow keys to
adjust the value or select an adjustment option. Press the MENU key to exit.
1. Display Menu
(this setting has a 2-page menu)
Contrast:
To adjust the brightest to darkest ratio of the image
Brightness:
To adjust the image’s brightness
Saturation:
To adjust the color saturation in the image
Sharpness:
To adjust the depth and detail in the image
Color Temp:
Use this adjustment to alter the color temperature of the image to
one of the following presets: User, 6500K, 7300K, 9300K
Picture Mode:
Preset image brightness, softness and contrast effects settings
—choose from User-defined, Vivid, Standard, Soft options
Aspect Ratio:
To choose the aspect ratio shoose from Full Screen 16:9, 4:3,
Panorama, Zoom 1 or Zoom 2
Tint:
In composite video mode, this is used to adjust the NTSC color signal
3. System Settings Menu
(this setting has a 3-page menu)
Language:
Choose from Chinese or English
PIP:
This setting is used to display two input signal pictures at the same time.
You can adjust picture position, size, input source and PBP/POP options.
SDI:
HD/SDI switch - SDI option is not available on this monitor model
Screen Marker:
Image framing marker options include OFF, 96%, 93%, 90% & 85%
Scan Mode:
Choose from standard, overscan or underscan
Effect:
To select OSD display effects
Menu Transparency:
To adjust transparency of the Menu
Menu Timer:
This timer setting controls the time the menu pop-up screen will
stay on screen without any user input before disappearing
Check Field:
Changes the color saturation of images—choose from OFF,
Mono, Red, Green, Blue
H/V Delay:
Image Up/Down, Left/Right flip
Image Flip:
Line field blanking option switch
Camera:
When shooting with Canon 5D II or similar, this setting optimizes
the image so it is not deformed or distorted, not black, and has no delay
Dot by Dot:
Video point to point display to see the image more clearly
Reset:
Resets system parameters and settings to original factory settings
2. Sound Menu
Volume:
To adjust the volume
Balance:
To adjust 2-channel audio (L & R)
4. Scan Adjust Menu
Horizontal Position:
To adjust the image display left and right
Vertical Position:
To adjust the image display up and down
Horizontal Size:
To adjust the image stretch left and right
Vertical Size:
To adjust the image stretch up and down
1
3
2
4
(continued on reverse
>
)


