background image


23

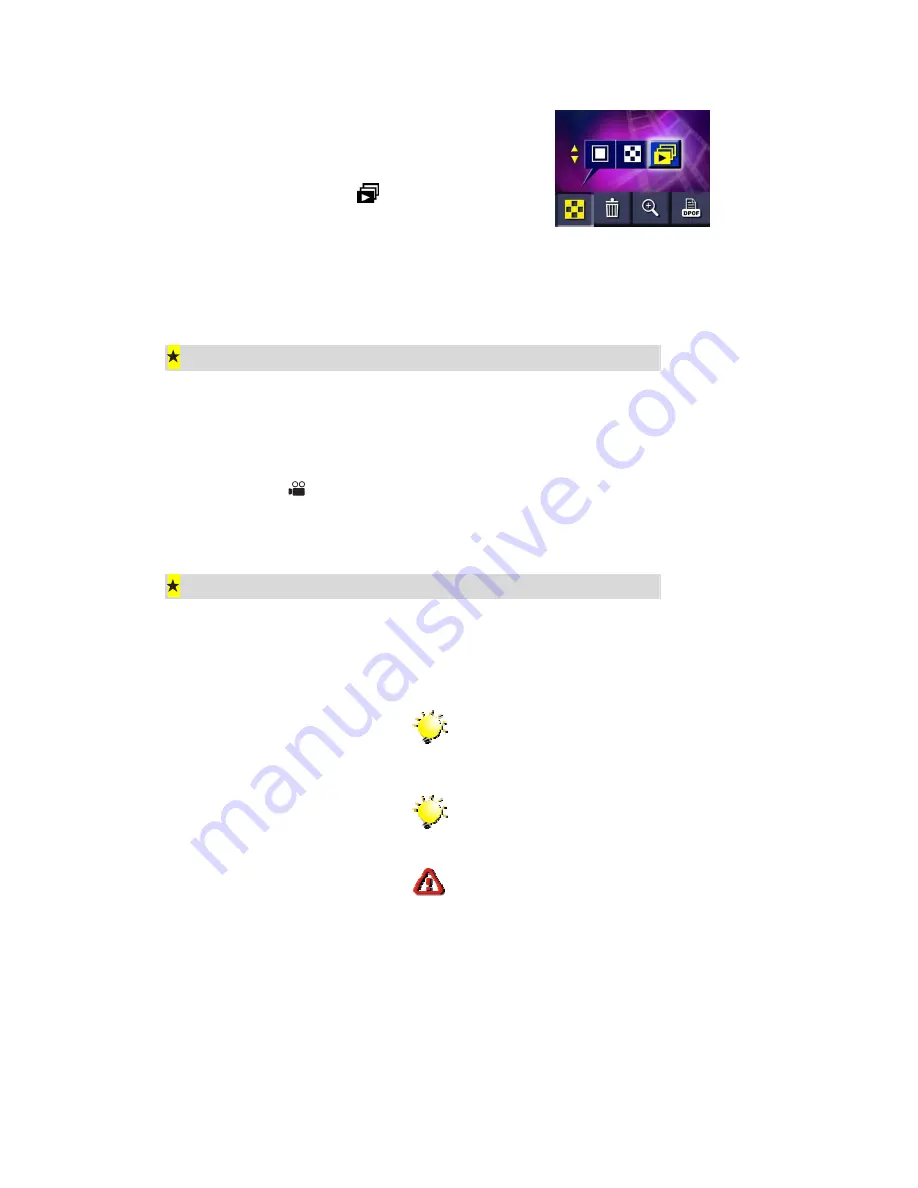
1.  When in Playback Mode, press the Enter 

button to open the Options Menu appears. 

The Display Mode submenu is the first item. 

2.  Use the Up or Down direction key to highlight 

the Slideshow icon (

). 

3.  Press the Enter button again to launch the 

slideshow. Stored images will be displayed in 

succession.  

4.  To halt the slideshow, press the Enter button.


Playing Movie Clips


Playing movie clips is as simple as viewing stored images. Follow the instructions for 

displaying single images above. Use the up and down direction buttons to cycle through stored 

images until you locate the desired movie clip, the first frame of which will be displayed tagged 

with a movie icon (

). Press the shutter button to play the movie clip and a second time to 

stop playing. 


Deleting Photos & Movie Clips 


Deleting unwanted images and movie clips helps free up memory capacity. You can delete 

images and movie clips individually or delete all images and movie clips together.         


Note


If a memory card is fitted, you can delete only 
those images and movie clips stored on the 
card.


Note


Images on a write-protected memory card 
cannot be deleted.


Caution


Images and movie clips that have been deleted 
cannot be recovered.


Deleting Images and Movie Clips 

To delete images and/or movie clips: 

Содержание quantum 3.2

Страница 1: ......

Страница 2: ...ion 3 Camera Mode 7 Direction Button Functions 7 LCD Monitor Information 7 Taking Photos 8 Taking Close Up Photos 8 Taking Movies 9 Shooting Spur of the Moment Movie Clips 9 Using the Self timer 10 Using the Digital Zoom 10 Camera Mode Settings 11 Taking Photos Continuously 13 Changing Resolution 13 Using the Flash 14 Setting the LCD Brightness 14 Advanced Settings 15 Adjusting Exposure 16 Adjusti...

Страница 3: ...n a TV 26 Connecting the Camera to a Television 26 Viewing Photos and Movie Clips on a Television 26 Section 6 Transferring Data to a Computer 27 Installing the Digital Camera Driver 27 Connecting Your Camera to a Computer 28 Mass Storage Mode 28 PC Camera Mode 28 Installing Bundled Software 29 Section 7 Troubleshooting 30 Can t turn the camera on 30 Camera turns on but the LCD monitor is blank 30...

Страница 4: ...Hotkey lets you switch rapidly between taking movie clips and taking photographs The camera is also ideally suited for use as a PC camera hooked up to your home computer 16MB of memory is built in to your camera so you can take photos and movie clips without installing a memory card The memory card slot allows you to increase the storage capacity if you wish When you want to print out images play ...
Страница 5: ... and in the Playback Mode to navigate through menus Turn to section 3 Camera Mode and section 4 Playback Mode for full details Ö For information on using the PC Mode Movie button turn to Section 6 Transferring Data to a Computer Side View TV Out Port USB Port Macro Switch Battery SD Card Cover Eyelet for Wrist Strap Release Button Power Button Mode Button Wrist Strap LCD Monitor Direction Button P...

Страница 6: ...or information on transmitting images and movie clips to a computer using the TV Out and USB ports turn to Section 5 Viewing Photos and Movie Clips on a TV and Section 6 Transferring Data to a Computer respectively Ö The Macro Switch is used when taking photos with different lengths of focus Turn to Taking Close Up Photos in section 3 for full details Bottom View Tripod Mount ...

Страница 7: ... Battery SD Card Cover AA Size Battery Release Button Inserting and Removing an SD Card Optional The camera comes with 16MB of built in memory allowing you to store images and movie clips You can expand the memory capacity by using an optional SD Secure Digital memory card To insert a memory card refer to the figure above and 1 Open the battery SD card cover 2 Insert the memory card with the metal...

Страница 8: ...saved on the card rather than on the built in memory Protecting Data on an SD Card Valuable data on an SD Card can be protected by preventing any new data being written onto the same card To do this Slide the write protected tab on the side of the SD memory card to LOCK Opening and Closing the Lens Cover To open the lens cover simply use a finger to slide the cover across as shown To close the len...

Страница 9: ...matically if it is left unused for THREE minutes Ö To take a picture press the shutter button For full details turn to Taking Photos in Section 3 Ö To view stored photos press the mode button once to move to Playback Mode Press a second time to return to Camera Mode For full details turn to Section 4 Playback Mode Ö To take a movie clip press the PC mode movie button to temporarily switch to Movie...

Страница 10: ...the mode button to switch between Camera Mode and Playback Mode LCD Monitor Information The indicators shown may display on the LCD monitor when images are recorded to indicate the following 78 The number of images that can still be taken at current resolution Single Image photograph Mode Movie Mode Multisnap continuous shooting Mode SD card inserted Macro Mode Self timer Mode Auto flash Flash off...

Страница 11: ... the shutter button to take the picture Taking Close Up Photos Your camera has two close up photo modes to allow you to take high quality photos at close range The Macro Mode should be used for objects located at about 20cm from the camera while the Portrait Mode should be used for object located at 60cm to 130cm You may use the LCD monitor to compose close up pictures more easily To take close up...

Страница 12: ...Enter button again to exit the Options Menu The Movie Mode icon will display on the LCD monitor Shooting Spur of the Moment Movie Clips You can temporarily switch your camera into Movie Mode by pressing the PC mode movie button Press this hotkey first then press the shutter button to start recording To stop recording just press the shutter button again When you finish recording your camera will re...

Страница 13: ...n When the self timer is triggered the self timer icon on the LCD monitor will blink 3 The RED self timer LED on the front of the camera beneath the lens cover will also blink The speed of blinking will increase just before the picture is taken Note Self timer turns off automatically once a self timer photo is taken To restore the self timer press the left direction button again Using the Digital ...

Страница 14: ...Options Menu To open this menu 1 When in Camera Mode press the enter button 2 The first screen of the Options Menu appears with the Shooting Mode submenu open and Single Photo Mode 3 Use the left and right direction buttons to move between submenus 4 Use the up and down direction buttons to change selections within a submenu 5 When you have completed changing the settings press the enter button to...

Страница 15: ...ff default setting Advanced Settings The Advanced Settings submenu allows you to set the following Ö Exposure Ö White Balance Ö Sharpness Ö Quick Review Ö Video Format Ö Sound Ö Format SD Card Ö Language LCD Brightness Low Brightness Normal Brightness default setting High Brightness Changes made to Resolution Flash Quick Review Video Sound and Language settings are saved when the camera is powered...

Страница 16: ...r photos Low resolution images may be sufficient for sending by email or posting on a website Higher resolution images require more storage space on the built in memory or optional memory card Your decision of what resolution to use will be determined therefore by the intended use of the image and the memory space remaining Three resolution settings are available Low Standard and High These corres...

Страница 17: ...ng images in a place where flash photography is prohibited or when the subject is distant beyond the range of the flash Note The flash cannot be used when battery power is low Setting the LCD Brightness Three brightness settings are available Ö Low LCD Brightness Normally sufficient in dim lighting conditions Ö Normal LCD Brightness Use in intermediate lighting conditions This is the default setti...

Страница 18: ...our photos You can set the following options by press the direction button and then enter button Submenu Display Options Exposure Nine incremental settings default 0 White Balance Automatic default Daylight Fluorescent Tungsten Sharpness Hard Normal default Soft Quick Review On Off default Video NTSC PAL Default setting depends on area Sound On default Off ...

Страница 19: ...usting Exposure Your camera adjusts image exposure automatically depending on lighting conditions In certain circumstances you may wish to adjust the exposure compensation setting for instance to avoid making your subject too dark when it is backlit or shot against a bright background or to avoid making lights appear too bright in night shots The default setting is 0 ...

Страница 20: ...ight Use when outside on a clear day Ö Fluorescent Use when under fluorescent tube lighting Ö Tungsten Use when under tungsten filament light bulb lighting Sharpening Images Your can soften and sharpen images to achieves different effects The following settings are available Ö Hard Image processed to increase sharpness making edges more distinct Ö Normal Standard level of sharpening on all images ...

Страница 21: ... Video Settings Before outputting video that you have taken you should ensure that the appropriate TV standard for your area is selected either NTSC or PAL Countries using the NTSC standard include the USA Canada Japan South Korea and Taiwan Countries and areas using the PAL standard include the UK Europe China Australia Singapore and Hong Kong If the wrong standard is selected video may flicker w...

Страница 22: ...ts Formatting a Memory Card This camera only supports memory cards with the FAT16 format A new card or one that has been used in another device will probably need to be formatted before it can be used Ö YES Format the built in memory or optional SD card Ö NO Do not format built in memory or optional SD card Caution Formatting destroys all data stored on the card ...

Страница 23: ...20 Selecting Interface Language You can change the interface language The following languages are available Ö English Ö German Ö French Ö Italian Ö Spanish Ö Portuguese ...

Страница 24: ... In this mode the direction button has the following functions Right button LCD monitor information on off Left button No function Up button View the previous stored image or movie clip in sequence Down button View the next stored image or movie clip in sequence Enter button Enter options menu Note If there is no photo or movie clip in the memory a message NO PICTURE will display on the LCD monito...

Страница 25: ...ode images will automatically be displayed one at a time Press the up or down direction buttons to view the previous or next image in the memory Displaying Thumbnail Images When you first enter Playback Mode single images are displayed Ö Press the direction button to enter the thumbnail view Ö To take a closer look at a single image and return to single image view use the direction button to selec...

Страница 26: ... cycle through stored images until you locate the desired movie clip the first frame of which will be displayed tagged with a movie icon Press the shutter button to play the movie clip and a second time to stop playing Deleting Photos Movie Clips Deleting unwanted images and movie clips helps free up memory capacity You can delete images and movie clips individually or delete all images and movie ...

Страница 27: ...magnify an image 1 In Playback Mode locate the image you want to magnify 2 When the image is being displayed press the enter button 3 Open the Zoom Menu 4 Select either 2x or 4x magnification 5 Press the enter button to select the magnification 6 The selected image will be shown with a square overlay This is the area to be magnified Use the direction buttons to move this over the area of the image...

Страница 28: ...t all images to be printed Note DPOF only works with an optional memory card installed Printing a Single Image or All Images To select a single or all images for DPOF printing 1 In Playback Mode locate the image you want to print 2 When the image is displayed press the enter button and select the DPOF Menu 3 The first item selected in the DPOF Menu is for Single Image Printing 4 To set all image p...

Страница 29: ... the other end of the cable to a television or videocassette recorder Viewing Photos and Movie Clips on a Television The steps for viewing stored photos and movie clips are exactly the same as for viewing them on the LCD monitor First connect the camera to a television and turn it on Then enter Playback Mode and proceed as described in Section 4 Playback Mode Note The LCD monitor does not work whe...

Страница 30: ...ating systems installed Ö Windows 98SE 2000 ME XP The computer should have at least 64MB RAM Installing the Digital Camera Driver Before connecting your camera to a computer for the first time you should install a driver on the computer The driver is on the CD ROM disc provided in the camera package To install the driver 1 Insert the CD ROM into the computer s CD ROM drive The welcome screen appea...

Страница 31: ...d to the computer and in Mass Storage Mode Image and movie files can then be found on your computer at My Computer Removable Disk DCIM Under this mode you can read delete move or copy any image or movie files you want Use the bundled application software ArcSoft PhotoImpression 3 0 and VideoImpression 2 0 to edit the photos and movie clips if necessary PC Camera Mode The GREEN status LED will ligh...

Страница 32: ...friendly application that helps you retouch edit and organize images Ö ArcSoft VideoImpression 2 0 allows you to edit movie clips and is equally easy to use Ö Acrobat Reader is a popular program that you need to have installed to read the User s Manual Many computer users will find they already have this software installed on their computer ...

Страница 33: ...n the shutter button is pressed Pictures cannot be taken when the camera is saving the previous photo Wait for the previous photo to be saved The built in memory or installed memory card may be full Delete some images or movie clips or insert a memory card with space Flash may be being charged Wait for the flash to complete charging Photos are not in focus Subjects must be at least 130 cm away for...

Страница 34: ...r LCD Storage Media Built in 16M Memory SD MMC Card Slot Support Image Resolution 2976x2232 2048x1536 1024x768 Movie Clips 320x240 at 20 fps White Balance Auto Manual Daylight Fluorescent Tungsten Exposure Auto Manual Self timer 10 Seconds Delay Flash Strobe Auto Off File Format Still Image JPEG Movie AVI Motion JPEG Image play Single Image Thumbnails Slideshow Interface Mini USB TV Out TV out NTS...

Страница 35: ...32 System Requirements Windows 98SE 2000 ME XP Pentium MMX Celeron or AMD Athlon CPU 64MB RAM CD ROM drive 500MB free HDD space Available USB port 16 bit Color Display ...

Отзывы: