background image

LIVEMIX CS-SOLO

 51

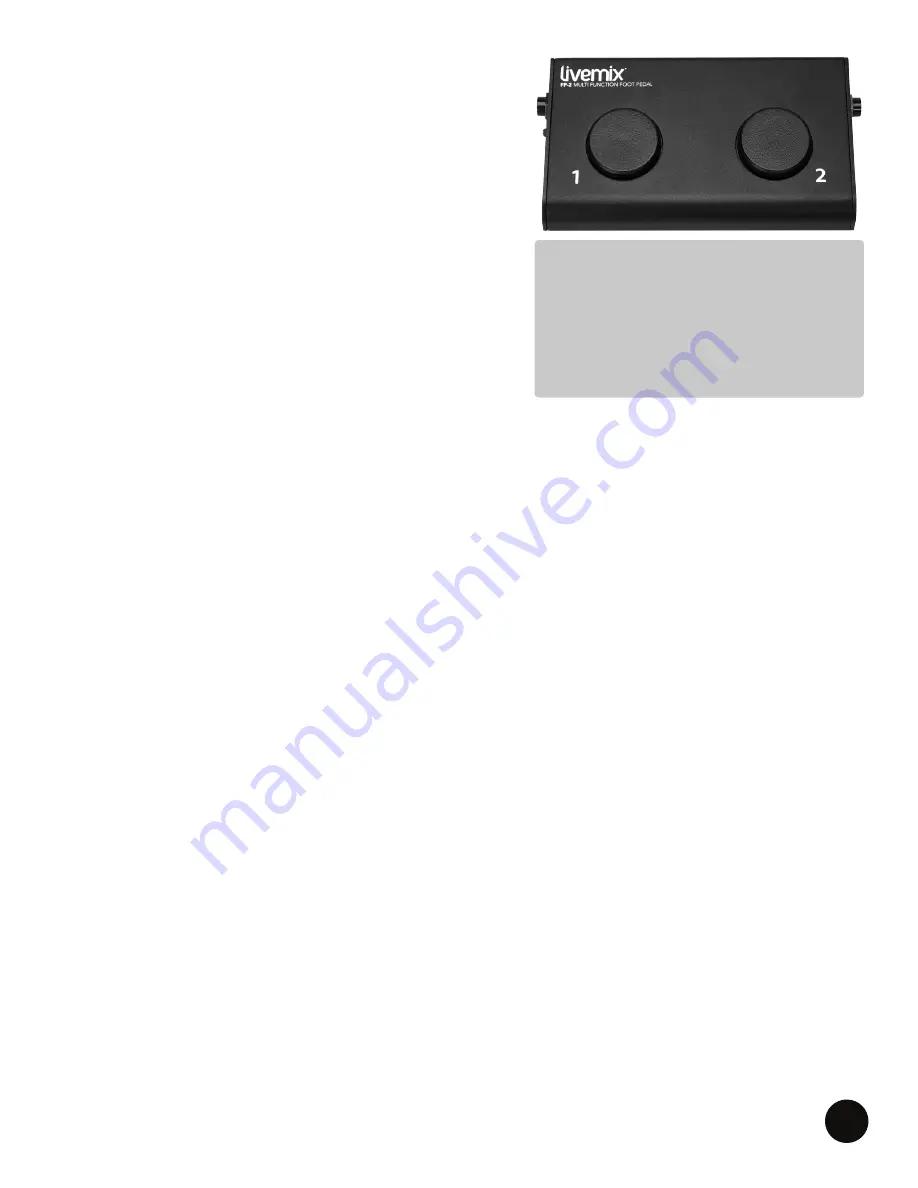
ACCESSORY: FP-2 FOOT PEDAL

The ¼” TRS connector on the Livemix personal mixer rear 

panel allows connection to the optional FP-2 Foot Pedal 

accessory. The foot pedal allows you to adjust mix settings 

or activate the intercom on your mixer, while keeping your 

hands on your instrument or microphone. 

SETTING UP THE FP-2 FOOT PEDAL

1. 

IN: 

Connect a ¼” TRS cable to the Footswitch 

connector to the personal mixer. Make sure the cable 

is a TRS and has Tip, Ring, and Sleeve. A standard TS 

or guitar cable will not work with the FP-2.

2. 

A/B Switch (CS-DUO ONLY):

 Depending on if you 

are using the A or B side for mixing on the CS-DUO, 

set this switch to 

MIX A

 or 

MIX B

. This switch is 

inactive on the CS-SOLO.

3. 

THRU (CS-DUO ONLY)

: The FP-2 THRU connector allows you to connect two foot pedals to 

one CS-DUO; one for 

MIX A

 and one for 

MIX B

. Use a TRS cable to connect the first pedal to 

the second pedal and assign the 

MIX A

 or 

MIX B

 switches accordingly.

USING THE FP-2 FOOT PEDAL

The FP-2 foot pedal is controlled by either a TAP or a HOLD on one of the buttons. A TAP is a short 

press, less than 1 sec in duration. A HOLD is a long press lasting more than a second.

1. 

TAP BUTTON 1: 

A short tap on button 1 will select the next channel on the Livemix personal 

mixer. When you reach channel 24 it will select the Accessory Channels then cycle back to 

channel 1.

2. 

HOLD BUTTON 1:

 A long press on button 1 will return you to the ME Group. A second long 

press will select channel 1. If a ME Group is not set up, holding button 1 will return you to 

channel 1. 

3. 

TAP BUTTON 2: 

A short tap on button 2 will turn up the volume of the selected channel. 

4. 

HOLD BUTTON 2: 

A long press on button 2 will reduce the volume of the selected channel. 

The volume of the selected channel will continue to reduce as long as button 2 is held.

5. 

HOLD BUTTON 1 & BUTTON 2: 

A long press on both buttons simultaneously will activate 

the intercom. You will need to hold both buttons down for a full second before the intercom 

activates. The intercom will remain active until the buttons are released. 

NOTE:

The only foot pedal that will function 

with the CS-SOLO or CS-DUO is the 

Livemix FP-2. Third party footswitches 

will not work. The FP-2 is available from 

an authorized Digital Audio Labs dealer.

Содержание LIVEMIX CS-SOLO

Страница 1: ...1266 Park Road Chanhassen MN 55317 952 401 7700 support digitalaudio com www digitalaudio com CS SOLO USER GUIDE Version 1 1 February 2017...

Страница 2: ...at the safety purpose of the polarized or grounding type plug A polarized plug has two blades with one wider than the other A grounding type plug has two blades and a third grounding prong 8 Protect t...

Страница 3: ...uct to the place of purchase Please write the RMA number on the outside of the shipping carton Any product sent to us without a valid RMA number will be refused Include the following with the product...

Страница 4: ...DA 816 ANALOG OUTPUT RACK UNIT 10 GENERAL CONCEPTS 11 LOCAL VS GLOBAL 11 KNOBS MASTER VOLUME ADJUST VOL PAN AND ME KNOB 11 CHANNEL OVERVIEW VS SINGLE CHANNEL VIEW 12 CHANNEL OVERVIEW 13 ACCESSORY CHAN...

Страница 5: ...FIGURATION 43 DANTE NETWORK CHANNEL SETUP 43 AUTO ASSIGN DANTE CHANNELS 1 24 43 MANUALLY ASSIGN DANTE CHANNELS 44 DEVICE CHANNEL VIEW TOGGLE 44 IMPORT DANTE NAMES 45 DA 816 SOFTROUTE 46 ASSIGN A MIX T...

Страница 6: ...ics presets on every channel Sweepable EQ High Pass Filtering and Compression Settings allow you to craft the channel s sound EQ Dynamics Reverb on the master output Fine tune the overall sound of you...

Страница 7: ...ETUP MASTER VOLUME CS SOLO CS SOLO TOP Master Volume Knob Adjust Vol Pan Knob Dedicated Me Knob Color Touchscreen Intercom Button CS SOLO BACK 1 4 Mix Output TRS 1 4 Footswitch Jack TRS CS Port In CS...

Страница 8: ...ustments or select other features 3 ME KNOB The ME knob adjusts the volume of the assigned ME group PRESS the ME knob to configure which channels make up the ME group and other groups 4 COLOR TOUCHSCR...

Страница 9: ...sonal mixer See the Loading Saving a Personal Mix for more details 10 Auxiliary Input This unbalanced stereo input allows you to connect an auxiliary audio device such as a portable music player phone...

Страница 10: ...S Port Thru on the first CS SOLO to the CS PORT IN on the second CS SOLO See Connecting Two CS SOLOs WARNING WHILE LIVEMIX DATA IS TRANSMITTED OVER STANDARD NETWORK CABLES IT IS NOT IN THE FORMAT THAT...

Страница 11: ...t two CS SOLOs 1 Connect a standard network cable from a MIX 16 MIX 32 Control Surface Port to the CS PORT IN on the CS SOLO 2 Connect another standard network cable from the CS Port Thru on the first...

Страница 12: ...DATA IN 12VDC 3 33A DA 816 BALANCED 4dBu LINE OUT USB WIRELESS TRANSMITTER 1 WIRELESS TRANSMITTER 2 LIVEMIX DATA IN 12VDC 3 33A DA 816 BALANCED 4dBu LINE OUT USB LIVEMIX DATA IN 12VDC 3 33A DA 816 BA...

Страница 13: ...m time Changing the channel effects Naming a channel Global Mute Global LCD Dim Passcode Global Configuration settings accessible from the Mix Tools will appear purple indicating that changes made are...

Страница 14: ...ntify which channels you want to adjust The Single Channel View provides additional functions From here you have access to mixing a single channel and also other functions Channel Naming Channel EQ Dy...

Страница 15: ...ow and finally red as the signal increases in level 4 VOLUME LEVEL This horizontal strip shows the current volume level of the channel 5 PAN LEVEL NOT SHOWN The volume strip switches to pan by pressin...

Страница 16: ...f the stage and audience you can make your in ear mix sound much more natural because you are hearing the sound of the audience and the reverb of the hall you are performing in INTERCOM The Livemix sy...

Страница 17: ...Aux button allows you to share your Auxiliary Input with other personal mixers in the system When Share Aux is not selected your Aux Input will be local to your personal mixer This is useful for a loc...

Страница 18: ...can be accessed by pressing Met Setup 1 BPM Press BPM to adjust the tempo of the metronome Use the ADJUST knob to change the tempo 2 BEATS PER MEASURE PRESS Beats per Measure to cycle through the opti...

Страница 19: ...sonal mixes MIRRORMIX REMOTE MIXING MirrorMix Remote Mixing allows any experienced user to help performers from any Livemix personal mixer Being able to push a starter mix to anyone allows them to bet...

Страница 20: ...eo or mono mix Another way to access these options is to PRESS the Master Volume Knob For more details see the Mix Output Settings section GROUP ME SETUP This provides an alternate way to get to the G...

Страница 21: ...settings EQ Dynamics Presets are Global 3 MUTE BUTTON PRESS Mute to silence the channel in a mix A red indicator will illuminate in the Status Bar on the right Please note if the Global Mute feature...

Страница 22: ...View screen To name a channel LONG PRESS the channel to enter Single Channel View LONG PRESS channel number name at the top ENTER the channel name PRESS Done Use Next Channel or Previous Channel when...

Страница 23: ...hannel is soloed a yellow bar will illuminate in the Status Bar on the right Solo is visible in the Channel Overview for the soloed channel GROUP INDICATOR If the channel is in a group the Group butto...

Страница 24: ...SET 1 LONG PRESS EQ Dynamics Preset 2 PRESS continue on the warning screen 3 ROTATE the ADJUST knob to select a preset 4 PRESS X to return to Single Channel View In the channel preset screen you are p...

Страница 25: ...1 While still on the EQ Dynamics Preset screen PRESS Channel EQ 2 PRESS one of the three bands to adjust 3 ROTATE the ADJUST knob to cut or boost the EQ band TO ADJUST THE FREQUENCY OF THE THREE EQ B...

Страница 26: ...be filtered out This setting is good for most instruments 80Hz 80Hz or lower will be filtered out This setting will cut out some 60Hz hum and noise good for male vocals 150Hz 150Hz or lower will be f...

Страница 27: ...compressor has two controls one is the amount of compression applied to the channel and the second is the type ROTATE the ADJUST knob to adjust the amount of compression applied to the mix PRESS any o...

Страница 28: ...ptions for the personal mixer These include Stereo or Mono mode Mute Master Output and Limiting options MASTER EQ This 3 band EQ can be used to tailor the overall sound of the monitor mix that you hea...

Страница 29: ...3 80Hz A larger amount of lower frequencies 80Hz or lower will be filtered out 4 120Hz The largest amount of lowest frequencies everything from 120Hz or lower will be filtered out MASTER DYNAMICS Dyna...

Страница 30: ...rb effect to your stereo mix in order to make it sound more natural and mimic these effects SELECT one of the four Reverb effect settings that sounds best to you OFF Reverb bypassed SMALL ROOM MEDIUM...

Страница 31: ...three ways to cancel Mute Master Output 1 Turn the Master Volume Knob 2 De select Mute Master Output 3 PRESS and HOLD down the Master Volume Knob for 3 seconds VOLUME LIMIT The headphone amplifiers in...

Страница 32: ...SS Show 13 24 3 PRESS Show Next Group and SELECT channels to add to each group Repeat for each group 4 PRESS X to exit ADJUSTING THE VOLUME OF A GROUP To adjust the volume of a group select any one of...

Страница 33: ...the channel from the group The white outline of the selected channel will flash 3 Use the ADJUST knob to adjust the volume of the channel 4 PRESS the ADJUST knob to return the channel to the group Fr...

Страница 34: ...he ADJUST knob The Auto Dim feature will cause the LCD screen to reduce in brightness after 15 seconds of inactivity Touching the screen or any control will bring the screen back to the preset brightn...

Страница 35: ...Local Mix Options 2 PRESS Quick Mute 3 PRESS X three times to exit to the Channel Overview 4 You may now quickly mute a channel by selecting it and then a second time to mute it PRESS the channel agai...

Страница 36: ...e is recognized the USB Storage button will appear on the Load Save screen SELECT the USB Storage button and follow steps 3 8 above TO LOAD A PERSONAL MIX 1 SELECT Mix Tools from the Channel Overview...

Страница 37: ...ixer MIX A blue will have an A after the port number and be colored blue in the MirrorMix selection box MIX B red will have a B after the port number and be colored red in the MirrorMix selection box...

Страница 38: ...UPS PRESS Push Groups to send your current group settings to the remote mixer PUSH SAVED MIX PRESS Push Saved Mix to send a saved mix from your personal mixer to the remote mixer Available saved mixes...

Страница 39: ...er mixes Front of House engineers can load a mix remotely and then setup the ME group allowing the stage musicians to focus more on the performance and audience Studio engineers can customize mixes fo...

Страница 40: ...lows you to select analog or digital input DIGITAL CONFIGURATION IF LM DANTE EXP INSTALLED If a LM DANTE EXP is installed the Digital Configuration button will appear This function assigns devices and...

Страница 41: ...to change the value of that field PRESS X when finished The date and time data will be written to any mixes or templates saved to a USB flash drive GLOBAL MUTE It may be desirable for the mute feature...

Страница 42: ...t happens if I forget or don t know the passcode To remove the passcode LONG PRESS the ME Knob for three seconds on any screen that prompts you to enter the passcode After three seconds release the ME...

Страница 43: ...isted here is for the local personal mixer All CS SOLOs and CS DUOs will require their own update The listed MIX 16 MIX 32 and Dante option card information are system based You may initiate a firmwar...

Страница 44: ...be visible This function will prepare the system to accept audio from the AD 24 or the Dante Network 1 From Global Configuration SELECT Input Select 2 You will be prompted with a warning PRESS Contin...

Страница 45: ...enabled devices for information on how each device will transmit publish channels to the Dante network AUTO ASSIGN DANTE CHANNELS 1 24 With Dante Channel Setup easily assign the first 24 networked ch...

Страница 46: ...Select a Device by rotating the ADJUST knob PRESS the ADJUST knob to accept a selected device If you have previously assigned a device to this channel the selector may be on Channel Select If so PRES...

Страница 47: ...ESS Global Configuration in Mix Tools 2 SELECT Digital Configuration 3 You will be prompted with a warning PRESS Continue 4 PRESS Import Dante Names 5 PRESS Yes to copy the Dante Channel names to the...

Страница 48: ...e Select DA 816 Output screen SELECT an output you wish to assign image 1 1 The screen will change to display the MIX 16 MIX 32 Ports image 2 Each slot is labeled with the loaded or saved mix name 1 a...

Страница 49: ...output The Output ID feature can be used with multiple outputs that have been selected at the same time 3 PRESS Output ID again to exit this mode NOTE Observe the VU meters on the connected wireless...

Страница 50: ...drive into the USB slot on the personal mixer When a USB device is recognized the USB Storage button will appear on the Load Save screen SELECT USB Storage and follow steps 2 7 above TO LOAD A GLOBAL...

Страница 51: ...with a pop up display 4 Press YES to begin If you do not want to update the firmware press NO Once the firmware update has started do not turn off the power to the CS SOLO CS DUO or MIX 16 MIX 32 as...

Страница 52: ...this process and may take a few minutes Once the updater has started a progress bar will appear Do not turn off the power until the update is complete or you may damage the unit 6 PRESS Finish 7 Disco...

Страница 53: ...r a HOLD on one of the buttons A TAP is a short press less than 1 sec in duration A HOLD is a long press lasting more than a second 1 TAP BUTTON 1 A short tap on button 1 will select the next channel...

Страница 54: ...mic stand mount is dual position and attaches to the bottom of your CS SOLO It can be attached to the top of any standard microphone stand or to the vertical post The MT 1 dual position microphone st...

Страница 55: ...ous controls on the unit users can each create their own custom mix which is then output to headphones in ear monitors or stage monitors directly from the personal mixer or Livemix DA 816 analog outpu...

Страница 56: ...my mix Verify that the channel is not muted If it is muted you will see a red mute label next to the channel name on the Channel Overview and a red indicator will be visible on the Status Bar Verify t...

Страница 57: ...setting on your console Then in Dante Controller set your console s Dante option card to be the Master Dante device on the Dante network and select Sync to External for this If audio is dropping out f...

Страница 58: ...S ELECTRIC FINGER 12 BASS ELECTRIC PICK 13 BASS ELECTRIC SLAP 14 BASS UPRIGHT 15 GUITAR ELECTRIC LEAD 16 GUITAR ELECTRIC RHYTHM 17 GUITAR ACOUSTIC 18 KEYS ACOUSTIC PIANO 19 KEYS ELECTRIC PIANO 20 KEYS...

Страница 59: ...ATE the Adjust Knob to pan left or right The mixer returns to volume mode after 5 seconds 2 VOLUME PAN 4 SAVE YOUR MIX 5 LOAD YOUR MIX The Livemix system has many advanced features If you find yoursel...

Страница 60: ...song is going ADD YOU Increase your channel volume so you can hear yourself but don t overpower the mix ADD THE REST SPARINGLY You don t need to hear everything on stage Some instruments are not essen...

Страница 61: ...22 200mW 1 THD N 100mW 03 THD N 32 250mW 1 THD N 100mW 014 THD N 64 250mW 1 THD N 100mW 005 THD N 300 130mW 1 THD N 100mW 003 THD N Frequency Response 20 Hz 22 kHz 3 dB S N Ratio 103 dB Input Impedanc...

Страница 62: ...LIVEMIX SYSTEM SPECIFICATIONS THD N 18 dBu 1kHz input 03 100mW 22 014 100mW into 32 005 100mW into 64 003 100mW into 300 S N Ratio 103 dB Frequency Response 20Hz 22kHz 3 dB Crosstalk Left to Right 103...

Страница 63: ...2014 2015 Digital Audio Labs 2017 Digital Audio Labs Audinate the Audinate logo and Dante are trademarks of Audinate Pty Ltd Livemix is a registered trademark of Digital Audio Labs Patents pending...

Отзывы: