Record Settings
On the Main menu, selecting the Record option will allow you to set the quality and speed of
recordings.
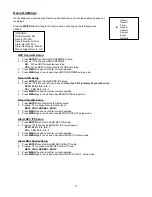
Pressing
ENTER
after scrolling to the Record option will bring up the following menu
options:
(Menu)
Search
Timer
►
Record
Camera
System
Event
Network
(RECORD)
HDD Overwrite: NO
Record IPS: 25A
Record Quality: Normal
Alarm Rec IPS: 25A
Alarm Rec Quality: Normal
Motion Trigger Record: ON
HDD Overwrite Setup
1. Press
ENTER
to confirm HDD OVERWRITE setup.
2. Press
▲
/
▼
to choose HDD OVERWRITE.
NO:
When HDD full will stop recording
YES:
When HDD full will overwrite the HDD recording
3. Press
MENU
to exit and confirm current operation.
4. Press
MENU
again to exit and close HDD OVERWRITE
setup
mode.
Record IPS Setup
1. Press
ENTER
to confirm RECORD IPS setup.
2. Press
▲
/
▼
to choose IPS record speed
. Note that ‘25A’ indicates 25 ips with audio.
NTSC: 25A, 15, 8, 4, 2, 1
PAL: 18A, 12, 6, 3, 2, 1
3. Press
MENU
to exit and confirm current operation.
4. Press
MENU
again to exit and close RECORD IPS setup mode.
Record Quality Setup
1. Press
ENTER
to confirm Record Quality setup.
2. Press
▲
/
▼
to choose Record Quality level.
BEST, HIGH, NORMAL, BASIC
3. Press
MENU
to exit and confirm current operation.
4. Press
MENU
again to exit and close RECORD QUALITY setup
mode.
Alarm REC IPS Setup
1. Press
ENTER
to confirm ALARM REC IPS setup.
2. Press
▲
/
▼
to choose ALARM REC IPS record speed.
NTSC: 25A, 15, 8, 4, 2, 1
PAL: 18A, 12, 6, 3, 2, 1
3. Press
MENU
to exit and confirm current operation.
4. Press
MENU
again to exit and close ALARM REC IPS setup
mode.
Alarm REC Quality Setup
1. Press
ENTER
to confirm ALARM REC QUALITY setup.
2. Press
▲
/
▼
to choose ALARM REC QUALITY level.
BEST, HIGH, NORMAL, BASIC
3. Press
MENU
to exit and confirm current operation.
4. Press
MENU
again to exit and close ALARM REC QUALITY setup
mode.
12


