CONTROL PANEL AND BASIC OPERATION
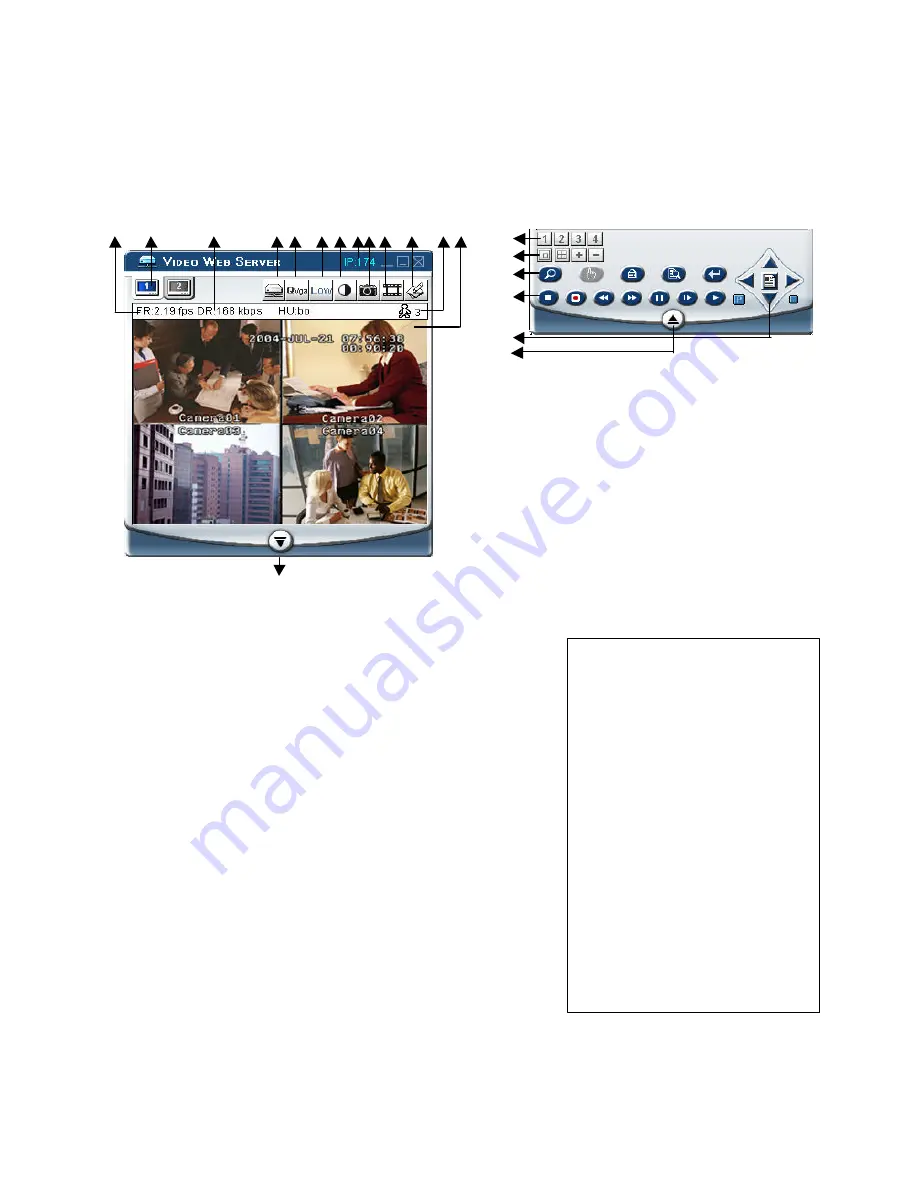
1. Image transmission rate per second
2. Video Channels
3. Data transmission rate
4. Connection/Disconnection
5. Resolution : VGA, QVGA
6. Image quality : High, Middle, Low
7. Image adjusting : Brightness/ Contrast/ Saturation
8. IP address (last 3 digits are displayed)
9. Snapshot : Press this button to automatically save the
image on your PC.
10. Record : Press this button to record the files & save them
on your PC
11. System setting
12. Number of online users
13. Window adjust ( right click for Full Screen)
14. Click on the arrow key to go to the “Digital Device Control
Panel”.
NOTES
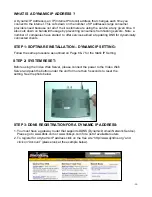
1.When you setup the video input from
the DVR, the screen will show the
operation interface, shown above.
2.Use the 16 CH DVR to explain the
operation (please refer to the
DVR user manual & APPENDIX#1 for
details)
3.After you press the record icon, there
will be a recorded file on your PC.
Each recording file can save up
to 6000 frames.
The recording file will be assigned
to the second file if it is more than
6000 frames.
If the HDD space is less than 200MB,
the program will stop recording.
1. Camera video inputs
2. Quad screen, 7-9-10-13-16 screen
3. Zoom, PIP, Select, Lock, Search, Enter
4. Stop, Record, Rewind, Fast Forward, Pause,
Slow, Play
5. Menu(Exit), Left, Right, Up, Down
6. Click on the arrow key to go to the “Video
Web Server Control Panel”
A. Video Web Server control panel
B. Digital device control panel
1
2
3
4
5
1
2
3
4
9
7
6
5
8
10 11
12 13
14
6
-27-


