24
On-Screen Display Menu
On-Screen Display Menu
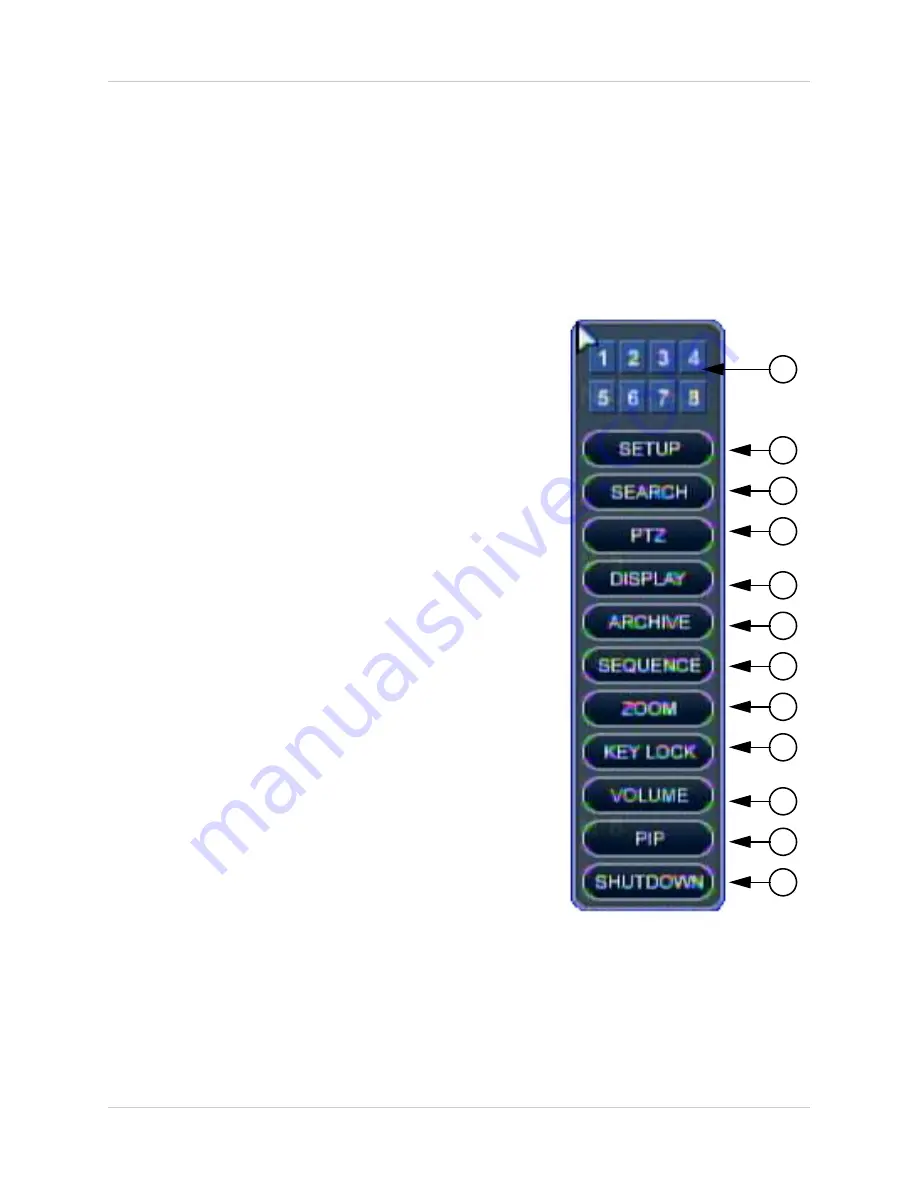
The On-Screen Display Menu is accessed by either:
• Pressing the Up or Down Arrows on the Front Panel
• Right Clicking the Mouse
The Menu options include:
1.
CHANNELS:
Select a Channel Number (1~16) to display
a camera in Full Screen Mode.
2.
SETUP
: Displays the System Setup Menu. Please refer
to the System Setup section for detailed configuration.
3.
SEARCH
: Allows you to locate previously recorded video
by Date and Time, or by Event Type.
4.
PTZ
: Displays the PTZ Control Screen. The PTZ / Focus
Menus will only work with PTZ type cameras (not included)
5.
DISPLAY
: Changes the current display mode to Single,
Quad, 6-Channel Split, 8-Channel Split or 9-Channel Split
screen views.
6.
ARCHIVE
: The Archive feature copies data from the
Hard Drive to a USB backup media such as a Memory Stick
or USB Hard Drive. See the Archive Menu Section for
details.
7.
SEQUENCE
: Selecting the Sequence option switches
the live camera view to the Sequence set in the System
Menu.
8.
ZOOM
: Displays one channel with Digital Zoom.
9.
KEY LOCK
: Locks all Front Panel and Remote Control
buttons (except the Mode change buttons). The password
is required to unlock the keys. The System can still enter
any other mode while the keys are locked (VGA,
Component, Picture Frame or Installation Video modes).
10.
VOLUME
: Adjusts the volume of the System.
11.
PIP
: Select the PIP Button to display the VGA or
Component mode in a PIP window. This function could be
used to watch a Movie while still monitoring the Live Video
display.
12.
SHUTDOWN
: Select the Shutdown option to turn off the
System.
1
2
3
4
5
6
7
8
9
10
11
12


