background image


Chapter 2: Installing a Desk Module


5


Leveling the Pins on the Rightmost Unit


Each D-Control unit ships with two pins in its right side to an-
chor the units together on the stand. These pins are not 
needed on the rightmost unit in your configuration. 


To level the roll pins on the rightmost unit:


1  


Identify the unit that will occupy the rightmost position in 

your configuration. 


2  


Use a small hammer to tap in the two pins the right side of 

until they are flush with the side of the unit. (There is no stop 
inside the pin rails, so you will be able to install new pins if 
you expand your system later.)


Installing the Units on the Stand


After the D-Control Main Unit, Fader Modules, and Desk 
Modules are prepared for installation, the units are placed on 
the stand in the appropriate order for your configuration. In-
stall the units from left to right on the stand.


To install the D-Control units on the stand:


1  


Lift the first unit into place on the stand so the channels in 

the bottom of the unit go over the rear and front rails of the 
stand. 


2  


Slide the unit to the left side of the stand, leaving a gap of 

about an inch (2 cm) between the side of the unit and the 
flange on the inside of the stand.


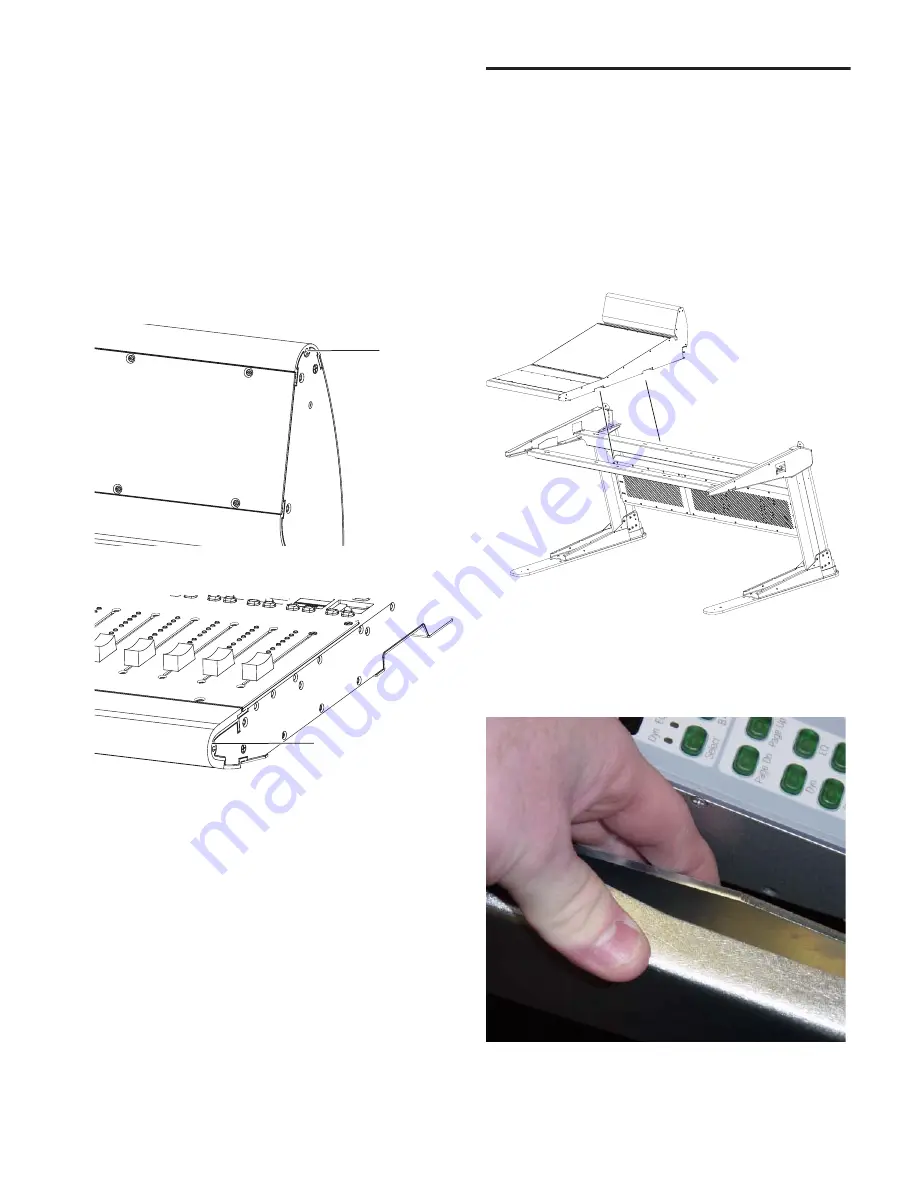
Figure 7.  Installing the roll pin in the top of a D-Control unit

Figure 8.  Installing the roll pin in the front of a D-Control unit

Top roll pin
location

Front roll pin
location


Figure 9.  Placing a Desk Module on the stand

Figure 10.  Leaving a gap between the unit and stand

Содержание D-Control

Страница 1: ... 6300 fax 650 731 6399 Technical Support USA tel 650 731 6100 fax 650 731 6384 Product Information USA tel 650 731 6102 tel 800 333 2137 International Offices Visit the Digidesign Web site for contact information Web Site www digidesign com D Control Desk Module Installation Guide ...

Страница 2: ...uplicated in whole or in part without the written consent of Digidesign DIGIDESIGN AVID and PRO TOOLS are trademarks or registered trademarks of Digidesign and or Avid Technology Inc All other trademarks are the property of their respective owners Product features specifications system requirements and availability are subject to change without notice PN 932713897 00 REV A 08 04 ...

Страница 3: ...sk Module Features 1 Desk Module Components 1 Desk Module Expansion Options 1 Desk Module Optional Hardware 1 Desk Module Top Panel 2 Chapter 2 Installing a Desk Module 3 Attaching Spacer Plates 3 Installing the Units on the Stand 5 Installing the Rack Equipment Enclosure 6 ...

Страница 4: ...Desk Module Installation Guide iv ...

Страница 5: ...wing components are included in a D Control Desk Module D Control Desk Module 1 3U blank rack panel 2 4U blank rack panels 4 pcs rack equipment enclosure Assembly and stand mounting hardware Cabling accessories Desk Module Expansion Options Any number of Desk Modules can be added to a D Control system up to the maximum possible D Control stand size which is the equivalent of 112 channels of stand ...

Страница 6: ...wing Top 3U of deep rack gear up to 12 in 30 cm deep Middle 3U of shallow rack gear up to 4 in 10 cm deep Bottom 5U of deep rack gear up to 15 in 37 5 cm deep Work Space The work space in the front of the Desk Module is suitable for supporting hardware such as audio equipment remote con trols or laptop computers or work materials such as note books or clip boards Rack Equipment Enclosure The rack ...

Страница 7: ...ction below for example system configurations 16 fader and 48 fader systems are shown 16 Fader System Plus Desk Module If you are building a 16 fader D Control and a Desk Module you can place the Main Unit to the left to the right or in between the Fader Module and the Desk Module If you need to move the spacer plate from the rightmost Fader Module or Desk Module and install it on another unit ref...

Страница 8: ...ght side of previ ous D Control unit To move the spacer plate 1 Remove the screws holding the spacer plate in place Make sure to note the location of the longer screws 2 in the front and 5 in the back as you remove them 2 Remove the spacer plate from the right side of the Fader Module or Desk Module 3 Replace the screws in the side of the Fader Module or Desk Module making sure to replace the long...

Страница 9: ...d After the D Control Main Unit Fader Modules and Desk Modules are prepared for installation the units are placed on the stand in the appropriate order for your configuration In stall the units from left to right on the stand To install the D Control units on the stand 1 Lift the first unit into place on the stand so the channels in the bottom of the unit go over the rear and front rails of the st...

Страница 10: ...n the bottom of the Desk Module after the module is attached to the D Con trol stand The pieces are then joined together after they in place under the Desk Module To install the rack equipment enclosure on the Desk Module 1 Lift the Back panel into place on the back of the Desk Mod ule and attach it to the bottom of the module with M4 x 8 mm Philips pan head screws Leave the screws loose until you...

Страница 11: ...side panel to the bottom of the Desk Module in the same manner 5 Attach the front panel to the Desk Module with M4 x 8 mm Philips pan head screws Leave the screws loose until you have attached all of the enclosure panels 6 With all four panels in place attach the panels to each other with M4 x 8 mm Philips pan head screws Figure 14 Lifting the enclosure side panel into place Figure 15 Attaching th...

Страница 12: ...sk Module check to make sure there is sufficient clearance at the stand crossbar for the top rack spaces or at the rear stand rail for the mid dle rack spaces for the equipment and any associated cabling Cable Runs When running audio and power cables to equipment in the Desk Module you can use the provided cable ties to run cables into the rear stand rail and out the side of the rack equipment enc...

Отзывы: