background image

55

Supported Software

3

The CD that came with the system board contains drivers, utilities and software 
applications required to enhance the performance of the system board. 

Insert the CD into a CD-ROM drive. The autorun screen (Mainboard Utility CD) 
will appear. If after inserting the CD, “Autorun” did not automatically start (which 
is, the Mainboard Utility CD screen did not appear), please go directly to the root 
directory of the CD and double-click “Setup”.

Chapter 3 - Supported Software

Содержание COM331-B

Страница 1: ...COM331 B System Board User s Manual A20700205 ...

Страница 2: ...tents or use of this manual and specifically disclaims any express or implied warranties of merchantability or fitness for any particular purpose The user will assume the entire risk of the use or the results of the use of this document Further the manufacturer reserves the right to revise this publication and make changes to its contents at any time without obligation to notify any person or enti...

Страница 3: ...ticular installation If this equipment does cause harmful interference to radio or televi sion reception which can be determined by turning the equipment off and on the user is encouraged to try to correct the interference by one or more of the following measures Reorient or relocate the receiving antenna Increase the separation between the equipment and the receiver Connect the equipment into an ...

Страница 4: ... 2 Hardware Installation 11 System Board Layout 11 Jumper Settings 12 USB Power Select 12 Panel Power Select 13 Clear CMOS 14 Super IO Enable Disable 15 Backlight Power Select 16 VCC5_In Power Select 17 PCIe x16 Normal Reversed 18 BIOS Select 19 FWH Write Protect 20 Function Test Jumper 21 Battery Low Test 21 Wake up Test 22 Thermal Trigger 23 Rear Panel I O Ports 24 Serial COM Ports 25 VGA Port 2...

Страница 5: ...SATA Serial ATA Connectors 36 Cooling Fan Connectors 37 I2 C Connector 38 SM Bus 39 Power Connectors 40 Standby Power LED 41 Front Panel Connectors 42 Expansion Slots 43 Battery 44 COM Express Connectors 45 Chassis Instrusion Connector 49 Display Port 50 Express Card 51 SDIO 52 Switches 53 Serial Interface connector 54 Chapter 3 Supported Software 55 ...

Страница 6: ...f components and product specifications 2 The warranty is void if the product has been subjected to physical abuse improper installation modification accidents or unauthorized repair of the product 3 Unless otherwise instructed in this user s manual the user may not under any circumstances attempt to perform service adjustments or repairs on the product whether in or out of warranty It must be ret...

Страница 7: ...r ends Important Electrostatic discharge ESD can damage your processor disk drive and other components Perform the upgrade instruction procedures described at an ESD workstation only If such a station is not available you can provide some ESD protection by wearing an antistatic wrist strap and attaching it to a metal part of the system chassis If a wrist strap is unavailable establish and maintain...

Страница 8: ...ot come similar to the information listed above This may differ in accordance to the sales region or models in which it was sold For more information about the standard package in your region please contact your dealer or sales representative Before Using the System Board Before using the system board prepare basic system components If you are installing the system board in a new system you will n...

Страница 9: ...1 RJ45 LAN port 4 USB 3 0 ports 4 USB 2 0 ports Line in Surround Line out Mic in Center Subwoofer jacks 1 connector for 1 external RS232 serial port 2 serial interface connectors 1 SDIO slot 1 DisplayPort 1 LVDS LCD panel connector 1 LCD inverter power connector 1 8 bit Digital I O connector 1 front audio connector for line out and mic in jacks 1 S PDIF connector 4 Serial ATA ports 1 LPC connector...

Страница 10: ... Monitors 5V 1 5V 12V 3 3V Monitors SIO_Fan 1 SIO_Fan 2 System fan 1 SPI interface Supports up to 64Mbit 1 LPC FWH interface Operating 0o C to 60o C Storage 20o C to 85o C 10 to 90 12V 5VSB VCC_RTC ATX mode 12V 5V VCC_RTC AT mode 12V VCC_RTC AT mode EMC CE FCC Part 15 Class B Dimensions microATX form factor 244mm 9 6 x 244mm 9 6 Compliance PICMG COM Express R2 0 Type 6 ...

Страница 11: ...nel power select JP7 1 1 Backlight power select JP6 1 LVDS LCD panel SPI Flash BIOS PCIE x16 Sleep Lid Power Reset 1 2 12 11 Front Panel LAN USB 3 0 2 3 DP2 USB 2 0 6 7 DP1 USB 2 0 4 5 USB 3 0 0 1 Buzzer LPC JP3 JP14 1 2 10 9 COM2 FWH Write Protect J21 Super IO enable Disable JP9 1 5 1 8 LCD Inverter power DP3 USB 0 1 power select JP5 USB 4 7 power select JP4 USB 2 3 power select JP8 SM Bus Clear ...

Страница 12: ...m Important If you are using the Wake On USB Keyboard Mouse function for 2 USB ports the 5V_standby power source of your power supply must support 1 5A For 3 or more USB ports the 5V_standby power source of your power supply must support 2A USB Power Select USB 0 1 JP5 USB 4 7 JP4 3 1 2 3 1 2 2 3 On 5V_standby 1 2 On 5V default Jumper Settings USB 2 3 JP8 3 1 2 3 1 2 1 2 On 5V default 2 3 On 5V_st...

Страница 13: ...er supplied to the LCD panel Important Before powering on the system make sure JP7 s setting matches the LCD panel s specification Selecting the incorrect voltage will seriously damage the LCD panel 1 2 On 12V 3 4 On 5V 5 6 On 3V default JP7 1 5 3 2 4 6 1 5 3 2 4 6 2 4 6 1 5 3 ...

Страница 14: ...sor or user password you can reconfigure the system with the default values stored in the ROM BIOS To load the default values stored in the ROM BIOS please follow the steps below 1 Power off the system and unplug the power cord 2 Set JP11 pins 2 and 3 to On Wait for a few seconds and set JP11 back to its default setting pins 1 and 2 On 3 Now plug the power cord and power on the system ...

Страница 15: ...15 2 Hardware Installation Super IO Enable Disable 1 2 3 2 3 On Disable default 1 2 On Enable JP9 JP9 is used to select enable or disable the super IO select 1 2 3 ...

Страница 16: ...2 3 On 3 3V default 1 2 On 5V JP6 is used to select the backlight control level 5V or 3 3V Important Before powering on the system make sure JP6 s setting matches the backlight power s specification Selecting the incorrect voltage will seri ously damage the backlight ...

Страница 17: ...17 2 Hardware Installation VCC5_IN Power Select JP1 1 2 On 5VSB JP1 is used to select the power of the COM Express connector 6 4 2 5 3 1 6 4 2 5 3 1 6 4 2 5 3 1 3 4 On 5V 5 6 On NC ...

Страница 18: ...allation PCIe x16 Normal Reversed JP15 1 2 3 2 3 On Reversed for cards that support reversed signals 1 2 On Normal default IF you are installing a PCIe x16 card who s signal is reversed set JP15 pins 2 and 3 to on 1 2 3 ...

Страница 19: ...14 are used to determine the BIOS boot device 3 1 2 JP3 1 2 On JP14 1 2 On Carrier LPC FWH Module SPI BIOS 3 1 2 3 1 2 JP3 2 3 On JP14 2 3 On 3 1 2 3 1 2 JP3 1 2 On 3 1 2 JP14 1 2 On Carrier SPI0 JP3 2 3 On 3 1 2 3 1 2 JP14 2 3 On Module SPI0 Default ...

Страница 20: ... Default 1 2 On Enable 2 1 2 1 J21 is used to configure the BIOS Write Protect function When this function is enabled the system will be protected from unnecessary updating or flashing of the BIOS It secures the BIOS therefore any updates to it will not take effect ...

Страница 21: ...s Battery Low Test This jumper is used to simulate the signal status that indicates the external bat tery is low By setting J23 pins 1 and 2 to On it sends a battery low signal to the module J23 1 2 Off Normal default 1 2 On Battery low test 1 2 1 2 ...

Страница 22: ...l status that indicates the wake on ring or PME event from the Super I O It is also used to simulate a general purpose wake up signal such as wake up on PS 2 keyboard or PS 2 mouse Set J24 pins 1 and 2 to On to use this function J24 1 2 Off Normal default 1 2 On Wake up test 1 2 1 2 ...

Страница 23: ... Over Temper ature Signal OVT output from the Super I O F71879 When monitored tempera ture exceeds the OVT value OVT will be asserted until the temperature goes below the hysteresis temperature Set J25 pins 1 and 2 to On to send THRM signal to the module J25 1 2 Off Normal default 1 2 On Thermal Trigger 1 2 1 2 ...

Страница 24: ...O Ports The rear panel I O ports consist of the following 2 Display ports 1 COM port VGA port LAN port 8 USB ports Mic in jack Line in jack Line out jack USB 0 1 USB 2 3 USB 6 7 LAN PS 2 KB MS COM 1 VGA DP1 USB 4 5 Line in Line out Mic in DP2 ...

Страница 25: ...ous communication ports with 16C550A compatible UARTs that can be used with modems serial printers remote display terminals and other serial devices To connect COM 2 please refer to the follow ing description The serial port may be mounted on a card edge bracket Install the card edge bracket to an available slot at the rear of the system chassis then insert the cable connector to the 9 pin connect...

Страница 26: ... used for connecting a VGA monitor Connect the monitor s 15 pin D shell cable connector to the VGA port After you plug the monitor s cable con nector into the VGA port gently tighten the cable screws to hold the connector in place VGA Port VGA ...

Страница 27: ...27 2 Hardware Installation RJ45 LAN Port The onboard RJ45 LAN port allows the system board to connect to a local area network by means of a network hub LAN ...

Страница 28: ...pped with four onboard USB 3 0 2 0 1 1 ports USB 0 3 and four onboard USB 2 0 1 1 ports USB 4 7 BIOS Setting Configure the onboard USB in the Advanced menu USB Configuration sub menu of the BIOS Refer to chapter 3 for more information Driver Installation You may need to install the proper drivers in your operating system to use the USB device Refer to your operating system s manual or documentatio...

Страница 29: ...tate To use this function Jumper Setting JP4 JP5 and or JP8 must be set to 2 3 On 5V_standby Refer to USB Power Select in this chapter for more information Important If you are using the Wake On USB Keyboard Mouse function for 2 USB ports the 5V_standby power source of your power supply must support 1 5A For 3 or more USB ports the 5V_standby power source of your power supply must support 2A ...

Страница 30: ... board is equipped with 3 audio jacks A jack is a one hole connecting interface for inserting a plug Line in Jack Light Blue This jack is used to connect any audio devices such as Hi fi set CD player tape player AM FM radio tuner synthesizer etc Line out Jack Lime This jack is used to connect a headphone or external speakers Mic in Jack Pink This jack is used to connect an external microphone Fron...

Страница 31: ... PDIF ports may be mounted on a card edge bracket Install the card edge bracket to an available slot at the rear of the system chassis then connect the audio cable to the S PDIF connector Make sure pin 1 of the audio cable is aligned with pin 1 of the connector 5 1 5V Key SPDIF out Ground SPDIF in I O Connectors ...

Страница 32: ...nel connector and the LCD Inverter power connector These connec tors transmit video signals and power from the system board to the LCD Display Panel Refer to the next page for the pin functions of these connectors Jumper Settings Refer to the Jumper Settings section in this chapter for settings relevant to the LCD panel LVDS LCD panel LCD Inverter power 2 1 40 39 8 1 ...

Страница 33: ...AA Panel Power Panel Power Pins 2 4 6 8 10 12 14 16 18 20 22 24 26 28 30 32 34 36 38 40 Function GND LVDS_Out7 LVDS_Out7 GND LVDS_Out6 LVDS_Out6 GND LVDS_Out5 LVDS_Out5 GND LVDS_Out4 LVDS_Out4 GND LVDS_CLK2 LVDS_CLK2 GND N C N C Panel Power Panel Power LVDS LCD Panel Connector LCD Inverter Power Connector Pins 1 2 3 4 5 6 7 8 Function GND GND Panel Inverter Brightness Voltage Control Panel Power 3...

Страница 34: ...ovides powering on function to external devices that are connected to these connectors Pin Pin Assignment Pin Pin Assignment 1 GND 2 12V 3 DIO7 GPO3 4 12V 5 DIO6 GPO2 6 GND 7 DIO5 GPO1 8 5V 9 DIO4 GPO0 10 5V 11 DIO3 GPI3 12 GND 13 DIO2 GPI2 14 5VSB 15 DIO1 GPI1 16 5VSB 17 DIO0 GPI0 18 GND 19 GND ...

Страница 35: ...tem which are typically provided by a Super I O controller Furthermore it can be used to interface firmware hubs Trusted Platform Module TPM devices and embedded controller solutions Data transfer on the LPC bus is implemented over a 4 bit serialized data interface which uses a 33MHz LPC bus clock For more information about LPC bus refer to the Intel Low Pin Count Interface Specification Revision ...

Страница 36: ...A devices Connect one end of the Serial ATA cable to a SATA connector and the other end to your Serial ATA device BIOS Setting Refer to the module s BIOS for more information Features SATA 0 and SATA 1 support data transfer rate up to 6Gb s SATA 2 to SATA 3 support data transfer rate up to 3Gb s Integrated Advanced Host Controller Interface AHCI controller Supports RAID 0 RAID 1 RAID 5 and RAID 10...

Страница 37: ...rs are used to connect cooling fans The cooling fans will pro vide adequate airflow throughout the chassis to prevent overheating the module and system board components 1 3 Sense Power Ground System_Fan SIO_Fan 2 SIO_Fan 1 1 3 Sense Power Ground 1 3 Sense Power Ground ...

Страница 38: ...nstallation I2 C Connector 1 4 I2C_DAT 3V3 3 2 I2C_CLK Ground The 1 channel I2 C bus interface conforms to the version 2 1 I2 C bus specification It operates as a master or slave device and supports a multi master bus ...

Страница 39: ...ystem Management Bus connector is used to connect SMBus devices It is a multiple device bus that allows multiple chips to connect to the same bus and enable each one to act as a master by initiating data transfer SM Bus 1 5 3VDU Data CLK ALERT GND ...

Страница 40: ... may not attain its minimum load causing instability to the entire system Use a power supply that complies with the ATX12V Power Supply Design Guide Version 1 1 An ATX12V power supply unit has a standard 24 pin ATX main power connector that must be inserted into the 24 pin connector The 4 pin 12V power connector enables the delivery of more 12VDC current to the COM ex press module board and carrie...

Страница 41: ...This LED will lit red when the system is in the standby mode It indicates that there is power on the system board Power off the PC then unplug the power cord prior to installing any devices Failure to do so will cause severe damage to the motherboard and components ...

Страница 42: ...tem PWR LED Power Standby LED When the system s power is on this LED will light When the system is in the S1 POS Power On Suspend state it will blink every second When the system is in the S3 STR Suspend To RAM state it will blink every 4 seconds Pin 1 3 5 7 9 11 N C HDD LED RESET SW N C Pin Assignment N C HDD Power Signal Ground RST Signal N C Pin 2 4 6 8 10 12 PWR LED PWR BTN Key Pin Assignment ...

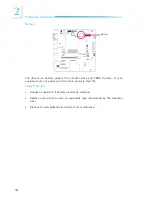
Страница 43: ...o the PCI Express x1 slot PCI Express x4 Slots Install PCI Express cards such as network cards or other cards that comply to the PCI Express specifi cations into the PCI Express x4 slot Mini PCIe Slot The Mini PCIe socket is used to install a Mini PCIe card Mini PCIe card is a small form factor PCI card with the same signal protocol electrical definitions and con figuration definitions as the conv...

Страница 44: ...memory It is an auxiliary source of power when the main power is shut off Safety Measures Danger of explosion if battery incorrectly replaced Replace only with the same or equivalent type recommend by the manufac turer Dispose of used batteries according to local ordinance Battery Battery ...

Страница 45: ...ation COM Express Connectors The COM Express connectors are used to interface the carrier board with a COM Express board Refer to the following pages for the pin functions of these connec tors COM Express Connectors Type 6 ...

Страница 46: ... 65 5 J 69 69 676J6HK 676J6 5 K 69 69 65 5 J U 65 5 J U J EU J EU 65 5 J 65 5 J J E J E 4 4 4 4 65 5 J U 65 5AJ U J FU J FU A 65 5 J 65 5AJ J F J F H 676J6 K 1 J J2 69 65 5 J U 65 5AJ U J 5 H U 69 E 65 5 J 65 5AJ J 5 H J 5 U F 85 3 1K 1 69 J 5 6 5 5J5 K 5 G2 5J6 69 69 5 G2 5J6 5 G2 5J6 J 5 U J 5 U A 5 G2 5J 6 K 5 G2 5J6 J 5 J 5 A 4 4 4 4 A 5 G2 5J8 3 6 J 3 3 J57 U J 5 U AA 5 G2 5J6 7 J J 3 5 5J57 ...

Страница 47: ... J U J U J AU J AU E J J J A J A EA A 69 69 EH J U J U 69 69 E J J J HU J HU EE 15 K J H J H EF 15 K 69 E J U J U J U J U E J J J J F 4 4 4 4 F 39 6J5 U 39 6J8 U J EU J EU F 39 6J5 39 6J8 J E J E FA 39 6J5 U 39 6J8 U FH 39 6J5 39 6J8 J FU J FU F 39 6J5 U 39 6J8 U J F J F FE 39 6J5 39 6J8 FF 39 6J9 J 39 6J8AU 69 69 F 39 6J5AU 39 6J8A J U J U F 39 6J5A 39 6J8 3 J J J 4 4 4 4 39 6J5J U 39 6J8J U J U ...

Страница 48: ... 6 J 6 9 5J J J A J A E J 9 5J J 5 F K 6 J 6K 69 69 6 J 69 J HU J HU 6 J 69 J H J H 4 4 4 4 6 J 45 J 1 7 J U J U 6 J 45 J 5 2 J J A 3 K 63 K H 9 J 9 9 J 9 9 J 9 9 J 9 9 J 9 9 J 9 9 J 9 9 J 9 E 9 J 9 9 J 9 9 J 9 9 J 9 F 9 J 9 9 J 9 9 J 9 9 J 9 9 J 9 9 J 9 9 J 9 9 J 9 9 J 9 9 J 9 9 J 9 9 J 9 4 4 4 4 ...

Страница 49: ...nction Connect the chas sis intrusion sensor cable from the chassis to this connector When the system s power is on and a chassis intrusion occurred an alarm will sound When the system s power is off and a chassis intrusion occurred the alarm will sound only when the system restarts Chassis signal Ground 1 2 ...

Страница 50: ...DisplayPort is a digital display interface used to connect a display device such as a computer monitor It is used to transmit audio and video simultaneously The interface which is developed by VESA delivers higher performance features than any other digital interface ...

Страница 51: ...cards solid state drives or TV tuner cards Its hot plug functionality allows you to install and re move modules at any time without having to switch off your system This pro vides added reliability durability and expansion flexibility to your system The ExpressCard slot supports PCIe signal only To support both PCIe and USB signals another version will be provided upon request Since the USB signal...

Страница 52: ...llation SDIO SDIO This expansion port is used to insert a Secure Digital Input Output SDIO or Multimedia Card MMC device Aside from storing data files an SDIO card is also capable of storing powerful software applications ...

Страница 53: ...n Switches Sleep Lid Power Reset Sleep it is used to set the system to sleep or wake up mode Lid it is used to turn the LVDS on or off Note The Sleep and Lid functions are supported only when your operating system supports ACPI ...

Страница 54: ...rdware Installation Serial Interface Connector Serial Interface 0 Rx Tx Serial Interface 1 Rx Tx 1 1 TX0 RX0 GND TX1 RX1 GND This serial interface connectors are used to any device supported Tx and Rx sig nal ...

Страница 55: ...e performance of the system board Insert the CD into a CD ROM drive The autorun screen Mainboard Utility CD will appear If after inserting the CD Autorun did not automatically start which is the Mainboard Utility CD screen did not appear please go directly to the root directory of the CD and double click Setup Chapter 3 Supported Software ...

Страница 56: ... 1 Setup is now ready to in stall the audio driver Click Next 2 Follow the remainder of the steps on the screen click ing Next each time you finish a step 3 Click Yes I want to restart my computer now then click Finish Restarting the system will allow the new software in stallation to take effect ...

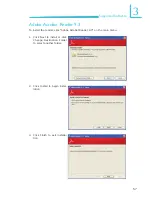
Страница 57: ...Reader 9 3 To install the reader click Adobe Acrobat Reader 9 3 on the main menu 1 Click Next to install or click Change Destination Folder to select another folder 2 Click Install to begin instal lation 3 Click Finish to exit installa tion ...

Отзывы: