4
SAVE ALL WARNINGS AND INSTRUCTIONS FOR
FUTURE REFERENCE
Unpacking your planer
Check the contents of your planer carton to make sure that you have received all
parts. In addition to this instruction manual, the carton should contain:
•
1
Planer
• 1 Round dust port
• 1 T-wrench (located in the top cover of the unit)
• 1 Depth adjustment crank handle
• 1 Hex screw for crank handle
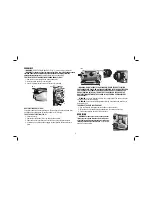
Transporting the Planer (Fig. 1)
WARNING: For your own safety, it is recommended
D
A
B
C
FIG. 1
that two people carry this machine or serious injury
could result.
When moving your planer, carry it either by the side
carrying handles (A) or by the handles at the base of the
planer (B). When transporting or storing the planer, use
the cord wrap located in the back of the tool (C) to keep
the cord in place.
Bench Mounting (Fig. 1)
To facilitate bench mounting, two different sized holes
(D) are provided on the four corners of your planer. If
mounting the planer with bolts, use the larger holes. If
mounting the planer with nails or screws, use the smaller
holes. It is not necessary to use both sets of holes.
Always mount your planer firmly to prevent movement. To enhance the tool’s
portability, it can be mounted to a piece of 12.7 mm (1/2") or thicker plywood
which can then be clamped to your work support or moved to other job sites and
reclamped.
NOTE:
If you elect to mount your planer onto a piece of plywood, make sure that the
mounting screws don’t protrude from the bottom of the wood. The plywood must sit
flush on the work support.
CAUTION:
The mounting surface should not be warped or otherwise uneven.
WARNING:
Some dust created by power sanding, sawing, grinding, drilling, and
other construction activities contains chemicals known to cause cancer, birth defects
or other reproductive harm. Some examples of these chemicals are:
• lead from lead-based paints,
• crystalline silica from bricks and cement and other masonry products, and
• arsenic and chromium from chemically-treated lumber.
Your risk from these exposures varies, depending on how often you do this type of
work. To reduce your exposure to these chemicals: work in a well ventilated area, and
work with approved safety equipment, such as those dust masks that are specially
designed to filter out microscopic particles.
•
Avoid prolonged contact with dust from power sanding, sawing, grinding,
drilling, and other construction activities. Wear protective clothing and wash
exposed areas with soap and water.
Allowing dust to get into your mouth, eyes,
or lay on the skin may promote absorption of harmful chemicals.
WARNING:
Use of this tool can generate and/or disburse dust, which may cause
serious and permanent respiratory or other injury. Always use AS/NZS1716 approved
respiratory protection appropriate for the dust exposure. Direct particles away from
face and body.
WARNING: Always wear proper personal hearing protection that conforms to
AS/NZS1270 during use.
Under some conditions and duration of use, noise from this
product may contribute to hearing loss.
• The label on your tool may include the following symbols. The symbols and their
definitions are as follows:
V ................. volts
A ...............amperes
Hz ............... hertz
W ..............watts
min ............. minutes
...........alternating current
........ direct current
...........alternating or direct current
.............. Class I Construction
no ..............no load speed
...................
...................
(grounded) n
................rated
speed
.............. Class II Construction
.............earthing terminal
...................
(double insulated)
..............safety alert symbol
…/min ........ per minute
BPM ..........beats per minute
IPM ............. impacts per minute
RPM ..........revolutions per minute
SPM ............ strokes per minute
sfpm ..........surface feet per minute
Содержание DW735-XE
Страница 1: ...DW735 XE 330 MM 13 HEAVY DUTY PORTABLE THICKNESS PLANER INSTRUCTION MANUAL ...
Страница 2: ......
Страница 15: ......


