44
EnGLIsh
Chargers
D
e
WALT
chargers require no adjustment and are designed to be as easy as
possible to operate.
Electrical Safety
The electric motor has been designed for one voltage only. Always check
that the battery pack voltage corresponds to the voltage on the rating
plate. Also make sure that the voltage of your charger corresponds to that
of your mains.
Your
D
e
WALT
charger is double insulated in
accordance with EN60335; therefore no earth wire
is required.
If the supply cord is damaged, it must be replaced only by
D
e
WALT
or an
authorised service organisation.
Mains Plug Replacement
(U.K. & Ireland Only)
If a new mains plug needs to be fitted:
• Safely dispose of the old plug.
• Connect the brown lead to the live terminal in the plug.
• Connect the blue lead to the neutral terminal.
WARNING:
No connection is to be made to the earth terminal.
Follow the fitting instructions supplied with good quality plugs.
Recommended fuse: 3 A.
Using an Extension Cable
An extension cord should not be used unless absolutely necessary. Use an
approved extension cable suitable for the power input of your charger (see
Technical Data
). The minimum conductor size is 1 mm
2
; the maximum
length is 30 m.
When using a cable reel, always unwind the cable completely.
Important Safety Instructions for All Battery Chargers
SAVE THESE INSTRUCTIONS:
This manual contains important safety
and operating instructions for compatible battery chargers (refer to
Technical Data
).
• Before using charger, read all instructions and cautionary markings on
charger, battery pack, and product using battery pack.
WARNING:
Shock hazard. Do not allow any liquid to get inside
charger. Electric shock may result.
WARNING:
We recommend the use of a residual current device with a
residual current rating of 30mA or less.
CAUTION:
Burn hazard. To reduce the risk of injury, charge only
D
e
WALT
rechargeable batteries. Other types of batteries may burst
causing personal injury and damage.
CAUTION:
Children should be supervised to ensure that they do not
play with the appliance.
NOTICE:
Under certain conditions, with the charger plugged into the
power supply, the exposed charging contacts inside the charger can be
shorted by foreign material. Foreign materials of a conductive nature
such as, but not limited to, steel wool, aluminum foil or any buildup of
metallic particles should be kept away from charger cavities. Always
unplug the charger from the power supply when there is no battery
pack in the cavity. Unplug charger before attempting to clean
• Risk of accidents caused by the uncovered parts of the rotating saw blade.
• Risk of injury when changing the blade.
• Risk of squeezing fingers when opening the guards.
• Health hazards caused by breathing dust developed when sawing wood,
especially oak, beech and MDF.
The following factors increase the risk of breathing problems:
• No dust extractor connected when sawing wood.
• Insufficient dust extraction caused by uncleaned exhaust filters.
SAVE THESE INSTRUCTIONS
•
DO NOT attempt to charge the battery pack with any chargers
other than the ones in this manual.
The charger and battery pack are
specifically designed to work together.
•
These chargers are not intended for any uses other than charging
D
e
WALT
rechargeable batteries.
Any other uses may result in risk of fire,
electric shock or electrocution.
•
Do not expose charger to rain or snow.
•
Pull by plug rather than cord when disconnecting charger.
This will
reduce risk of damage to electric plug and cord.
•
Make sure that cord is located so that it will not be stepped on,
tripped over, or otherwise subjected to damage or stress.
•
Do not use an extension cord unless it is absolutely necessary.
Use of improper extension cord could result in risk of fire,electric shock,
or electrocution.
•
Do not place any object on top of charger or place the charger on
a soft surface that might block the ventilation slots and result in
excessive internal heat.
Place the charger in a position away from any
heat source. The charger is ventilated through slots in the top and the
bottom of the housing.
•
Do not operate charger with damaged cord or plug—
have them
replaced immediately.
•
Do not operate charger if it has received a sharp blow, been
dropped, or otherwise damaged in any way.
Take it to an authorised
service centre.
•
Do not disassemble charger; take it to an authorised service centre
when service or repair is required.
Incorrect reassembly may result in a
risk of electric shock, electrocution or fire.
• In case of damaged power supply cord the supply cord must be replaced
immediately by the manufacturer, its service agent or similar qualified
person to prevent any hazard.
•
Disconnect the charger from the outlet before attempting any
cleaning. This will reduce the risk of electric shock.
Removing the
battery pack will not reduce this risk.
•
NEVER
attempt to connect two chargers together.
•
The charger is designed to operate on standard 230V household
electrical power. Do not attempt to use it on any other voltage.
This
does not apply to the vehicular charger.
Charging a Battery (Fig. B)
1. Plug the charger into an appropriate outlet before inserting
battery pack.
2. Insert the battery pack
4
into the charger, making sure the battery
pack is fully seated in the charger. The red (charging) light will blink
repeatedly indicating that the charging process has started.
3. The completion of charge will be indicated by the red light remaining
ON continuously. The battery pack is fully charged and may be used
at this time or left in the charger. To remove the battery pack from the
charger, push the battery release button
5
on the battery pack.
nOTE:
To ensure maximum performance and life of lithium-ion battery
packs, charge the battery pack fully before first use.
Charger Operation
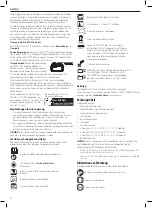
Refer to the indicators below for the charge status of the battery pack.
Charge Indicators
Charging
Fully Charged
Hot/Cold Pack Delay*
*
The red light will continue to blink, but a yellow indicator light will be
illuminated during this operation. Once the battery pack has reached an
appropriate temperature, the yellow light will turn off and the charger will
resume the charging procedure.
Содержание DCS727
Страница 1: ...Final Page Size 172 x 240 mm DCS727 ...
Страница 4: ...2 Fig D Fig C Fig B Fig E Fig F 41 42 5 4 61 4 5 39 68 40 36 ...
Страница 5: ...3 Fig G Fig H4 Fig I Fig H1 Fig H2 Fig H3 1 44 1 43 31 21 22 19 51 49 50 46 43 45 31 48 47 ...
Страница 6: ...4 Fig N Fig O1 Fig L Fig M Fig K 21 21 60 62 Fig J 10 59 52 53 54 55 56 57 58 ...
Страница 7: ...5 Fig O2 Fig Q Fig S Fig P Fig T Fig R 2 1 A 1 2 ...
Страница 8: ...6 Fig X1 Fig W1 Fig W1 Fig V2 Fig V1 13 46 17 13 46 13 13 17 Fig U ...
Страница 9: ...7 Fig X2 Fig Y Fig AA Fig Z 1 63 64 15 16 66 65 67 ...

