


4
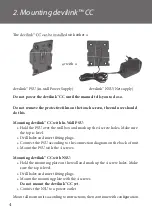
Th e devilink™ CC can be installed with either a
Do not power the devilink™ CC until the manual tells you to do so.
Do not remove the protective fi lm on the touch screen, the end user should
do this.
Mounting devilink™ CC with In-Wall PSU:
• Hold the PSU over the wall box and mark up the 4 screw holes. Make sure
the top is level.
• Drill holes and insert fi tting plugs.
• Connect the PSU according to the connection diagram on the back of unit
• Mount the PSU with the 4 screws.
Mounting devilink™ CC with NSU:
• Hold the mounting plate on the wall and mark up the 4 screw holes. Make
sure the top is level.
• Drill holes and insert fi tting plugs.
• Mount the mounting plate with the 4 screws.
Do not mount the devilink™ CC yet
.
• Connect the NSU to a power outlet.
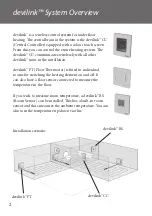
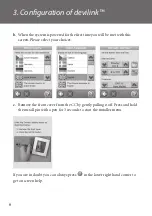
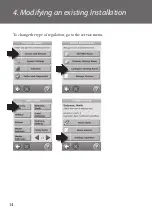
Mount all room units according to instructions, then continue with confi guration.
devilink™ PSU (in-wall Power Supply)
or with a
2. Mounting devilink™ CC
devilink™ NSU (Net supply)


