background image

Contents

1 Introduction

4

1.1 Packing List . . . . . . . . . . . . . . . . . . . . . . . . . . . . . . . . . . . . . . . . . . . . .

4

1.2 Technical Data . . . . . . . . . . . . . . . . . . . . . . . . . . . . . . . . . . . . . . . . . . .

5

2 Product Description

6

3 Basic Instructions

7

3.1 Batteries Setup . . . . . . . . . . . . . . . . . . . . . . . . . . . . . . . . . . . . . . . . . . .

7

3.2 System Start and Shutdown . . . . . . . . . . . . . . . . . . . . . . . . . . . . . . . . . . . .

7

3.2.1

Start . . . . . . . . . . . . . . . . . . . . . . . . . . . . . . . . . . . . . . . . . . . . .

7

3.2.2

Shutdown . . . . . . . . . . . . . . . . . . . . . . . . . . . . . . . . . . . . . . . . . .

7

4 Quick Start

8

4.1 Open the Door . . . . . . . . . . . . . . . . . . . . . . . . . . . . . . . . . . . . . . . . . . .

9

4.1.1

with Finger . . . . . . . . . . . . . . . . . . . . . . . . . . . . . . . . . . . . . . . . .

9

4.1.2

with Card (G800FPC Only) . . . . . . . . . . . . . . . . . . . . . . . . . . . . . . . .

9

4.1.3

with Password . . . . . . . . . . . . . . . . . . . . . . . . . . . . . . . . . . . . . . .

9

4.2 Close the Lock . . . . . . . . . . . . . . . . . . . . . . . . . . . . . . . . . . . . . . . . . . .

10

5 Lock Menu

11

5.1 Enter the System Menu . . . . . . . . . . . . . . . . . . . . . . . . . . . . . . . . . . . . . .

11

5.2 System Settings . . . . . . . . . . . . . . . . . . . . . . . . . . . . . . . . . . . . . . . . . .

11

5.2.1

Unlock Mode . . . . . . . . . . . . . . . . . . . . . . . . . . . . . . . . . . . . . . . .

11

5.2.2

Set Password . . . . . . . . . . . . . . . . . . . . . . . . . . . . . . . . . . . . . . . .

12

5.2.3

Set Time . . . . . . . . . . . . . . . . . . . . . . . . . . . . . . . . . . . . . . . . . .

13

5.2.4

Unlocked Alarm

. . . . . . . . . . . . . . . . . . . . . . . . . . . . . . . . . . . . . .

13

5.2.5

Connect to PC . . . . . . . . . . . . . . . . . . . . . . . . . . . . . . . . . . . . . . .

13

5.3 Manager Users . . . . . . . . . . . . . . . . . . . . . . . . . . . . . . . . . . . . . . . . . . .

13

5.3.1

Add Admin Fingerprint . . . . . . . . . . . . . . . . . . . . . . . . . . . . . . . . . . .

14

5.3.2

Add User Fingerprint . . . . . . . . . . . . . . . . . . . . . . . . . . . . . . . . . . . .

14

5.3.3

Add Card (G800FPC Only) . . . . . . . . . . . . . . . . . . . . . . . . . . . . . . . .

15

5.3.4

Delete User . . . . . . . . . . . . . . . . . . . . . . . . . . . . . . . . . . . . . . . . .

15

5.4 Information . . . . . . . . . . . . . . . . . . . . . . . . . . . . . . . . . . . . . . . . . . . . .

15

5.4.1

Users Log . . . . . . . . . . . . . . . . . . . . . . . . . . . . . . . . . . . . . . . . . .

16

5.4.2

Users List . . . . . . . . . . . . . . . . . . . . . . . . . . . . . . . . . . . . . . . . . .

16

5.4.3

Storage . . . . . . . . . . . . . . . . . . . . . . . . . . . . . . . . . . . . . . . . . . .

16

6 Lock Functions

17

6.1 Alarm Functions . . . . . . . . . . . . . . . . . . . . . . . . . . . . . . . . . . . . . . . . . .

17

6.1.1

Illegal Intrusion Alarm . . . . . . . . . . . . . . . . . . . . . . . . . . . . . . . . . . .

17

6.1.2

Multi-attempts Alarm . . . . . . . . . . . . . . . . . . . . . . . . . . . . . . . . . . . .

17

6.1.3

Unlocked Door Alarm . . . . . . . . . . . . . . . . . . . . . . . . . . . . . . . . . . .

17

6.2 Batteries Low . . . . . . . . . . . . . . . . . . . . . . . . . . . . . . . . . . . . . . . . . . . .

18

6.2.1

First Warning . . . . . . . . . . . . . . . . . . . . . . . . . . . . . . . . . . . . . . . .

18

6.2.2

Last Warning . . . . . . . . . . . . . . . . . . . . . . . . . . . . . . . . . . . . . . . .

18

6.3 Emergency Battery . . . . . . . . . . . . . . . . . . . . . . . . . . . . . . . . . . . . . . . . .

18

6.4 Locker Function . . . . . . . . . . . . . . . . . . . . . . . . . . . . . . . . . . . . . . . . . . .

19

6.4.1

Close Position . . . . . . . . . . . . . . . . . . . . . . . . . . . . . . . . . . . . . . .

19

6.4.2

Open Position

. . . . . . . . . . . . . . . . . . . . . . . . . . . . . . . . . . . . . . .

19

2

Содержание G800FPC TX

Страница 1: ...DESSMANN FINGERPRINT LOCK User Guide G800FP G800FPC 1...

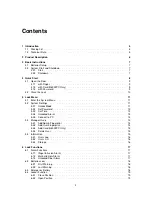
Страница 2: ...ock Mode 11 5 2 2 Set Password 12 5 2 3 Set Time 13 5 2 4 Unlocked Alarm 13 5 2 5 Connect to PC 13 5 3 Manager Users 13 5 3 1 Add Admin Fingerprint 14 5 3 2 Add User Fingerprint 14 5 3 3 Add Card G800...

Страница 3: ...CONTENTS CONTENTS 6 5 Mechanical Key 19 6 6 Factory Reset 20 7 Product Warranty 21 8 Contact Us 22 3...

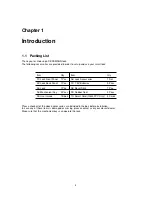
Страница 4: ...Set 02 Lock Back Panel 1 Pce 07 1 5V Batteries 4 Pces 03 Lock 1 Pce 08 Reset Stick 1 Pce 04 Mechanical Key 3 Pces 09 Rubber Seal 2 Pces 05 User Guide 1 Book 10 Smart Card G800FPC Only 4 Cards Please...

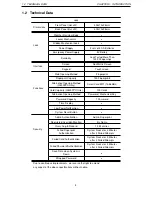
Страница 5: ...13 56MHz Card Capacity G800FPC Only 100 Cards Alternative Opening Method Password Mechanical Key Password Capacity 1 Password Time Display Low Power Notification System Reset Button Security Admin Aut...

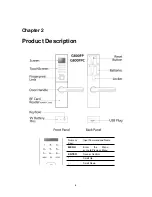
Страница 6: ...Chapter 2 Product Description Numeric Keys Input Password and Name MENU Enter the Menu or Go to Previous Menu ENTER Save or Confirm Scroll Up Scroll Down 6...

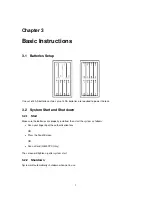
Страница 7: ...3 2 System Start and Shutdown 3 2 1 Start Make sure the batteries are properly installed then start the system as follows Scan your fingertip at the authentication lens OR Press the TouchScreen OR Sca...

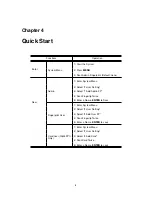
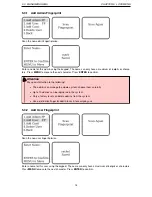
Страница 8: ...ct 2 User Setting 3 Select 1 Add Admin FP 4 Scan Fingertip Twice 5 Enter a Name ENTER to Save Fingerprint User 1 Enter System Menu 2 Select 2 User Setting 3 Select 2 Add User FP 4 Scan Fingertip Twice...

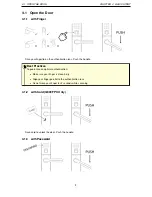
Страница 9: ...on lens Push the handle Best Practices To guarantee an optimal authentication Make sure your finger is clean dry Align your finger parallel to the authentication lens Do not move your finger for 2 sec...

Страница 10: ...o confuse people looking at you when you type your password it can be inputted within a random string of number If your password is 888888 the following combinations will still unlock the door 1289888...

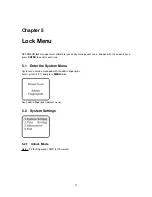
Страница 11: ...with the arrows keys press ENTER to confirm each step 5 1 Enter the System Menu System can only be managed with the admin fingerprint Start system 3 2 1 and press MENU twice Scan admin fingerprint de...

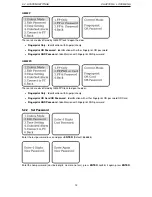
Страница 12: ...erprint AND password G800FPC There are 3 modes offered by G800FPC lock to open the door Fingerprint Only Identification with fingerprint only Fingerprint OR Card OR Password Identification with either...

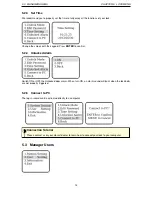
Страница 13: ...ss ENTER to confirm 5 2 4 Unlocked Alarm Switch ON or OFF the Unlocked door alarm When turn ON an alarm sound will buzz when the lock bolts are not properly triggered 5 2 5 Connect to PC The log in re...

Страница 14: ...ecial attention to the following The admins can manage the whole system choose them carefully Up to 10 admins can be registered in the system Only a factory reset can delete admins from the system Use...

Страница 15: ...pad The name can only have a maximum of 6 digits or characters Press MENU to move to the next character Press ENTER to confirm Smart Card Tag Any empty Smart Card or Tag MF1 13 56MHz can be registered...

Страница 16: ...to exit 5 4 2 Users List Users list informs you about registered user in the system Change page with the arrows keys press ENTER to exit 5 4 3 Storage Storage informs you about how many users are reg...

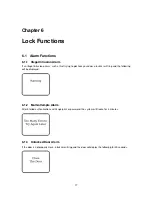
Страница 17: ...k lock your door a buzzer will ring and the following will be displayed 6 1 2 Multi attempts Alarm After 3 failed authentications with fingerprint or password the system will freeze for 3 minutes 6 1...

Страница 18: ...Recycle the used batteries according to the related laws and regulations of your country 3 differents warnings will informed you about the state of your batteries 6 2 1 First Warning At first warning...

Страница 19: ...Card or Mechanical Key 6 4 2 Open Position When the 3 locking bolts are inside the lock turn the locker upwards The lock will always be open The door can always be opened from the outside 6 5 Mechanic...

Страница 20: ...s User Fingerprints Password Log in Record Time Steps to proceed to a factory reset 1 Open the battery cover leave one set of 4 batteries and take one single battery out 2 Keep press Reset Button with...

Страница 21: ...erral to the nearest DESSMANN AUTHORIZED REPAIR CENTER In some instances it may be necessary for you to ship the complete product FREIGHT PRE PAID AND INSURED FOR LOSS OR DAMAGE to the nearest service...

Страница 22: ...Chapter 8 Contact Us Maintenance Repair Operations Tel 86 571 8711 9266 Fax 86 571 8711 9299 Mail mro dessmannlock com www dessmannlock com 22...

Отзывы: