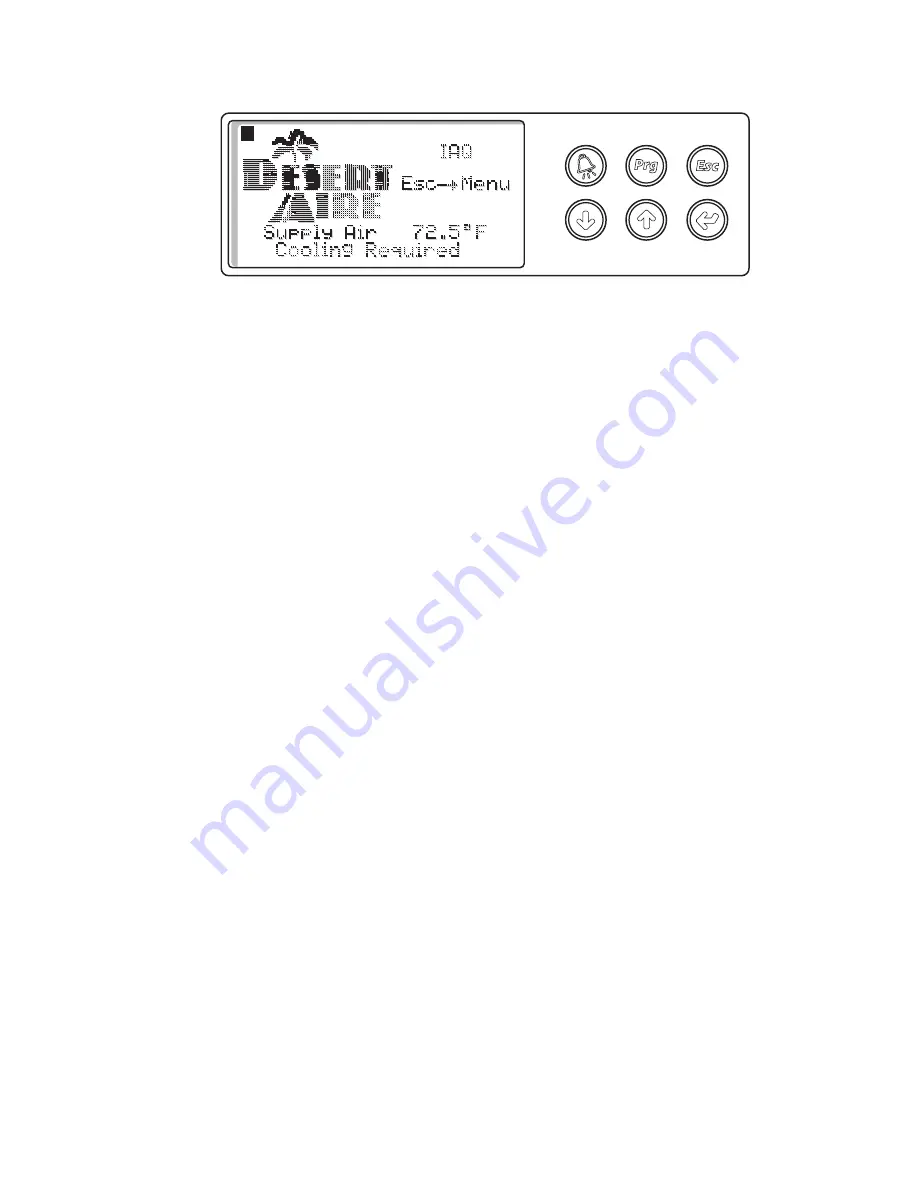
Desert Aire CM35xx Скачать руководство пользователя страница 7

7


Figure 2


The IDT, Figure 2, allows the operator to monitor the operation and adjust the setpoints of the 


Desert Aire dehumidifi er.  The IDT has an LCD screen and 6 keys.  The keys on the top row are 


the ALARM key shown as an alarm bell, PROGRAM key abbreviated “Prg” and the ESCAPE key 


abbreviated “Esc.”  The keys on the bottom row are the UP key shown as an up arrow, the 


DOWN key shown as a down arrow and the ENTER key shown as a left arrow.


The Home Screen will display the Desert Aire logo and the dehumidifi er type in the upper right. 


Below it, “Esc

Menu”, indicates that if the Esc key is pressed, the MAIN MENU will be displayed. 


On any other screen, pressing Esc will take you back one screen.  The bottom two rows will 


display the specifi c unit data which might include occupancy status and zone conditions.


Menu screens allow the user to select from a series of actions.  The action that is capitalized on 


the screen will be selected when the ENTER key is pressed.  To cycle through the selections on 


a menu screen, use the UP and DOWN keys.


If setpoints or selections can be altered on a screen, the ENTER key will cycle through those 


items.  Once the cursor is over an item, the UP and DOWN arrow keys will modify the setting. 


Numeric values will require that the ENTER key be pressed to accept the value.  An ‘on’ or ’off’ 


selection will be altered as soon as the UP or DOWN keys are pressed.


To view the alarms from any menu, simply press the ALARM key. The UP and DOWN keys will 


show any active alarm. Any time an alarm is triggered, the red LED behind the ALARM key will 


light.  This LED will remain on until the alarm is acknowledged. Alarm acknowledgement and 


history instructions are shown on the main Alarm Screen. To escape from the alarm screens, 


press the Esc key.


Screens which display a small up arrow in the upper right and a small down arrow in the lower 


left are part of a series of screens which can be accessed by pressing either the UP or DOWN 


arrow keys. If the operator has not pressed a key for a while, the remote terminal will return to 


the Home Screen.

Desert Aire - CM35xx Quick Start Guide

Содержание CM35xx

Страница 1: ......

Страница 2: ...2 ...

Страница 3: ...8 3 5 Occupancy Schedule 8 3 5 1 Schedule Options 9 3 5 2 Current Schedule 9 3 5 3 Temporary Holidays 9 3 5 4 Annual Holidays 9 3 5 5 Set Time 9 3 6 Unit Revision 9 3 7 Service Menu 10 3 8 Unit Status 10 3 9 Factory Configuration 10 3 10 I O Status 10 3 11 Pressure Cutouts 10 3 12 Sensor Offsets 11 3 13 Building Management Communication 11 4 Alarm Menu 11 4 1 Alarm History Screen 11 Desert Aire CM3...

Страница 4: ...4 Desert Aire CM35xx Quick Start Guide ...

Страница 5: ...ote display terminal RDT Although the placement of the keys for these two options is different the key functions are exactly the same Figure 1 shows an RDT and Figure 2 shows an IDT The ND SA and LC products will use the RDT and the QM will use the IDT The IAQ products will use a combination of RDTs and IDTs typically depending on the physical placement of the controller in the unit If the control...

Страница 6: ...ontroller is pre programmed and configured at the factory for use in the application you have specified The RDT Figure 1 allows the operator to monitor the operation and adjust the setpoints of the Desert Aire dehumidifier The RDT has an LCD screen and 6 keys The keys on the left hand side of the RDT top to bottom are the ALARM key shown as an alarm bell PROGRAM key abbreviated Prg and the ESCAPE key...

Страница 7: ...y is pressed To cycle through the selections on a menu screen use the UP and DOWN keys If setpoints or selections can be altered on a screen the ENTER key will cycle through those items Once the cursor is over an item the UP and DOWN arrow keys will modify the setting Numeric values will require that the ENTER key be pressed to accept the value An on or off selection will be altered as soon as the...

Страница 8: ...efer to Section 3 for setpoint modification instructions 3 4 Temporary Occupancy This screen allows the operator to set the unit into occupied mode for a preset amount of time Press the ENTER key and enter in the hours and minutes you would like the unit to be temporarily in the occupied mode When the cursor is blinking over the Press Prg to set message pressing the Prg key will override the schedu...

Страница 9: ...idays can be set from this screen Select the number to assign to the Annual Holiday and then select the Start Date and the End Date for that holiday 3 5 4 Annual Holidays The Annual Holiday settings are for holidays with dates that remain constant year to year such as New Years Day and the 4th of July Up to 10 different annual holidays can be set from this screen Select the number to assign to the...

Страница 10: ...puts analog inputs digital outputs and analog outputs The Digital Input Screen will display the state of any switch wired to a digital input on the wiring diagram The digital inputs are designated as ID on the controller and include switches or contacts The Analog Input Screen displays the status of any sensors wired to the analog inputs on the wiring diagram The analog inputs are designated as B ...

Страница 11: ...he ModBus network 4 Alarm Menu The ALARM MENU can be accessed anytime by pressing the ALARM key The main Alarm Screen includes the instructions for viewing and resetting the alarms as well as a means to access the Alarm History Screen Pressing the ENTER key while viewing the main Alarm Screen will reset any alarm that has returned to its safe state Please note that active alarms can only be reset ...

Страница 12: ...12 N120 W18485 Freistadt Road Germantown WI 53022 E mail info desert aire com Ph 262 946 7400 Fax 262 946 7401 Website www desert aire com 56 5 10 ...

Отзывы: