TB-3033
Page 3 of 5
© 2011 DESCO INDUSTRIES INC.
Employee Owned
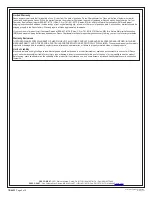
Figure 6: Mounting the console to the mounting plate
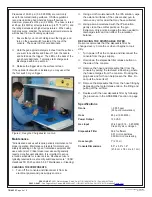
Figure 7: Inserting the disposable filter
Figure 8: Connecting the hose and disposable filter to the
console
II. Connect the hose and disposable filter to the console.
Press the disposable filter release button on the front of
the console to lock it down. Push the fitting containing
the disposable filter all the way into the opening in the
console until it latches with a click. It fits only in the
correct orientation. The small plastic fitting on the end
of the disposable filter must align with the metal guide
coupling in the console. You may have to wiggle the
disposable filter slightly while inserting it.
Choose a location that will be convenient to the work area
and the gas supply. The Console takes up very little space
and is adaptable to a variety of permanent or temporary
installations. To minimize bends in the gun hose, orient the
console so that the open end points toward the work area
and the male connector points toward the air supply.
I. Use the included screws to attach the supplied
mounting plate to the threaded holes on the back of the
console.
III. Attach the included 1/4” NPT female quick connect
fitting to your gas supply line. Slide the outer ring on
the fitting towards the supply line to insert the mating
fitting on the console. You can attach the console
directly to the gas supply pipe or attach it using a hose
(not supplied). If necessary, use a prefilter as defined
in the COMPRESSED GAS REQUIREMENTS section
of this technical bulletin.
IV. If you would like to use the optional foot switch, plug its
cable to the jack located at the top of the console.
Operation
NOTE: Our recommendation is to set the pressure regulator
on your air or nitrogen supply between 20 and 65 psi
(0.14-0.45 MPa). Discharge times vary depending on air
pressure.
DESCO WEST
- 3651 Walnut Avenue, Chino, CA 91710 • (909) 627-8178 • Fax (909) 627-7449
DESCO EAST
- One Colgate Way, Canton, MA 02021-1407 • (781) 821-8370 • Fax (781) 575-0172 • Website:
Desco.com
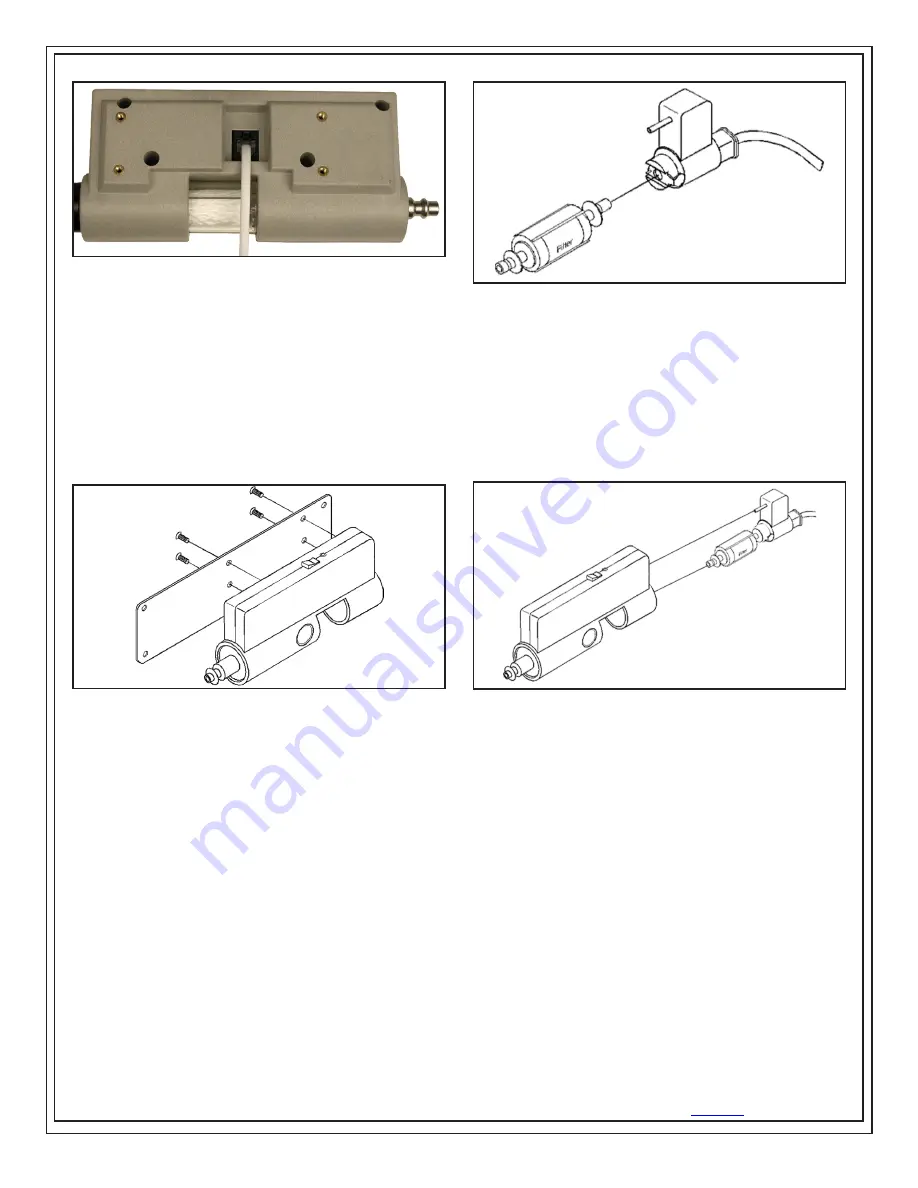
Figure 5: Connecting the cable from the Wall Transformer
to the back of the console
II. Attach the plate to a flat surface, such as a wall or back
of a work bench, using suitable screws and fasteners.
When mounting to a hollow wall be sure to use #8
screws and 3/4” length anchors as a minimum.
MOUNTING TO A GAS SUPPLY
When a gas supply is close to the work area and fitted
with a standard industrial interchange quick coupling, you
may attach the console to the air supply fitting directly. If
necessary, use a prefilter as defined in the COMPRESSED
GAS REQUIREMENTS section of this technical bulletin.
ASSEMBLY
NOTE: Protect the hose from sharp objects, abrasion, and
high temperatures. Do not pull or pinch the hose while
assembling the components.
I. Insert the larger diameter end of the air filter into the
end of the flexible air hose connector. Press the metal
filter release tab at the end of the hose until it locks into
place.


