background image

107434-01C

For more information, visit www.desatech.com

For more information, visit www.desatech.com

18

TROUBLESHOOTING

Continued

OBSERVED PROBLEM

Burner does not light after ODS/pilot is lit

Delayed ignition burner

Burner backfiring during combustion

Slight smoke or odor during initial operation

Moisture/condensation noticed on windows

Heater produces a whistling noise when
burner is lit

Dark residue on logs or inside of stove

White powder residue forming within burner
box or on adjacent walls or furniture

REMEDY

1. Clean burner (see Cleaning and Main-

tenance,  pages 15 and 16) or replace
burner orifice

2. Contact local natural gas company
3. Replace burner orifice
4. Reconnect leads (see wiring diagram)

5. Replace battery in transmitter and receiver

1. Contact local natural gas company
2. Clean burner (see Cleaning and Mainte-

nance, pages 15 and 16) or replace burner
orifice

1. Clean burner (see Cleaning and Main-

tenance,  pags 15 and 16) or replace
burner orifice

2. Replace damaged burner
3. Replace gas control

1. Check burner for dirt and debris. If found,

clean burner (see Cleaning and Mainte-
nance, 
pags 15 and 16)

2. Replace gas control
3. Problem will stop after a few hours of

operation

1. Refer to Air for Combustion and Ventila-

tion requirements (page 4)

1. Turn control knob to LO position and let

warm up for a minute

2. Operate burner until air is removed from

line. Have gas line checked by local natu-
ral gas company

3. Observe minimum installation clearances

(see page 7)

4. Clean burner (see Cleaning and Main-

tenance,  pages 15 and 16) or replace
burner orifice

1. Properly locate logs (see Installing Logs,

page 9)

2. Eliminate source of drafts around heater

3. Clean out air holes at burner inlet. Peri-

odically repeat as needed

4. Remove blockage

1. Turn heater off when using furniture pol-

ish, wax, carpet cleaners, or similar
products

POSSIBLE CAUSE

1. Burner orifice clogged

2. Inlet gas pressure is too low
3. Burner orifice diameter is too small
4. Thermopile leads disconnected or im-

properly connected

5. Burners will not come on in remote position

1. Manifold pressure is too low
2. Burner orifice clogged

1. Burner orifice is clogged or damaged

2. Damaged burner
3. Gas regulator defective

1. Not enough air

2. Gas regulator defective
3. Residues from manufacturing processes

and logs curing

1. Not enough combustion/ventilation air

1. Turning control knob to HI position when

burner is cold

2. Air in gas line

3. Air passageways on heater blocked

4. Dirty or partially clogged burner orifice

1. Improper log placement

2. Drafts or other air currents affecting

flame pattern

3. Air holes at burner inlet blocked

4. Burner flame holes blocked

1. When heated, vapors from furniture pol-

ish, wax, carpet cleaners, etc. may turn
into white powder residue

TROUBLESHOOTING

Содержание 107434-01C.pdf

Страница 1: ...instructions If you cannot reach your gas supplier call the fire department Installation and service must be performed by a qualified installer service agency or the gas supplier WARNING Improper installation ad justment alteration service or main tenance can cause injury or property damage Refer to this manual for cor rect installation and operational proce dures For assistance or additional in f...

Страница 2: ...WARNING Any change to this stove or its con trols can be dangerous WARNING Do not allow fans to blow directly into the heater Avoid any drafts that alter burner flame patterns Ceiling fans can create drafts that alter burner flame patterns Altered burner patterns can cause sooting WARNING Do not use a blower insert heat exchanger insert or other accessory not approved for use with this heater Due ...

Страница 3: ... shutting off see Trouble shooting pages 17 through 19 9 Do not run heater where flammable liquids or vapors are used or stored under dusty conditions 10 Do not use this stove to cook food or burn paper or other objects 11 Do not use heater if any part has been exposed to or under water Immediately call a qualified service technician to in spect the room heater and to replace any part of the contr...

Страница 4: ...all into one of the three following ventilation classifications 1 Unusually Tight Construction 2 Unconfined Space 3 Confined Space The information on pages 4 through 6 will help you classify your space and provide adequate ventilation Unusually Tight Construction The air that leaks around doors and windows may provide enough fresh air for combustion and ventilation However in buildings of unusuall...

Страница 5: ...t vent draws com bustion air from the outdoors and vents to the outdoors Example Gas water heater _____________ Btu Hr Vent free heater _____________ Btu Hr Total _____________ Btu Hr 4 Compare the maximum Btu Hr the space can support with the actual amount of Btu Hr used __________________ Btu Hr maximum the space can support __________________ Btu Hr actual amount of Btu Hr used Example 51 200 B...

Страница 6: ...rmostat controlled power vent Heated air entering the attic will activate the power vent Outlet Air Ventilated Attic Outlet Air Inlet Air Inlet Air Ventilated Crawl Space To Crawl Space To Attic Or Remove Door into Adjoining Room Option 3 Ventilation Grills Into Adjoining Room Option 2 Ventilation Grills Into Adjoining Room Option 1 12 12 O F F P I L O T O N H I L O WARNING Never install the heate...

Страница 7: ... inches B Clearances from outermost point of stove top to any combus tible back wall should not be less than 6 inches Includes cor ner installations C Clearances from the stove top to the ceiling should not be less than 48 inches Figure 4 Minimum Clearance to Walls and Ceiling Front View 12 Minimum 12 Minimum 48 Minimum Ceiling Side Wall Side Wall Top View Side View Front of Stove Unit Back Wall S...

Страница 8: ...er See Accessories page 24 Minimum inlet pressure for purpose of input adjustment CAUTION Avoid damage to regulator Hold gas regulator with wrench when connecting it to gas piping and or fittings Installation must include an equipment shutoff valve union and plugged 1 8 NPT tap Locate NPT tap within reach for test gauge hook up NPT tap must be upstream from heater see Figure 6 IMPORTANT Install eq...

Страница 9: ... to Appliance page 14 ON POSIT O POS Figure 7 Equipment Shutoff Valve Closed Equipment Shutoff Valve Open WARNING Failure to position the parts in accor dance with these diagrams or failure to use only parts specifically approved with this heater may result in property damage or personal injury INSTALLING LOGS It is very important to install the logs exactly as instructed Do not modify logs Only u...

Страница 10: ...rough the rectangular opening in the rear panel see Figure 12 5 Disconnect power cord wires from blower motor if connected see Figure 13 6 Disconnectgreengroundwirefromblowerhousing ifconnected by removing screw holding wire terminal see Figure 13 7 Remove the two blower mounting brackets from the rear panel by removing two screws each see Figure 14 8 Attach the two mounting brackets to blower hou...

Страница 11: ...ELECTRICAL GROUNDING INSTRUCTIONS This appliance is equipped with a three prong grounding plug for your protection against shock hazard and should be plugged directly into a properly grounded three prong receptacle 101584 05 120 Vac 60 Hz 78 Amps DESA International Bowling Green KY WARNING Never attempt to service heater while it is plugged in operating or hot Burns and electrical shock could resu...

Страница 12: ...near blower see Figure 19 14 Align holes in the switch cover assembly with holes in firebox back panel Using 3 screws from step 11 attach assembly to firebox back panel Tighten screws firmly see Figure 19 15 Working from the rear of the stove place entire power cord including speed control housing in lower control compartment see Figure 20 16 Route ends of 3 wire power cord up from the lower contr...

Страница 13: ...echnician to inspect the appliance and to replace any part of the control system and any gas control which has been under water WARNING ELECTRICAL GROUNDING INSTRUCTIONS Thisapplianceisequippedwithathree prong ground ing plug for your protection against shock hazard and should be plugged directly into a properly grounded three prong receptacle INSTALLATION Continued 18 Connect the black wire from ...

Страница 14: ... thermostat will gradually modulate the heat output and flame height from higher to lower settings or pilot in order to maintain the comfort level you select The ideal comfort setting will varybyhouseholddependingupontheamountofspacetobeheated the output of the central heating system etc Note Selecting the Hi setting with the control knob will cause the burners to remain fully on without modulatin...

Страница 15: ...qualified service person Heater may need more frequent cleaning due to excessive lint from carpeting bedding material pet hair etc CLEANING BURNER INJECTOR HOLDER AND PILOT AIR INLET HOLE The primary air inlet holes allow the proper amount of air to mix with thegas Thisprovidesacleanburningflame Keeptheseholesclearof dust dirt lint and pet hair Clean these air inlet holes prior to each heatingseas...

Страница 16: ... air inlet hole about two inches from where the pilot flame comes out of the pilot assembly see Figure 28 With the unit off lightly blow airthroughtheairinlethole Youmayblowthroughadrinkingstraw if compressed air is not available CLEANING AND MAINTENANCE Continued TECHNICAL SERVICE You may have further questions about installation operation or troubleshooting If so contact DESA International s Tec...

Страница 17: ...d 7 Control valve damaged REMEDY 1 Reconnect ignitor cable 2 Free ignitor cable if pinched by any metal or tubing Keep ignitor cable dry 3 Tighten nut holding piezo ignitor to base panel of log set Nut is located behind base panel 4 Replace ignitor cable 5 Replace piezo ignitor 6 Replace pilot assembly 7 Replace pilot assembly 1 Turn on gas supply or open equipment shutoff valve 2 Turn control kno...

Страница 18: ...knob to LO position and let warm up for a minute 2 Operate burner until air is removed from line Have gas line checked by local natu ral gas company 3 Observe minimum installation clearances see page 7 4 Clean burner see Cleaning and Main tenance pages 15 and 16 or replace burner orifice 1 Properly locate logs see Installing Logs page 9 2 Eliminate source of drafts around heater 3 Clean out air ho...

Страница 19: ...ces unwanted odors Heater shuts off in use ODS operates Gas odor even when control knob is in OFF position Gas odor during combustion Burner flame is excessively large and is very near or touches the top of firebox REMEDY 1 This is common with most heaters If noise is excessive contact qualified ser vice person 1 Open window and ventilate room Stop using odor causing products while heater is runni...

Страница 20: ...7434 01C For more information visit www desatech com For more information visit www desatech com 20 ILLUSTRATED PARTS BREAKDOWN S39NT 7 6 9 4 10 3 2 1 14 5 12 11 10 8 13 ILLUSTRATED PARTS BREAKDOWN S39NT ...

Страница 21: ... 24 of this manual KEY PART NO NUMBER DESCRIPTION QTY 1 107433 02 Log Set 1 2 104285 01 ODS Pilot NG 1 3 098249 01 ODS Nut 2 4 107090 01 Burner Outlet Tube 1 5 107089 01 Inlet Tube 1 6 102843 01 Burner Clip 1 7 099056 16 Burner Orifice Injector 1 8 101329 20 Gas Control Valve 1 9 102772 01 Burner 1 10 099387 09 Pilot Tube 1 11 098271 10 Ignitor Cable 1 12 101381 01 Piezo Ignitor and Cover 1 13 105...

Страница 22: ...n visit www desatech com For more information visit www desatech com 22 ILLUSTRATED PARTS BREAKDOWN S39NT 1 10 4 13 3 2 14 7 16 15 11 18 20 5 6 9 8 17 12 23 21 19 19 26 26 22 22 21 25 24 ILLUSTRATED PARTS BREAKDOWN S39NT Stove Body ...

Страница 23: ...080 01CK Firebox Floor 1 10 107081 01CJ Firebox Top 1 11 107365 01CK Screen Assembly 1 12 101382 01 Valve Bracket 1 13 107092 01 Brass Trim Bottom 1 14 107093 01 Brass Trim Firebox 1 15 106754 01 Knob 1 16 101386 02 Door Hinge 2 17 099230 02 Shoulder Screw 4 18 107079 01CJ Heat Deflector 1 19 102455 12 Louver Small 2 20 102455 13 Louver Large 1 21 107091 01CK Support End Louver 2 22 107084 01CK Su...

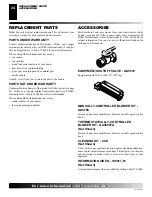
Страница 24: ...ral information When calling DESA International have ready model number of your heater the replacement part number ACCESSORIES Purchase these heater accessories from your local dealer or Parts Central see page 25 If they cannot supply these accessories call DESA International s Sales Department at 1 866 672 6040 for referral information You can also write to the address listed on the back page of ...

Страница 25: ... Completed College Completed Graduate School 13 Age of Purchaser Under 20 20 29 30 39 40 49 50 59 60 or Over 14 Buyer s total annual household income Under 15 000 15 000 to 19 999 20 000 to 34 999 35 000 to 49 999 50 000 to 74 999 75 000 to 99 999 100 000 and Over 15 Store where product was purchased Name ______________________________________ City _______________________ State __________ 16 In ch...

Страница 26: ...107434 01C For more information visit www desatech com For more information visit www desatech com 26 2701 Industrial Drive P O Box 90004 Bowling Green KY 42102 9004 TM Postage Required ...

Страница 27: ...4 Fax 1 800 846 0090 franktalk aol com Master Parts Dist 1251 Mound Ave NW Grand Rapids MI 49504 2672 616 791 0505 1 800 446 1446 Fax 616 791 8270 www nbmc com Washer Equipment Co 1715 Main Street Kansas City MO 64108 2195 KS MO AR 816 842 3911 www washerparts com East Coast Energy Products 707 Broadway W Long Branch NJ 07764 1542 732 870 8809 1 800 755 8809 www njplaza com ecep Dayton Hardware P ...

Страница 28: ...proper maintenance or defects caused by improper installation Travel diagnostic cost labor transportation and any and all such other costs related to repairing a defective heater will be the responsibility of the owner TO THE FULL EXTENT ALLOWED BY THE LAW OF THE JURISDICTION THAT GOVERNS THE SALE OF THE PRODUCT THIS EXPRESS WARRANTY EXCLUDES ANY AND ALL OTHER EXPRESSED WARRANTIES AND LIMITS THE D...

Отзывы: