20
ENGLISH
4
5
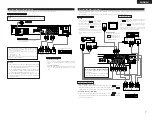
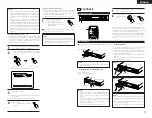
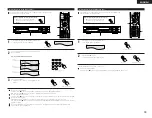
Start playback on the selected component.
•
For operating instructions, refer to the component’s
manual.
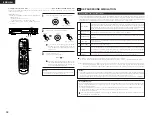
Either turn the MASTER VOLUME dial on the main unit
or use the VOLUME buttons on the remote control unit
to adjust the volume.
M.VOLUME -20
The volume level is displayed on
the display.
MASTER VOLUME
VOLUME
Main unit
Remote control unit
•
The volume can be adjusted within the range of -60
to 0 to +18 dB. Note that depending on the input
signal, surround mode, speaker settings and channel
level setting, it may not be possible to adjust the
volume up to +18 dB.
Input mode when playing DTS sources
•
If DTS-compatible CDs are played in the “PCM” mode,
noise is output because DTS playback is not possible.
To play a DTS-compatible source, be sure to set the
input mode to “AUTO” or “DTS”.
•
Noise may be generated at the beginning of playback
and while searching during DTS playback in the AUTO
mode. If so, play in the DTS mode.
STATUS
FUNCTION
/ SELECT
STATUS
2
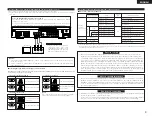
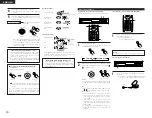
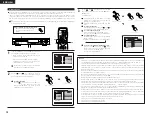
To check the currently playing program
source, etc.
Press the STATUS button.
Main unit
Remote control
unit
Main unit
AUTO
ANA
DIG
PCM DTS
ANA
DIG
PCM
AUTO
DTS
ANA
DIG
PCM
AUTO
DTS
ANA
DIG
PCM
AUTO
DTS
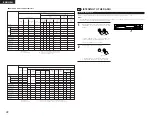
Input mode display
•
In the AUTO mode
•
In the DIGITAL
PCM mode
•
In the DIGITAL
DTS mode
•
In the ANALOG
mode
One of these lights, depending
on the input signal.
Lit
PRO LOGIC II
DIG
PCM
DIGITAL
DTS
DIG
PCM
DIGITAL
DTS
DIG
PCM
DIGITAL
DTS
One of these
lights,
depending on
the input signal.
Input signal display
•
DOLBY DIGITAL
•
DTS
•
PCM
•
“DIG” lights when digital signals are input properly. If “DIG”
is flashing, check whether the connections are proper and
whether the input component’s power is on.
\
To perform this operation on the main unit, press the
STATUS button, then turn the FUNCTION/SELECT
knob.
The current program source and surround settings are
shown on the display each time the button is pressed.
(When the function is set to DVD, the information is also
displayed on the TV screen.)
Input mode when playing DTS sources
•
When playing CDs containing recordings of live
concerts, etc., in the “AUTO” mode, the sound may be
slightly broken at the beginning. If this happens, switch
to the “PCM” mode.
After starting playback
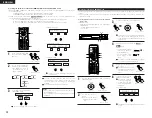
[1] Adjusting the sound quality (SDB / TONE)
The SDB/TONE function will not work in the direct mode.
1
2
VOLUME
ENTER
BAND
MODE
TOP MENU
SETUP
SDB/TONE
MUTE
SURR.PARA
SUB TITLE
ANGLE
AUDIO
SHIFT
CH.SELECT
CH
T.TONE
TU
PROG/DIRECT REPEAT A-B
REPEAT
RANDOM
DVD
STATUS
CDR/MD/TAPE TUNER/TV/VCR
VCR POWER
TV POWER
NTSC/PAL
MEMO
POWER
1
2
2
1
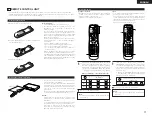
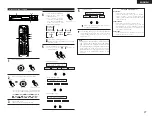
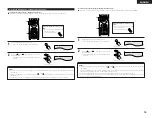
Press the SDB/TONE button.
•
The tone switches as follows each time the
SDB/TONE button is pressed.
SDB/TONE
SDB/TONE
Main unit
Remote control unit
DEFEAT
SDB
(ON/OFF)
BASS
TREBLE
2
With the name of the volume to be adjusted selected,
turn the FUNCTION/SELECT knob or cursor button (
,
) to adjust the level.
FUNCTION
/ SELECT
Main unit
Remote control unit
DEFEAT
•
The signals do not pass through the SDB, bass and
treble adjustment circuits, providing higher quality
sound.
SDB
•
Either turn the FUNCTION / SELECT dial or use the
(
,
) cursor buttons to select “ON” or “OFF”.
BASS, TREBLE
•
To increase the bass or treble: Turn the control
clockwise or press the cursor button. (The bass or
treble sound can be increased to up to +10 dB in
steps of 2 dB.)
•
To decrease the bass or treble: Turn the control
clockwise or press the cursor button. (The bass or
treble sound can be decreased to up to –10 dB in
steps of 2 dB.)
✽
If no operation is performed within 4 seconds, the
display switches back to what was previously
displayed.
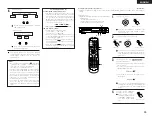
[2] Turning the sound off temporarily (MUTING)
VOLUME
BAND
MODE
TOP MENU
SETUP
SDB/TONE
MUTE
SURR.PARA
SUB TITLE
ANGLE
AUDIO
SHIFT
CH.SELECT
CH
T.TONE
TU
PROG/DIRECT REPEAT A-B
REPEAT
RANDOM
DVD
REMOCON MODE
STATUS
CDR/MD/TAPE TUNER/TV/VCR
VCR POWER
TV POWER
NTSC/PAL
MEMO
POWER
1
1
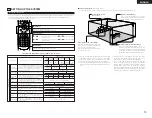
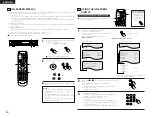
Use this to turn off the audio output temporarily.
Press the MUTE button.
✽
Cancelling MUTE mode.
Press the MUTE button again.
MUTE
Remote control unit
NOTE:
•
The setting is cancelled if the set’s power is turned off.
[3] Listening over head phones
1
1
Connect the headphones to the PHONES jack of the
front panel.
✽
The output to the speaker automatically is turned
off and no sound is produced from the speakers.
PHONES


