5
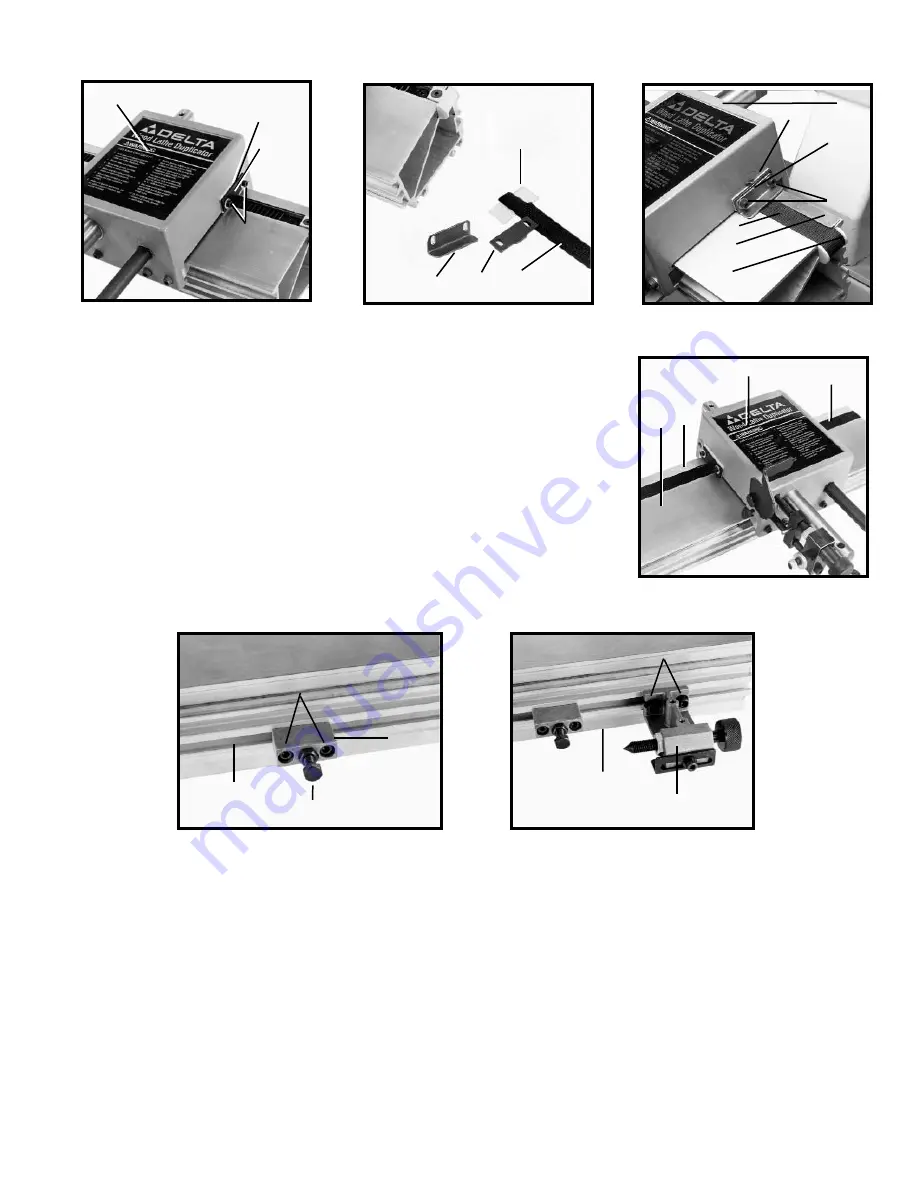
Fig. 16
Fig. 17
Fig. 18
4.
Remove the two screws and washers (D) Fig. 16, wiper, (E) and retainer
plate (F) from each side of the carriage (G).
5.
Place one end of belt (L) Fig. 17 on wiper (E) and cover with retainer plate
(F) and angle bracket (F2).
NOTE:
Cut-out section of belt (L) must be positioned
with, or slightly below, right side of wiper (E).
6.
Line up holes in wiper (E) Fig. 18, retainer plate (F), and angle bracket with
the two holes on the side of the carriage (G) and fasten the belt (L) to the car-
riage with the two hex socket head screws and flat washers (D) removed earli-
er.
7.
Attach belt (L) Fig. 18 under the lip (M) of the duplicator rail and around the
guide (B). Pass belt (L) inside and through duplicator rail (C) Fig. 19 and out the
other end of the duplicator rail.
IMPORTANT:
Make certain belt is not twisted
inside duplicator rail.
8.
Wrap the loose end of the belt (L) Fig. 19 around the guide on the left side
of the rail (C) and under the lip (M) of the guide rail. Fasten the belt (L) to the side
of the carriage (G) by repeating
STEPS 5
and
6
.
G
F
E
D
E
F
L
G
F
E
D
L
B
M
Fig. 19
C
L
M
G
Fig. 20
Fig. 21
ATTACHING PATTERN SUPPORT BRACKETS TO DUPLICATOR RAIL
1.
Slide pattern support bracket (A) Fig. 20 into bottom channel of duplicator rail (B) and tighten two screws (C).
2.
Thread a M8 x 40mm hex head screw (D) with M8 hex nut into face of pattern support bracket (A). Adjustments
will be made later.
3.
Attach remaining pattern support bracket to opposite end of duplicator rail in the same manner.
ATTACHING PATTERN HOLDING BRACKETS TO DUPLICATOR RAIL
1.
Slide pattern holding bracket (A) Fig. 21 into bottom channel of duplicator rail (B) and tighten two screws (C).
Adjustments will be made later.
2.
Assemble remaining pattern holding bracket to the opposite end of duplicator rail in the same manner.
C
A
D
B
C
B
A
F2
Содержание 46-408
Страница 19: ...19 NOTES...


