background image

Power Management Modes 

If you have VESA's DPM™ compliance display card or software installed in your PC, the monitor automatically reduces its power consumption when not in use. This is 

referred to as Power Save Mode. The monitor automatically resumes functioning when the system detects input from the keyboard, mouse or other input devices.The 
following table shows the power consumption and signaling of this automatic power saving feature: 


Activate the computer and the monitor to gain access to the 

OSD

.


* Zero power consumption in OFF mode can only be achieved by disconnecting the main cable from the monitor.


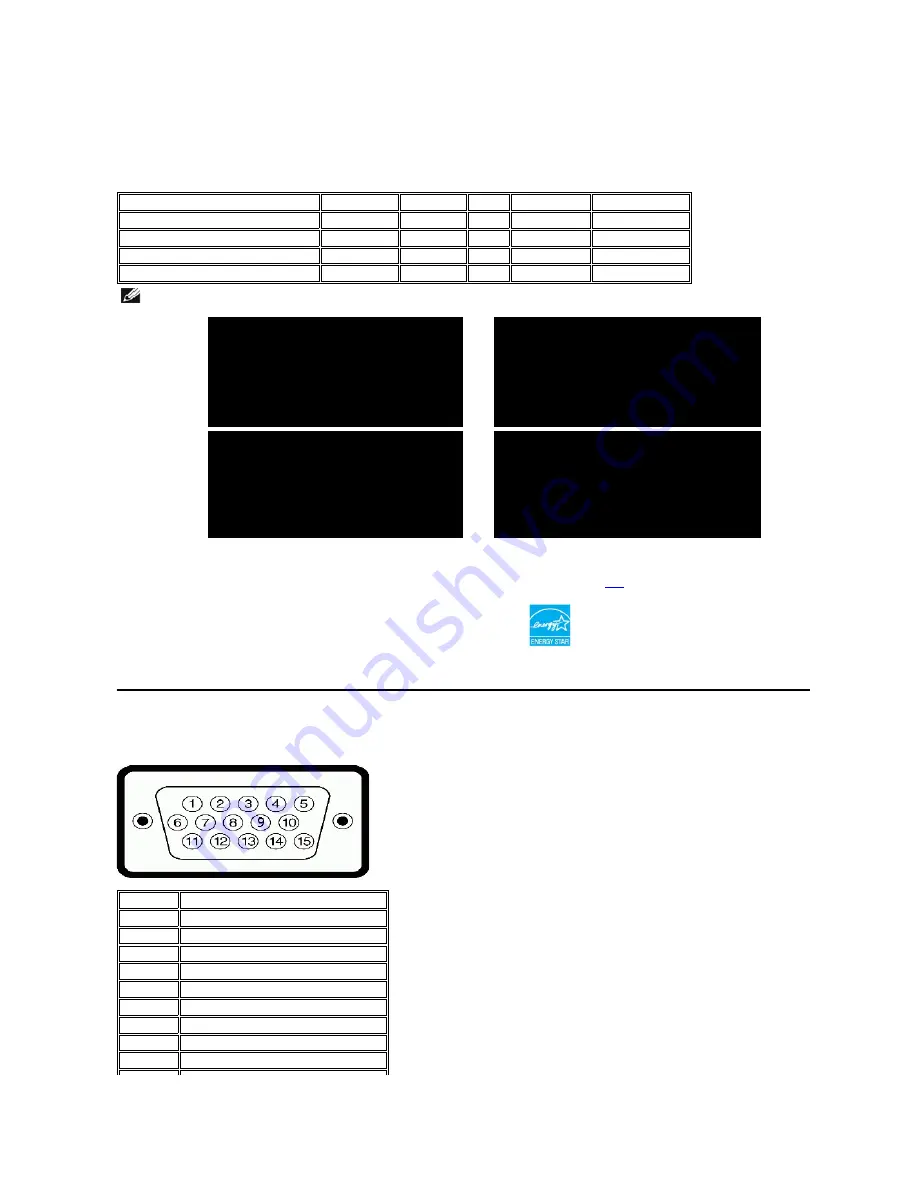
Pin Assignments 

15-pin D-Sub connector 


VESA Modes


Horizontal Sync


Vertical Sync  Video


Power Indicator


Power Consumption


Normal operation (with Dell Soundbar active)


Active


Active


Active 


Blue


75 W (maximum)


Normal operation


Active


Active


Active 


Blue


32 W (typical)


Active-off mode


Inactive


Inactive


Blanked


Amber


Less than 2 W


Switch off


-


-


-


Off


Less than 1 W


NOTE: 

The OSD only functions in the normal operation mode. One of the following messages appears when the Menu or Plus buttons are pressed when in 

Active-off mode.


1 : Auto Detect (Analog Input)


In Power Save Mode


Press computer power button


or any key on keyboard or move mouse


or 


1 : Auto Detect (Digital Input)


In Power Save Mode


Press computer power button


or any key on keyboard or move mouse


2: Analog Input


In Power Save Mode


Press computer power button


or any key on keyboard or move mouse


or 


3: Digital Input


In Power Save Mode


Press computer power button


or any key on keyboard or move mouse


This monitor is 

ENERGY STAR

®

-compliant as well as TCO '99 power management compatible.


Pin Number


Monitor Side of the 15-pin Side Signal Cable


1


Video-Red


2


Video-Green


3


Video-Blue


4


GND


5


Self-test 


6


GND-R


7


GND-G


8


GND-B


9


DDC +5V


Содержание S199WFP - 19" LCD Monitor

Страница 1: ...ed in this document to refer to either the entities claiming the marks and names or their products Dell Inc disclaims any proprietary interest in trademarks and trade names other than its own Model S199WFP August 2007 Rev A00 About Your Monitor Front View Back View Side View Bottom View Monitor Specifications Caring for your Monitor Using Your Monitor Stand Attaching the Stand Organizing Your Cabl...

Страница 2: ...r Monitor Front View Back View 1 Input signal select button 2 OSD menu Select button 3 Brightness and Contrast Down button 4 Auto adjust Up button 5 Power On Off button with LED indicator 1 VESA mounting holes 100mm Behind attached base plate Use to mount the monitor 2 Barcode serial number label Refer to this label if you need to contact Dell for technical support ...

Страница 3: ...undbar mounting brackets Attach the optional Dell Soundbar 7 Cable holder Help organize cables by placing them through the holder 1 Power connector Insert the power cable 2 Dell Soundbar power connector Connect the power cord for the Soundbar optional 3 Stand anti theft feature Mount a 3 8 screw to make the stand undetachable 4 DVI connector Connect your computer DVI cable 5 VGA connector Connect ...

Страница 4: ...tive Blue 75 W maximum Normal operation Active Active Active Blue 32 W typical Active off mode Inactive Inactive Blanked Amber Less than 2 W Switch off Off Less than 1 W NOTE The OSD only functions in the normal operation mode One of the following messages appears when the Menu or Plus buttons are pressed when in Active off mode 1 Auto Detect Analog Input In Power Save Mode Press computer power bu...

Страница 5: ... M D S Data 1 17 T M D S Data 0 2 T M D S Data 2 10 T M D S Data 1 18 T M D S Data 0 3 T M D S Data 2 Shield 11 T M D S Data 1 Shield 19 T M D S Data 0 Shield 4 No Pin 12 No Pin 20 No Pin 5 No Pin 13 No Pin 21 No Pin 6 DDC Clock 14 5V Power 22 T M D S Clock Shield 7 DDC Data 15 Ground for 5V 23 T M D S Clock 8 No Connect 16 Hot Plug Detect 24 T M D S Clock General Model number S199WFP Flat Panel S...

Страница 6: ...9 60 0 106 5 Electrical The following table lists the monitor electrical feature Video input signals Analog RGB 0 7 Volts 5 positive polarity at 75 ohm input impedance Digital DVI D TMDS 600mV for each differential line positive polarity at 50 ohm input impedance Synchronization input signals Separate horizontal and vertical synchronizations polarity free TTL level SOG Composite SYNC on green AC i...

Страница 7: ... monitor when not in use Back to Contents Page Stand dimensions Height 11 04 inches 280 31 mm Width 10 43 inches 264 84 mm Depth 5 81 inches 147 65 mm Weight with packaging 15 66lbs 7 1 kg Weight with stand assembly and cables 12 79 lbs 5 8 kg Weight without stand assembly For wall mount or VESA mount considerations no cables 8 16 lbs 3 7 kg Weight of stand assembly 2 87 lbs 1 3 kg Environmental T...

Страница 8: ...rantee that interference will not occur in a particular installation If this equipment does cause harmful interference with radio or television reception which can be determined by turning the equipment off and on you are encouraged to try to correct the interference by one or more of the following measures l Reorient the receiving antenna l Relocate the system with respect to the receiver l Move ...

Страница 9: ...on your need 5 Choose the method of contacting Dell that is convenient for you Your Monitor Set up Guide To view PDF files files with an extension of pdf click the document title To save PDF files files with an extension of pdf to your hard drive right click the document title click Save Target As in Microsoft Internet Explorer or Save Link As in Netscape Navigator and then specify a location on y...

Страница 10: ...adjust the image settings CAUTION Before you begin any of the procedures in this section follow the safety instructions or 1 Turn off your computer and disconnect the power cable 2 Connect either the white DVI or the blue VGA cable to the connectors on the computer and the monitor 3 Connect the power cable 4 Turn on your monitor and computer If you do not see an image press the input select button...

Страница 11: ...ect The Menu button is used to open and exit the on screen display OSD and exit from menus and sub menus See Using the OSD Menu C and D Down and Up Use these buttons to adjust decrease increase ranges items in the OSD menu E Power Button and Indicator Use the power button to turn the monitor on and off The Blue light indicates the monitor is on and fully functional An amber light indicates power s...

Страница 12: ...ption 4 Press and button to select the desired parameter 5 Press MENU to enter the slide bar and then use the and buttons according to the indicators on the menu to make your changes 6 Press the MENU button once to return to the main menu to select another option or press the MENU button two or three times to exit from the OSD menu or or NOTE Positioning and Image Settings are only available when ...

Страница 13: ...ction optimizes the display settings for use with your particular setup Select to activate automatic setup and adjustment The following dialog appears on a black screen as the monitor self adjusts to the current input Auto Adjustment allows the monitor to self adjust to the incoming video signal After using Auto Adjustment you can further tune your monitor by using the Pixel Clock Coarse and Phase...

Страница 14: ...g User Preset R G B Normal Preset mean color temperature 6500K l As soon as choose Graphics you can choose Normal Preset Multimedia Preset Gaming Preset Red Preset Blue Preset or User Preset l If you play game in PC choose Gaming Preset l If you view media application like photo clip etc via PC choose Multimedia Preset l If you prefer a warm color choose Red Preset l If you prefer a cool color cho...

Страница 15: ... Time OSD Lock Adjust the settings for the OSD including the location the amount of time the menu remains on the screen and the rotation of the OSD Position of the OSD l To adjust the horizontal position of the OSD use the and buttons and move OSD to the left and right l To adjust the vertical position of the OSD use the and buttons and move OSD down and up OSD Hold Time The OSD stays active for a...

Страница 16: ... options Position settings only Change the settings for Image Position back to original factory settings Color settings only Change the Red Green and Blue settings back to their original factory settings and set the default setting for Normal Preset All settings Change all the user adjustable settings including color position brightness contrast and OSD hold time to the factory defaults The langua...

Страница 17: ... and select Properties 2 Select the Settings tab 3 Set the screen resolution to 1440 x 900 4 Click OK If you do not see 1440 x 900 as an option you may need to update your graphics driver Depending on your computer complete one of the following procedures NOTE If you select disable for DDC CI a warning message as shown in the picture above appears on the screen Then you can select Yes or No accord...

Страница 18: ...to adjust the overall system level a blue LED for power indication and two audio headset jacks Attaching the Dell Soundbar Back to Contents Page 1 Power volume control 2 Power indicator 3 Headphone connectors NOTICE Do not use with any device other than Dell Soundbar NOTE Soundbar Power Connector 12V DC output is for optional Dell Soundbar only 1 Working from the rear of the monitor attach the Sou...

Страница 19: ... turn on both your computer and the monitor If your monitor screen remains blank after you use the previous procedure check your video controller and computer system your monitor is functioning properly OSD Warning Messages One of the following warning messages may appear on the screen indicating that the monitor is out of synchronization CAUTION Before you begin any of the procedures in this sect...

Страница 20: ... l Cycle power on off l These are pixels that are permanently off and this is a natural defect that occurs in LCD technology Brightness Problems Picture too dim or too bright l Perform monitor reset l Push Auto Adjust button l Adjust brightness contrast controls Geometric Distortion Screen not centered correctly l Perform monitor reset on Position Settings Only l Push Auto Adjust button l Adjust t...

Страница 21: ...e l Clear any obstructions between the Soundbar and the user l Confirm that the audio line in plug is completely inserted into the jack of the sound card l Set all Windows volume controls to their midpoints l Decrease the volume of the audio application l Turn the Power Volume knob on the Soundbar counter clockwise to a lower volume setting l Clean and reseat the audio line in plug l Troubleshoot ...

Страница 22: ... of the monitor onto the two tabs on the stand 3 Lower the monitor so that the monitor mounting area snaps on locks to the stand Organizing Your Cables After attaching all necessary cables to your monitor and computer See Connecting Your Monitor for cable attachment use the cable holder to neatly organize all cables as shown above Using the Tilt You can tilt the monitor to best fit your viewing ne...

Страница 23: ...nitor on a stable flat table 2 Lift the stand away from the monitor while pressing the stand release button Back to Contents Page After placing the monitor panel on soft cloth or cushion complete the following steps to remove the stand ...

Отзывы: