


support.dell.com
Microprocessor Board Upgrade Guide
1-13
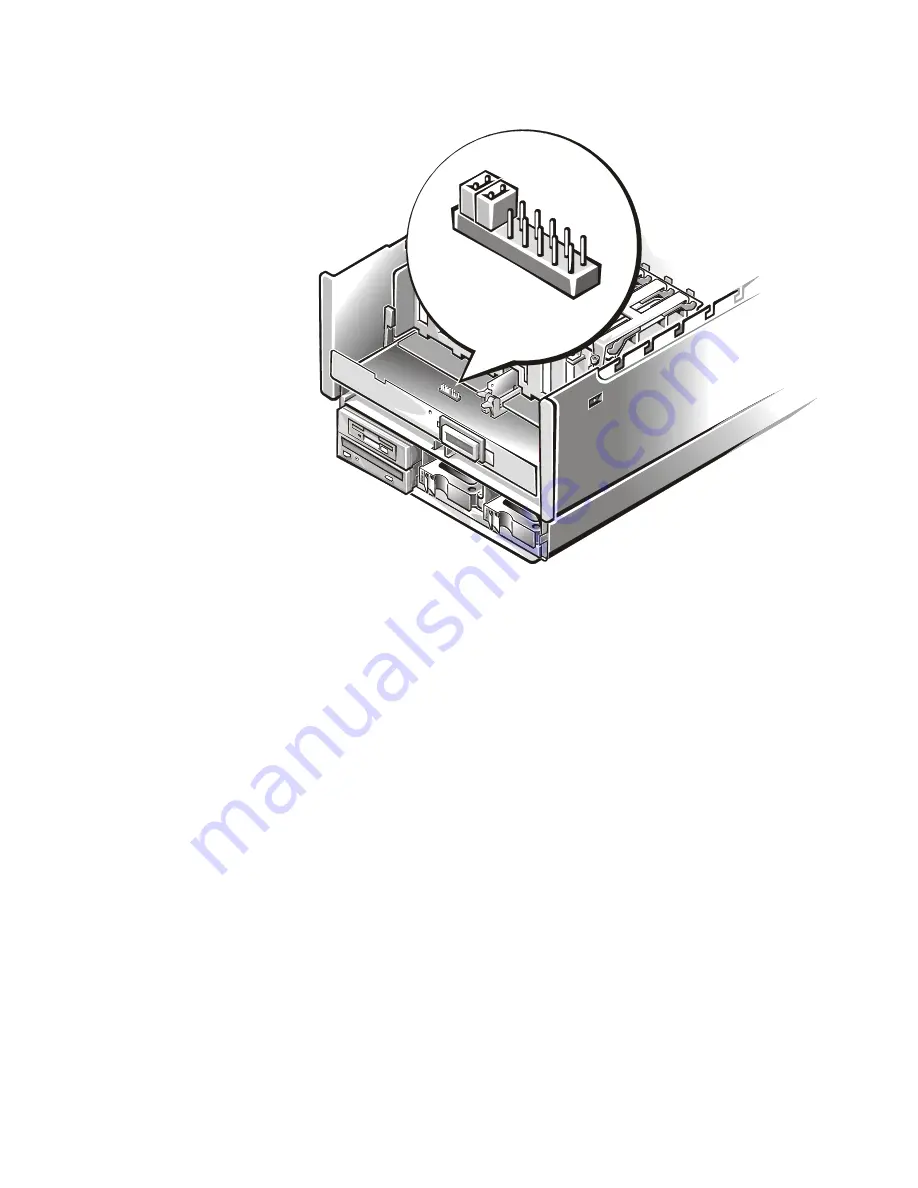
Figure 1-9. Locating the Microprocessor Speed Jumpers
5.
Replace the control panel tray into the chassis and secure it with the ten screws.
6.
Replace the fan bay housing and secure it with the three screws.
7.
Replace the fans and fan bay cover.
8.
Replace the memory board and memory board cover.
9.
Install the microprocessor assemblies and terminator cards.
10. Replace the computer cover.
11. Replace the front bezel.
12. Slide the computer back into the rack.
13. Reconnect the computer and peripherals to electrical outlets, and turn them on.
14. Run the Dell Diagnostics to test the newly installed microprocessor boards and
microprocessors.
For more information on the Dell Diagnostics, see your system’s
Installation and
Troubleshooting Guide.
This completes the installation of the microprocessor boards.
Содержание PowerEdge 8450
Страница 2: ......
Страница 3: ...www dell com support dell com Dell PowerEdge 8450 Systems MICROPROCESSOR BOARD UPGRADE GUIDE ...
Страница 6: ...iv ...
Страница 20: ...1 14 Microprocessor Board Upgrade Guide ...
Страница 24: ...iv ...
Страница 39: ...www dell com support dell com Dell PowerEdge 8450 Systeme HANDBUCH ZUR MIKROPROZESSORPLATINEN AUFRÜSTUNG ...
Страница 42: ...iv ...
Страница 60: ...iv ...
Страница 75: ......


