


10
Getting Started With Your System
Installing PowerConnect MPS 1U Shelf in a Rack
The PowerConnect MPS 1U Shelf can be installed in most standard
19-inch racks.
NOTE:
For racks that are not pre-threaded, cage nuts are provided.
1
Use the screws that are provided to attach a mounting bracket to each side
of the
PowerConnect
MPS 1U Shelf.
2
Position the
PowerConnect
MPS 1U Shelf in the rack and align the holes
in the mounting bracket with the holes in the rack.
3
Insert and tighten two screws through each of the mounting brackets.
Operating the PowerConnect MPS600 or MPS1000 in the MPS 1U Shelf After
Installation
1
Install up to three
PowerConnect
MPS600 or MPS1000 (or combinations)
into the MPS 1U Shelf.
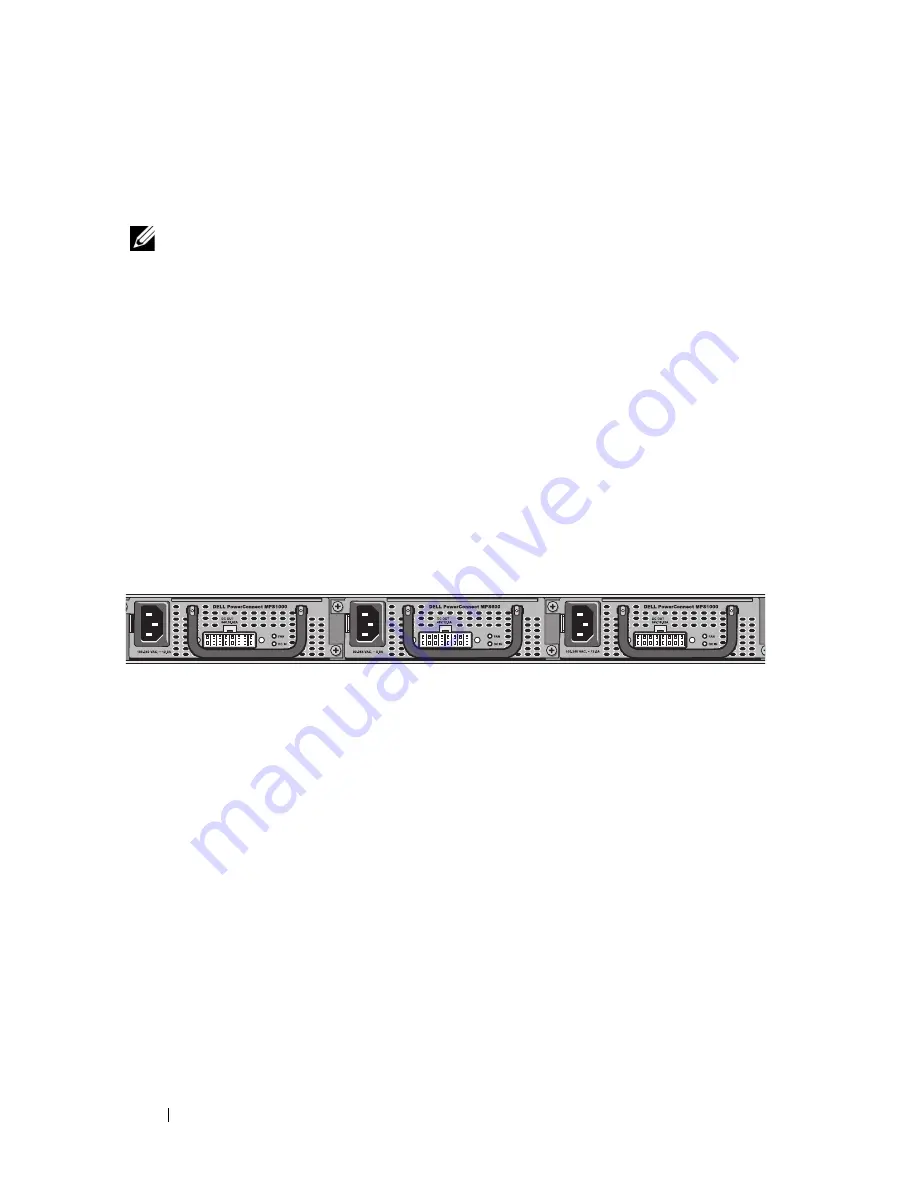
Figure 1-8.
Back View–PowerConnect MPS 1U Shelf
2
Plug one end of the switch DC power cord (16-pin) into the connector
labeled
MPS
on the back of an available switch. Connect the other end of
the switch DC power cord to the
DC OUT
connector on the back of an
available
PowerConnect
MPS600 or MPS1000.
3
Attach the AC power cord to the
PowerConnect
MPS600 or MPS1000 and
to an AC power outlet.
The switches are now using both power supplies simultaneously. You can
monitor the status of the all the power supplies through the front panel
LEDs on your PowerConnect switches and the
PowerConnect
MPS600s
or MPS1000s.