background image

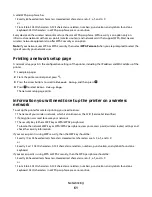
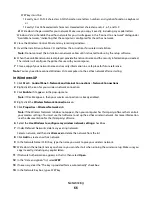
WEP keys must be:

Exactly 5 or 13 ASCII characters. ASCII characters are letters, numbers, and symbols found on a keyboard.

or

Exactly 10 or 26 hexadecimal characters. Hexadecimal characters are A–F, a–f, and 0–9.

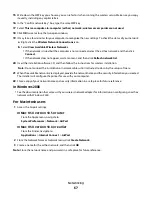
d

Write down the password for your network. Make sure you copy it exactly, including any capital letters.

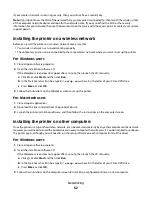
Windows Vista will enable the ad hoc network for you. It will appear in the “Connect to a network” dialog under
“Available networks,” indicating that the computer is configured for the ad hoc network.

4

Close the Windows Control Panel and any remaining windows.

5

Insert the installation software CD, and follow the instructions for wireless installation.

Note: 

Do not connect the installation or network cables until instructed to do so by the setup software.

6

When the available networks are displayed, provide the network name and the security information you created.
The installer will configure the printer for use with your computer.

7

Store a copy of your network name and security information in a safe place for future reference.

Note: 

You may need to reconnect Windows Vista computers to the ad hoc network after restarting.

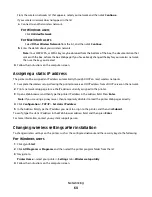
In Windows XP

1

Click 

Start

 > 

Control Panel

 > 

Network and Internet Connections

 > 

Network Connections

.

2

Right-click the icon for your wireless network connection.

3

Click 

Enable

, if it appears in the pop-up menu.

Note: 

If Disable appears, then your wireless connection is already enabled.

4

Right-click the 

Wireless Network Connection

 icon.

5

Click 

Properties

 > 

Wireless Networks

 tab.

Note: 

If the Wireless Networks tab does not appear, then your computer has third-party software that controls

your wireless settings. You must use that software to set up the ad hoc wireless network. For more information,
see the documentation for the third-party software.

6

Select the 

Use Windows to configure my wireless network settings

 check box.

7

Under Preferred Networks, delete any existing networks.

Select a network, and then click 

Remove

 to delete the network from the list.

8

Click 

Add

 to create an ad hoc network.

9

In the Network Name (SSID) box, type the name you want to give your wireless network.

10

Write down the network name you chose so you can refer to it when running the wireless setup. Make sure you
copy it exactly, including any capital letters.

11

If Network Authentication appears in the list, then select 

Open

.

12

In the “Data encryption” list, select 

WEP

.

13

If necessary, clear the “The key is provided for me automatically” check box.

14

In the Network Key box, type a WEP key.

Networking

66

Содержание P513w All In One Photo Printer

Страница 1: ...Dell P513w Series User s Guide August 2010 www dell com support dell com Machine type s 4443 Model s 7dw 3dw ...

Страница 2: ... 14 Changing temporary settings into new default settings 16 Changing the Power Saver timeout 17 Saving paper and energy with Eco Mode 17 Resetting to factory settings 17 Using the printer software 19 Minimum system requirements 19 Using the Windows printer software 19 Using the Macintosh printer software 21 Finding and installing optional software 22 Updating the printer software Windows only 23 ...

Страница 3: ...trol panel 51 Repeating an image on one page 52 Copying multiple pages on one sheet 52 Making a duplex copy 52 Canceling copy jobs 53 Scanning 54 Tips for scanning 54 Scanning to a local or network computer 54 Scanning to a flash drive or memory card 55 Scanning photos into an editing application 55 Scanning documents into an editing application 56 Scanning directly to e mail using the printer sof...

Страница 4: ...ng the Service Center to solve printer problems 86 If Troubleshooting does not solve your problem 86 Setup troubleshooting 86 Jams and misfeeds troubleshooting 93 Print troubleshooting 95 Copy and scan troubleshooting 97 Memory card troubleshooting 99 Wireless troubleshooting 101 Notices 119 Product information 119 Edition notice 119 Power consumption 121 Index 130 Contents 4 ...

Страница 5: ...NTIAL INJURY Do not cut twist bind crush or place heavy objects on the power cord Do not subject the power cord to abrasion orstress Do not pinchthe powercord betweenobjects such as furniture and walls If any of these things happen a risk of fire or electrical shock results Inspect the power cord regularly for signs of such problems Remove the power cord from the electrical outlet before inspectin...

Страница 6: ...re sets the screen brightness to low and sets the printer to change to Power Saver mode after the printer is left idle for 10 minutes Select thelowest PowerSavertimeout The Power Saver feature putsthe printer in a minimum powerstandby mode after the printer has been idle for a set amount of time the Power Saver timeout Share your printer Wireless network printers allow you to share a single printe...

Страница 7: ...ng information about the printer Publications What are you looking for Find it here Initial setup instructions Connecting the printer Installing the printer software Setup documentation The setup documentation came with the printer Additional setup and instructions for using the printer Selecting and storing paper and specialty media Loading paper Performing printing copying scanning and faxing ta...

Страница 8: ...e Have the following information ready when you contact support so that they may serve you faster Service Tag Express Service Code Note The ServiceTag and Express ServiceCode appear on labels located on your printer Software and Drivers Certified drivers for your printer and installers for Dell printer software Readme files Last minute technical changes or advanced technical reference material for...

Страница 9: ...d 4 Memory card slot Insert a memory card 5 PictBridge and USB port Connect a PictBridge enabled digital camera a USB Bluetooth adapter or a flash drive to the printer 6 Paper exit tray Hold paper as it exits 7 Printer control panel Operate the printer 8 Scanner lid Access the scanner glass 9 Paper feed guard Prevent items from falling into the paper slot 10 Paper guides Keep paper straight when f...

Страница 10: ...wer source 5 Duplex unit Print on both sides of a sheet of paper Remove paper jams 6 USB port Connect the printer to a computer using a USB cable Warning Potential Damage Do not touch the USB port except when plugging in or removing a USB cable or installation cable 7 Printhead Install replace or remove ink cartridges 8 Scanner unit Access the ink cartridges and printhead Remove paper jams About y...

Страница 11: ...ridge high yield2 Series 22 Series 22R 1 Licensed for a single use only After use return this cartridge to Dell for remanufacturing refilling or recycling To learn more about recycling Dell products visit www dell com recycling 2 Available only on the Dell Web site at www dell com supplies Replacing ink cartridges Make sure you have a new ink cartridge or cartridges before you begin 1 Turn on your...

Страница 12: ...cartridges until you have the new cartridges available or the ink remaining in the printhead may dry out and clog the nozzles 4 Unpack the cartridges If your ink cartridge comes with a muzzle cap then remove the cap If your ink cartridge comes with a twist cap then twist and remove the cap Ordering and replacing supplies 12 ...

Страница 13: ...cycling Dell products To return Dell products to Dell for recycling 1 Click or Start 2 Click All Programs or Programs and then select the printer program folder from the list 3 Select Printer Home 4 Choose your printer from the printer drop down list 5 From the Maintenance tab click Order supplies 6 Click 7 Follow the instructions on the computer screen Ordering and replacing supplies 13 ...

Страница 14: ...ower Saver mode Press and hold for threeseconds to turn off the printer 2 Copy Access the copy menu and make copies 3 Scan Access the scan menu and scan documents 4 Photo Access the photo menu and print photos 5 Back Return to the previous screen Exit from one menu level to a higher one 6 Color Black Switch to color mode or black and white mode 7 Start Start a print scan or copy job depending on w...

Страница 15: ... of the Setup menu to the top level of the previous mode Clear current settings or error messages and return to default settings 10 Arrow buttons Choose a menu or submenu item that appears on the display 11 Select Select menu options Save settings Feed or eject paper Press and hold for 3 seconds to feed or eject paper from the printer 12 Display Note The display is turned off in Power Saver mode V...

Страница 16: ...Layout Colorized Effect Photo Size Quality To change the temporary settings into new default settings 1 From the printer control panel press 2 Press the up or down arrow button to scroll to Defaults and then press 3 Press the up or down arrow button to scroll to Set Defaults and then press Use Current appears on the display 4 Press again to select Use Current 5 Press until you exit Setup or press ...

Страница 17: ... you exit Setup or press another mode button Saving paper and energy with Eco Mode The Eco Mode feature significantly cuts paper usage reduces paper waste optimizes energy efficiency and saves money Note If you are using Eco Mode then the Eco Mode settings override any changes you may make to individual settings that are part of Eco Mode When Eco Mode is enabled the printer automatically switches ...

Страница 18: ...u have set the Power Saver timeout in the Setup menu then press and hold for three seconds to turn off the printer 2 From the printer control panel press and hold and and then press and release to turn the printer on Note Donotrelease and untilLanguage Selectionappearsonthe display indicatingthat the printer has been reset 3 When prompted to set the initial settings of your printer make your selec...

Страница 19: ...11 0 and 11 1 Web only Linux Fedora 10 Web only The printer driver for this operating system is available only at support dell com Note Updated printer firmware may be available at support dell com Using the Windows printer software Software installed during printer installation When you set up the printer using the installation software CD all the necessary software was installed You may have cho...

Страница 20: ...s Add edit or delete contacts in the built in phone book Access the Dell Fax Setup Utility Use the Fax Setup Utility to set the Speed Dial and Group Dial numbers set Ringing and Answering and print fax history and status reports Abbyy Sprint OCR Scan a document and produce text that you can edit with a word processing program Dell Wireless Setup Utility referred to as Wireless Setup Utility Set up...

Страница 21: ... Macintosh OS Use the To Print dialog Adjust the print settings and schedule print jobs PrinterServicesdialog notavailableinMacOSXversion 10 5 or later Access the printer utility Troubleshoot Order ink or supplies Contact Dell Checktheprintersoftwareversioninstalledonthecomputer Printer software Applications are installed along with the printer software during installation These applications are s...

Страница 22: ...our printer may not come with these applications depending on the features of the printer that you purchased Finding and installing optional software For Windows users 1 Click or Start 2 Click All Programs or Programs and then select the printer program folder from the list 3 Navigate to Printer Home select your printer Support tab On line support 4 From the Web site select your printer and then d...

Страница 23: ...rinter software When you set up the printer using the installation software CD all the necessary software was installed If you encountered problems while installing or if your printer does not appear in the Printers folder or as a printer option when you send a print job then try removing and reinstalling the printer software Uninstalling the printer software For Windows users 1 Click or Start 2 C...

Страница 24: ... manually a Click or click Start and then click Run b In the Start Search or Run box type D setup exe where D is the letter of your CD or DVD drive c Press Enter or click OK 3 Follow the instructions on the Welcome screen For Macintosh users 1 Close all open applications 2 Download the latest installer from the printer Web site 3 Launch the printer installation software and then follow the instruc...

Страница 25: ... surface 2 Center the paper on the paper support 3 Adjust the paper guides so they rest against the edges of the paper Note Do not force paper into the printer The paper should be flat against the paper support and the edges should be flush against both paper guides 4 From the printer control panel select or confirm your paper settings Loading paper and original documents 25 ...

Страница 26: ... paper You select Automatic Normal or Photo print quality Note Draft mode is available but is not recommended for usewithexpensivepapersuchasheavyweightmatte labels photo cards and glossy paper 20 sheets of banner paper You remove all paper from the paper support before inserting banner paper You use banner paper designed for inkjet printers You place a stack of banner paper on or behind the print...

Страница 27: ...l is faceup The paper guides rest against the edges of the paper You select Automatic Normal or Photo print quality Note Draft mode is available but is not recommended for usewithexpensivepapersuchasheavyweightmatte labels photo cards and glossy paper 25 greeting cards index cards postcards or photo cards The print side of the card is faceup The paper guides rest against the edges of the cards You...

Страница 28: ...oose the default settings If you want to set the default paper size a Press to select Paper Setup b Press the up or down arrow button to scroll to Paper Size and then press c Press the up or down arrow button to select the default paper size for the printer and then press If you want to set the default paper type a Press to select Paper Setup b Press the up or down arrow button to scroll to Paper ...

Страница 29: ...Loading original documents on the scanner glass 1 Open the scanner lid and place the document facedown on the scanner glass 2 Close the scanner lid Loading paper and original documents 29 ...

Страница 30: ... Properties Preferences Options or Setup 3 Select the print quality the number of copies to print the type of paper to use and how the pages should print 4 Click OK to close any printer software dialogs 5 Click OK or Print For Macintosh users 1 With a document open choose File Page Setup 2 From the Page Setup dialog set the printer paper size and orientation 3 Click OK 4 From the menu bar choose F...

Страница 31: ...t to print and then select Collate Copies 5 Click OK to close any printer software dialogs 6 Click OK or Print For Macintosh users 1 With a document open choose File Page Setup 2 From the Page Setup dialog set the printer paper size and orientation 3 Click OK 4 From the menu bar choose File Print 5 From the Printer pop up menu choose your printer 6 From the Copies area enter the number of copies t...

Страница 32: ...er Handling menu or from the Page Order pop up menu select a page order To print the last page first select Reverse page order or Reverse To print the first page first clear the Reverse page order or Reverse option 6 Click Print Printing multiple pages on one sheet For Windows users 1 With a document open click File Print 2 Click Properties Preferences Options or Setup 3 Navigate to Advanced tab L...

Страница 33: ...ntheprinterautomaticallyswitchestoFilePrintmode If document files and image files are stored on the memory device then press the up or down arrow button to scroll to Documents and then press 3 Select and print the document If the printer is using a USB connection a Press the up or down arrow button to select the file name of the document that you want to print b Press to start printing the documen...

Страница 34: ...or Macintosh users 1 With a document open choose File Page Setup 2 From the Format for pop up menu choose your printer 3 From the Paper Size pop up menu choose your envelope size If no size matches the envelope size then set a custom size 4 Select an orientation and then click OK 5 From the menu bar choose File Print 6 From the Printer pop up menu choose your printer 7 Click Print Notes Most envel...

Страница 35: ... Settings or Quality Media 8 From the Paper Type pop up menu choose Card Stock 9 From the Print Quality menu choose a print quality other than Quick Print or Draft 10 Click Print Tips on loading label sheets Make sure the top of the label sheet feeds into the printer first Make sure the adhesive on the labels does not extend to within 1 mm of the edge of the label sheet Make sure the paper guide o...

Страница 36: ...orage devices frequently used with cameras and computers You can remove the memory card from the camera or the flash drive from the computer and insert it directly into the printer 1 Insert a memory card into the card slot or a flash drive into the USB port Inserting a memory card Inserting a flash drive Notes Insert the card with the brand namelabelfacing right Make sure any arrows on the card po...

Страница 37: ...re Digital with adapter Mini SD MultiMedia Card MMC Reduced Size MultiMedia Card with adapter RS MMC MultiMedia Card mobile with adapter MMCmobile Memory Stick Memory Stick PRO Memory Stick Duo with adapter Memory Stick PRO Duo with adapter xD Picture Card xD Picture Card Type H xD Picture Card Type M Documents doc Microsoft Word xls Microsoft Excel ppt Microsoft PowerPoint pdf Adobe Portable Docu...

Страница 38: ... least 24 hours before stacking displaying or storing Editing photos using the printer control panel 1 Load photo paper 2 Insert a memory card or flash drive If document files and image files are stored on the memory device then press to select Photos 3 From the printer control panel press to select Select and Print 4 Press the left or right arrow button to select the layout of the photo you want ...

Страница 39: ...he printer control panel press 3 Insert a memory card or flash drive 4 Transfer or print the photos If the printer is using a USB connection FastPicslaunchesautomaticallywhenyouinsertthememorydevice Followthe instructionsonthecomputer screen to transfer the photos to the computer or to print If the printer is using a Wireless connection selected models only a Press the up or down arrow button to s...

Страница 40: ... mode If the camera USB selection is incorrect then the camera is detected as a flash drive or an error message is displayed on the printer control panel For more information see the camera documentation The printer reads only one memory device at a time Warning Potential Damage Do not touch any cables any network adapter anyconnector thememorydevice ortheprinterintheareasshownwhileactively printi...

Страница 41: ...heet and then press 5 Press the up or down arrow button to select an option to print a proof sheet You can print a proof sheet For the 20 most recent photos if there are 20 or more photos on the memory device For all photos on the memory device Bydate if the photos onthe card were takenondifferentdates Ifyou choosethisoption thenpressthearrow buttons to set the start and end dates and then press t...

Страница 42: ... Detected appears on the display 4 Press the up or down arrow button to scroll to Print Photos and then press 5 Press the up or down arrow button to scroll to Print Camera Selections DPOF and then press to print the photos Note This option appears only if a DPOF file is detected in the memory card Note For best results allow the prints to dry at least 24 hours before stacking displaying or storing...

Страница 43: ...u choose your printer 6 From the print options pop up menu choose Print Settings or Quality Media 7 From the Paper Type pop up menu choose Plain Paper 8 From the print options pop up menu choose Layout 9 From the Two Sided pop up menu choose Long Edge binding or Short Edge binding For Long Edge binding pages are bound along the long edge of the page left edge for portrait top edge for landscape Po...

Страница 44: ...elect Extended 5 Click OK Printing on both sides of the paper duplexing manually For Windows users 1 With a document open click File Print 2 Click Properties Preferences Options or Setup 3 Navigate to Advanced tab 2 Sided Printing area select Manual Note The Print Instruction Page to Assist in Reloading item is selected automatically 4 Click OK The printer prints the odd numbered pages and the ins...

Страница 45: ...dd numbered pages 8 Click Print 9 Flip and reload the paper 10 Repeat steps 4 through 6 11 From the Print or Pages to Print pop up menu choose to print the even numbered pages 12 Click Print Managing print jobs Setting your printer as the default printer Yourprintershouldbeselectedautomaticallyfromthe Printdialogwhenyou senda printjob Ifyou havetomanually select your printer then it is not the def...

Страница 46: ...s users 1 Click or click Start and then click Run 2 In the Start Search or Run box type control printers 3 Press Enter or click OK The printer folder opens 4 Right click the printer and then select Printing Preferences 5 Select Quick Print as the printing mode For Macintosh users 1 With a document open choose File Print 2 From the printer pop up menu choose the printer 3 From the print options pop...

Страница 47: ...printers 3 Press Enter or click OK The printer folder opens 4 Right click the printer and then select Open or See what s printing 5 Pause the print job If you want to pause a particular print job then right click the document name and then select Pause If you want to pause all print jobs in the queue then click Printer and then select Pause Printing For Macintosh users 1 Click the printer icon on ...

Страница 48: ...se the document name and then click Resume If you want to resume all print jobs in the queue then click Resume Printer or Start Jobs Canceling print jobs Tocancelaprintjobfromtheprintercontrolpanel press Tocancelaprintjobfromthecomputer dothefollowing For Windows users 1 Click or click Start and then click Run 2 In the Start Search or Run box type control printers 3 Press Enter or click OK The pri...

Страница 49: ...e scanner glass close the scanner lid to avoid dark edges on the scanned image Do not load postcards photos small items transparencies photo paper or thin media such as magazine clippings into the ADF Place these items on the scanner glass Making copies 1 Load paper 2 Load an original document faceup into the ADF or facedown on the scanner glass 3 From the printer control panel press 4 Press the l...

Страница 50: ...instructions on the display Enlarging or reducing images 1 Load paper 2 Load an original document facedown on the scanner glass 3 From the printer control panel press 4 Press the up or down arrow button to scroll to Resize 5 Press the left or right arrow button to select the setting that you want Notes If you select Custom then press and then press the left or right arrow button to select the desi...

Страница 51: ...5 Press the left or right arrow button to adjust the slider Note Pressingthe leftarrowbuttonmakesthe copylighter and pressingthe right arrowbutton makesthe copy darker 6 Press Collating copies using the printer control panel If you print multiple copies of a document then you can choose to print each copy as a set collated or to print the copies as groups of pages not collated Collated Not collate...

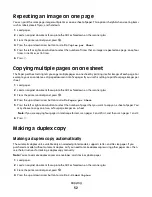
Страница 52: ...eup into the ADF or facedown on the scanner glass 3 From the printer control panel press 4 Press the up or down arrow button to scroll to Pages per Sheet 5 Press the left or right arrow button to select the number of pages that you want to copy on a sheet of paper You may choose to copy one two or four page images on a sheet Note If you are copying four pages in landscape format scan pages 3 and 4...

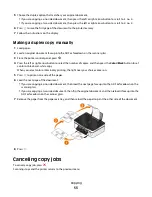
Страница 53: ... button to select the number of copies and then press the Color Black button to set a color or black and white copy When you select color or black only printing the light near your choice comes on 5 Press to print on one side of the paper 6 Load the next page of the document If you are copying a one sided document then load the next page faceup into the ADF or facedown on the scanner glass If you ...

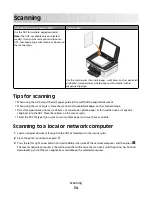
Страница 54: ...oid dark edges on the scanned image Do not load postcards photos small items transparencies photo paper or thin media such as magazine clippings into the ADF Place these items on the scanner glass Select the PDF file type if you want to scan multiple pages and save them as one file Scanning to a local or network computer 1 Load an original document faceup into the ADF or facedown on the scanner gl...

Страница 55: ...e Scanning to a flash drive or memory card Before you begin make sure your flash drive or memory card is not write protected 1 Load an original document faceup into the ADF or facedown on the scanner glass 2 From the printer control panel press 3 Press the up or down arrow button to scroll to Memory Device 4 Insert the flash drive or memory card and then press 5 Press the arrow buttons to select t...

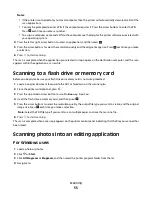
Страница 56: ...e printed or To be viewed on monitor Web page 6 From the Send scanned image to menu choose a destination folder or application for the scanned image 7 If you have several images to scan then select Prompt for multiple pages 8 Click Preview Edit The Scan dialog appears 9 Adjust the image and scan settings as needed 10 Click Scan Scanning documents into an editing application An Optical Character Re...

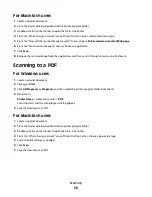
Страница 57: ...processing application to use for editing 7 Click Scan 8 Open the scanned document from a word processing application to edit it Scanning directly to e mail using the printer software For Windows users 1 Load an original document 2 Click or Start 3 Click All Programs or Programs and then select the printer program folder from the list 4 Navigate to Printer Home select your printer E mail 5 Select ...

Страница 58: ... it through e mail as an attachment Scanning to a PDF For Windows users 1 Load an original document 2 Click or Start 3 Click All Programs or Programs and then select the printer program folder from the list 4 Navigate to Printer Home select your printer PDF Scanning starts and the scan progress dialog appears 5 Save the document as a PDF For Macintosh users 1 Load an original document 2 From the F...

Страница 59: ...you are scanning to requires one To learn how PINs get assigned to network computers see the Help for the printer software associated with your operating system What is an application list and how do I update it When you scan a file you can choose which application to use to open it on your computer The printer downloads this application list from your computer when scanning for the first time If ...

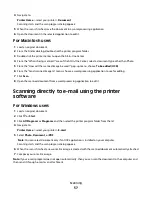
Страница 60: ...rk is connected to the Internet The range of your wireless network may extend far beyond the walls of your home allowing access to your network from the street or from your neighbors homes WEP WEP Wired Equivalent Privacy is the most basic and the weakest type of wireless security WEP security relies on a series of characters called the WEP key Every device on the wireless network must use the sam...

Страница 61: ...up and then press 4 Press to select Print Setup Page The network setup page prints Information you will need to set up the printer on a wireless network To set up the printer for wireless printing you need to know The name of your wireless network which is also known as the SSID Service Set Identifier If encryption was used to secure your network The security key either a WEP key or WPA WPA2 passp...

Страница 62: ... exe where D is the letter of your CD or DVD drive c Press Enter or click OK 3 Follow the instructions on the Welcome screen to set up the printer For Macintosh users 1 Close all open applications 2 Download the latest installer from the printer Web site 3 Launch the printer installation software and then follow the instructions on the computer screen Installing the printer on other computers Once...

Страница 63: ... access point has been turned off and back on and the printer is trying to establish communications with the network The wireless settings of the printer may no longer be valid Green means that the printer is connected to a wireless network and is ready for use Special wireless installation instructions The following instructions apply to customers outside of North America who are using a wireless...

Страница 64: ...HCP server on the network 2 Print a network setup page to see the IP address currently assigned to the printer 3 Open a Web browser and then type the printer IP address in the address field Press Enter Note If you are using a proxy server then temporarily disable it to load the printer Web page correctly 4 Click Configuration TCP IP Set static IP address 5 In the Address field type the IP address ...

Страница 65: ...the documentation that came with your computer The printer can communicate on only one wireless network at a time Configuring the printer for an ad hoc wireless network will keep it from working on any other wireless network either ad hoc or infrastructure In Windows Vista or later 1 Click Control Panel Network and Internet Network and Sharing Center 2 Click Set up a connection or network Set up a...

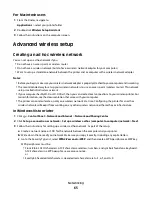
Страница 66: ...lick Start Control Panel Network and Internet Connections Network Connections 2 Right click the icon for your wireless network connection 3 Click Enable if it appears in the pop up menu Note If Disable appears then your wireless connection is already enabled 4 Right click the Wireless Network Connection icon 5 Click Properties Wireless Networks tab Note If the Wireless Networks tab does not appear...

Страница 67: ...or wireless installation Note Do not connect the installation or network cables until instructed to do so by the setup software 21 When the available networks are displayed provide the network name and the security information you created The installer will configure the printer for use with your computer 22 Store a copy of your network name and security information in a safe place for future refe...

Страница 68: ...i Protected Setup WPS it is easy to add computers or printers to your wireless network because the SSID and WPA passphrase are automatically detected and configured for you 1 Make sure your access point wireless router supports WPS 2 Insert the installation software CD and follow the instructions on the computer screen Notes If you are using the PIN method to add your printer using WPS then make s...

Страница 69: ...red your printer for one type of connection See related topics on troubleshooting specific connection types if you encounter difficulties during configuration Switching to a wireless connection 1 Close all open applications 2 Download the latest installer from the printer Web site 3 Double click Dell Extras Dell Setup Assistant 4 Follow the instructions on the computer screen for configuring the p...

Страница 70: ... In the Start Search or Run box type control printers 3 Press Enter or click OK b Right click the name of your printer c Click Sharing or Printer Properties d From the Sharing tab select Share this printer or Shared as e Assign a distinctive name and then click OK 3 Locate the printer from the remote computer Note The remote computer is the one that is not attached to the printer a Do one of the f...

Страница 71: ...figure the network name SSID and WEP key or WPA passphrase for network devices Note WPS supports only networks that communicate through access points wireless routers The printer supports the following methods in connecting to a wireless network PersonalIdentificationNumber PIN A PIN on the printer is entered into the wirelesssettingsof the access point Push Button Configuration PBC Buttons on bot...

Страница 72: ...ork broadcasts the SSID to allow wireless devices in the area to connect to it Sometimes the SSID is not broadcast for security reasons An SSID can contain up to 32 alphanumeric characters Where do I find my SSID View the settings on the access point wireless router Most access points have a built in Web server that can be accessed using a Web browser Check your computer to see if a program was in...

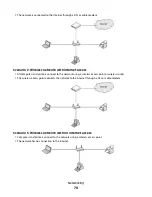
Страница 73: ...e is not the same as the password for the access point The password allowsyoutoaccesstheaccesspointsettings TheWEPkeyorWPApassphraseallowsprintersandcomputers to join your wireless network 3 Look for the WEP key or WPA passphrase How are home networks configured For desktop computers laptops and printers to communicate with each other over a network they must be connected by cables and or have wir...

Страница 74: ...onnect to the network using a wireless access point or wireless router The wireless access point connects the network to the Internet through a DSL or cable modem Scenario 3 Wireless network with no Internet access Computers and printers connect to the network using a wireless access point The network has no connection to the Internet Networking 74 ...

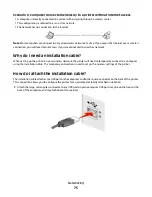
Страница 75: ...an installation cable When setting up the printer on your wireless network the printer will need to temporarily connect to a computer using the installation cable This temporary connection is used to set up the wireless settings of the printer How do I attach the installation cable The installation cable attaches to a USB port on the computer and to the square connectoronthe back of the printer Th...

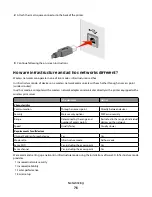
Страница 76: ...Ad hoc Characteristics Communication Through an access point Directly between devices Security More security options WEP or no security Range Determined by the range and number of access points Restricted to the range of individual devices on the network Speed Usually faster Usually slower Requirements for all devices Unique IP address for each device Yes Yes Mode set to Infrastructure mode Ad hoc...

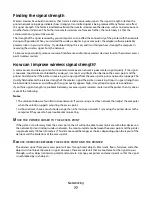
Страница 77: ...ss point print a network setup page The Quality field indicates the relative strength of the wireless signal the printer is receiving Drops in signal strength can be intermittent however and although the signal quality appears high it may drop during certain conditions If you think signal strength is a problem between your access point wireless router and the printer then try one or more of the fo...

Страница 78: ...s possible to avoid signal absorption How can I make sure my computer and printer are connected to the same wireless network If the printer is not on the same wireless network as the computer then you will not be able to print wirelessly The SSIDoftheprintermustmatchtheSSIDofthecomputer ifthecomputerisalreadyconnectedtothewirelessnetwork For Windows users 1 Obtain the SSID of the network that the ...

Страница 79: ... the network that the computer is connected to is displayed in the Network menu 2 Write down the SSID For Macintosh users with an access point 1 Type the IP address of the access point in the address field of your Web browser and continue to step 2 If you do not know the IP address of the access point then do the following a From the Apple menu navigate to System Preferences Network AirPort b Clic...

Страница 80: ...isnot commonpractice todo so Forthisreason MAC addresses are considered permanent IP addresses are easily changed so MAC addresses are a more reliable method of identifying a specific device on a network Routers with security capabilities may allow filtering of MAC addresses on networks This allows a managed list of devices to access the network identified by their MAC addresses as well as prevent...

Страница 81: ...uters printers and other devices are able to send data to each other either through cables or by using wireless signals This transfer of data is made possible by sets of data transmission rulescalledprotocols Aprotocolcanbethoughtofasalanguage andlikealanguage ithasrulesallowingparticipants to communicate with each other Different types of networks use different protocols but TransmissionControl P...

Страница 82: ...et up on a computer the computer sends all print jobs across the network to the printer using this address If the IP address is not automatically assigned you will be asked during wireless setup to manually enter an address and other network information after selecting your printer from the available list What is a key index An access point wireless router can be configured with as many as four WE...

Страница 83: ... Levels Using the printer software For Windows users 1 Click or Start 2 Click All Programs or Programs and then select the printer program folder from the list 3 Select Printer Home 4 Choose your printer from the printer drop down list 5 From the Maintenance tab click Check ink levels For Macintosh users 1 From the Finder desktop double click the printer program folder 2 Select Printer Utility fro...

Страница 84: ...r Utility from the list 4 From the Maintenance tab of the Printer Utility dialog click Print Alignment Page 5 Follow the instructions on the computer screen If you aligned the cartridges to improve print quality then print your document again If print quality has not improved then clean the printhead nozzles Cleaning the printhead nozzles Poorprintquality issometimesdue to cloggedprinthead nozzles...

Страница 85: ...HAZARD To avoid the risk of electric shock when cleaning the exterior of the printer unplug the power cord from the wall outlet and disconnect all cables to the printer before proceeding 2 Remove all paper from the printer 3 Dampen a clean lint free cloth with water Warning Potential Damage Do not use household cleaners or detergents as they may damage the finish of the printer 4 Wipe only the out...

Страница 86: ...ack on Using the Service Center to solve printer problems The Service Center provides step by step troubleshooting help and contains links to printer maintenance tasks and customer support To open the Service Center use one of these methods Method 1 Method 2 If it appears on an error message dialog click the For additional assistance use the Service Center link 1 Click or Start 2 Click All Program...

Страница 87: ...o Set Defaults and then press 4 Press the arrow buttons to scroll to Use Factory and then press 5 Complete the initial printer setup CHANGE THE LANGUAGE USING A BUTTON COMBINATION IF YOU CANNOT READ THE CURRENT LANGUAGE 1 Turn the printer off Note If you have set the Power Saver timeout in the Setup menu then press and hold for three seconds to turn off the printer 2 Press and hold down and and th...

Страница 88: ... 1 Open the printer and lift the latch 2 Remove the printhead Warning Potential Damage Do not touch the printhead ink filter or the printhead nozzles 3 Wipe the contacts using a clean lint free cloth On the printhead Troubleshooting 88 ...

Страница 89: ...uch the printhead ink filter or the printhead nozzles 4 Reinsert the printhead and then close the latch until it clicks 5 Close the printer Note If removing and reinserting the printhead does not resolve the error then contact customer support Troubleshooting 89 ...

Страница 90: ...B symbol Note If you continue to have problems then try another USB port on the computer You may have connected to a defective port RECONNECT THE PRINTER POWER SUPPLY 1 Turn off the printer and then unplug the power cord from the wall outlet 2 Gently remove the power supply from the printer and then reinsert it 3 Plug the power cord into the wall outlet and then turn on the printer Print job does ...

Страница 91: ...ctive port REMOVE AND REINSTALL THE PRINTER SOFTWARE Printer is printing blank pages Blank pages may be caused by improperly installed ink cartridges REINSTALL THE INK CARTRIDGES AND DEEP CLEAN AND ALIGN THE PRINTHEAD 1 Reinstall the ink cartridges See Replacing ink cartridges on page 11 for more information If the cartridges do not seem to fit make sure the printhead is properly seated and then t...

Страница 92: ...the power cord into the wall outlet and then turn on the printer Cannot delete documents from the print queue If you have jobs stuck in the print queue and cannot delete them to get other jobs to print then the computer and printer may not be communicating RESTART THE COMPUTER AND TRY AGAIN Cannot print through USB If the Before you troubleshoot checklist does not solve the problem then try one or...

Страница 93: ... Paper jam in the printer Note The parts inside the printer are sensitive Avoid unnecessarily touching these parts while clearing jams 1 Press to turn off the printer 2 Check the paper tray or lift the scanner unit to check for jammed paper 3 Firmly grasp the paper and then gently pull it out Note Be careful not to tear the paper while removing it 4 Press to turn the printer back on Paper jam in t...

Страница 94: ...wn the duplex latches and pull out the duplex unit CAUTION POTENTIALINJURY The area behind the duplex cover has protruding ribs as partof the paper path To avoid injury use caution when accessing this area for clearing a paper jam 2 Firmly grasp the paper and then gently pull it out Note Be careful not to tear the paper while removing it 3 Reinsert the duplex unit Troubleshooting 94 ...

Страница 95: ...ructions for your paper or specialty media REMOVE EACH PAGE AS IT IS PRINTED ADJUST THE PAPER GUIDES TO FIT THE LOADED PAPER Print troubleshooting Poor quality at the edges of the page on page 95 Streaks or lines on printed image on page 96 Print speed is slow on page 97 Computer slows down when printing on page 97 Poor quality at the edges of the page If the Before you troubleshoot checklist does...

Страница 96: ...e printer paper size and orientation in step 1 then you may have to choose your printer again from the Printer pop up menu before going to step 3 Otherwise set them a From the Printer pop up menu choose your printer b From the Paper Size pop up menu choose a paper size that has Borderless in its name For example if you loaded a 4 x 6 photo card then choose US 4 x 6 in Borderless c Select an orient...

Страница 97: ...YPE THAT MATCHES THE TYPE OF PAPER YOU ARE USING REMOVE AND REINSTALL THE PRINTER SOFTWARE Computer slows down when printing These are possible solutions Try one of the following IF YOU ARE USING A USB CONNECTION THEN TRY A DIFFERENT USB CABLE IF YOU ARE ON A NETWORK THEN RESET THE POWER OF THE ACCESS POINT ROUTER 1 Unplug the power cord from the access point 2 Wait ten seconds and then insert the...

Страница 98: ...NNER GLASS ADJUST THE SCAN QUALITY FROM THE PRINTER SOFTWARE REVIEW THE TIPS FOR COPYING SCANNING AND IMPROVING PRINT QUALITY USE A CLEARER VERSION OF THE ORIGINAL DOCUMENT OR IMAGE MAKE SURE THE DOCUMENT OR PHOTO IS LOADED FACEDOWN ON THE SCANNER GLASS AND IN THE CORRECT CORNER Partial copies or scans of documents or photos If the Before you troubleshoot checklist does not solve the problem then ...

Страница 99: ...eezes the computer If the Before you troubleshoot checklist does not solve the problem then try one or more of the following CLOSE OTHER SOFTWARE PROGRAMS THAT ARE NOT BEING USED USE A LOWER SCANNING RESOLUTION Cannot scan to a computer over a network If the Before you troubleshoot checklist does not solve the problem then try one or more of the following MAKE SURE THE PRINTER AND THE DESTINATION ...

Страница 100: ...ry another USB port on the computer You may have connected to a defective port CHECK THE NETWORK CONNECTION If the printer and computer are connected over a network then make sure that the correct host and device are communicating Select the printer from the computer or the computer from the printer Cannot print documents from a memory card or flash drive If the Memory card troubleshooting checkli...

Страница 101: ... green but the printer does not print Windows only on page 108 Wi Fi indicator light is still orange on page 109 Wi Fi indicator light is blinking orange during installation on page 110 Wireless print server not installed on page 114 Communication not available message appears when printing wirelessly on page 114 Communication with printer lost when connected to Virtual Private Network VPN on page...

Страница 102: ...ng baby monitors motors cordless phones security system cameras other wireless networks and some Bluetooth devices Resetting the wireless settings to factory defaults 1 From the printer control panel press 2 Press the arrow buttons to scroll to Network Setup and then press 3 Press the arrow buttons to scroll to Reset Network Adapter to Factory Defaults and then press 4 Press the arrow buttons to s...

Страница 103: ...S POINT HAS AN ASSOCIATION REGISTRATION BUTTON Wireless broadband boxes in Europe the Middle East and Africa such as LiveBox AliceBox N9UF Box FreeBox or Club Internet may require you to press an association registrationbutton whenadding the printer to yourwireless network If you are using one of these boxes and need more information then see the documentation that came with your box or contact yo...

Страница 104: ...s already connected to the wireless network For Windows users 1 Obtain the SSID of the network that the computer is connected to a Type the IP address of your access point into the address field of your Web browser If you do not know the IP address of the access point 1 Click or click Start and then click Run 2 In the Start Search or Run box type cmd 3 Press Enter or click OK 4 Type ipconfig and t...

Страница 105: ...2 If you do not know the IP address of the access point then do the following a From the Apple menu navigate to System Preferences Network AirPort b Click Advanced or Configure c Click TCP IP The Router entry is typically the access point 2 Type your user name and password when prompted and then click OK 3 In the Wireless settings section look for the SSID 4 Write down the SSID security type and t...

Страница 106: ...g a different USB cable If you are using a cable longer than 10 feet then try using a shorter cable MAKE SURE THAT YOU ARE USING THE CORRECT CD FOR YOUR PRINTER MODEL Comparetheprintermodelonthe CDto theprintermodelontheprinter Thenumbersshouldeithermatchexactly or be within the same series If you have any doubts look for an updated version of the printer software on our Web site For more informat...

Страница 107: ...installation to work Cannot print and there is a firewall on the computer Third party non Microsoft firewalls can interfere with wireless printing If the printer and computer are configured correctly and the wireless network is working but the printer will not print wirelessly then a firewall could be the problem If there is a firewall other than the Windows firewall on the computer try one or mor...

Страница 108: ... and Faxes window and try printing again SELECT THE WIRELESS PRINTER You may need to select the wireless printer from your computer to use the printer wirelessly 1 Click or click Start and then click Run 2 In the Start Search or Run box type control printers 3 Press Enter or click OK The printer folder opens 4 Right click the printer in the folder with the matching name and model number followed b...

Страница 109: ...the same name as another network near you For example if you and your neighbor both use a manufacturer s default network name your printer could be connecting to your neighbor s network If you are not using a unique network name consult the documentation for your wireless access point wireless router to learn how to set a network name If you set a new network name you must reset the printer and co...

Страница 110: ...ess point wireless router or until its settings are changed Try one or more of the following MAKE SURE THE ACCESS POINT IS ON Check the access point and if necessary turn it on MOVE YOUR ACCESS POINT TO MINIMIZE INTERFERENCE There may be temporary interference from other devices such as microwave ovens or other appliances cordless phones baby monitors and security system cameras Make sure your acc...

Страница 111: ...Start Search or Run box type cmd c Press Enter or click OK d Type ipconfig and then press Enter The Default Gateway entry is typically the access point The IP address appears as four sets of numbers separated by periods such as 192 168 2 134 2 Ping the access point a Click or click Start and then click Run b In the Start Search or Run box type cmd c Press Enter or click OK d Type ping followed by ...

Страница 112: ...ab b In the network address field type the IP address of the access point For example 10 168 1 101 c Click Ping 4 If the access point responds then you will see several lines that display the number of bytes received from the access point This means that your computer is connected to the access point Iftheaccesspointdoesnotrespond thennothingisdisplayed YoucanuseNetworkDiagnosticstohelpresolve the...

Страница 113: ...inter If the printer does not respond then nothing is displayed Your computer might not be connected to the network You can use Network Diagnostics to help resolve the problem You may need to change the settings of your printer Run the Wireless Setup Assistant again CONFIGURE THE PRINTER FOR WIRELESS ACCESS AGAIN If your wireless settings have changed then you must run the printer wireless setup a...

Страница 114: ...able message appears when printing wirelessly Try one or more of the following MAKE SURE YOUR COMPUTER AND PRINTER HAVE VALID IP ADDRESSES FOR THE NETWORK If you are using a laptop and have power saving settings enabled then you may see the Communication not available message on your computer screen when you attempt to print wirelessly This can occur if the laptop hard drive has powered down If yo...

Страница 115: ...IP addresses again If the laptop and or printer still does not receive a valid IP address then there is a problem with your wireless network Try the following Make sure your access point wireless router is turned on and is working Remove any objects that could be blocking the signal Temporarily turn off any unnecessary wireless devices on your network and pause any network intensive activities lik...

Страница 116: ... most Virtual Private Networks VPNs Most VPNs allow users to communicate with only the VPN and no other network at the same time If you would like to have the ability to connect to your local network and to a VPN at the same time then request the system support person for the VPN to allow split tunneling Be aware that some organizations will not allow split tunneling due to security or technical c...

Страница 117: ...ces of interference and see if it causes the problem If it does then separate your wireless network from the device CHANGE THE CHANNEL THE ACCESS POINT USES You can sometimeseliminate interference from unknownsourcesby changing the channel your access point uses to broadcast There are three distinct channels on a router See the documentation that came with your router to determine which three appl...

Страница 118: ...ess field and checking to see if the printer Web page reloads For more information on assigning static IP addresses see the documentation that came with your router and operating system CHECK FOR KNOWN ISSUES WITH THE ACCESS POINT Some wireless routers have documented defects that were identified and resolved by the manufacturers Visit the companyWebsiteoftheroutermanufacturer Checkforfirmwareupda...

Страница 119: ...ions Improvements or changes in the products or the programs described may be made at any time UNITED STATES GOVERNMENT RIGHTS This software and any accompanying documentation provided under this agreement are commercial computer software and documentation developed exclusively at private expense Licensing notices The following documents can be viewed from the installation software CD Directory Fi...

Страница 120: ...antenna Increase the separation between the equipment and receiver Connect the equipment into an outlet on a circuit different from that to which the receiver is connected Consult your point of purchase or service representative for additional suggestions The manufacturer is not responsible for radio or television interference caused by using other than recommended cablesorbyunauthorizedchangesorm...

Страница 121: ... consumption Watts Printing The product is generating hard copy output from electronic inputs 17 01 Copying The product is generating hard copy output from hard copy original documents 10 31 Scanning The product is scanning hard copy documents 9 37 Ready The product is waiting for a print job 6 95 Power Saver The product is in energy saving mode 3 33 Off The product is plugged into a wall outlet b...

Страница 122: ...ction requirements of EC Council directives 2004 108 EC 2006 95 EC and 2005 32 EC on the approximation and harmonization of the laws of the Member States relating to electromagnetic compatibility safety of electrical equipment designed for use within certain voltage limits and the ecodesign of energy using products The manufacturerof this product is Lexmark International Inc 740 WestNewCircle Road...

Страница 123: ...res that could affect the operation of this equipment If this happens the telephone company will provide advance notice in order for you to make necessary modifications to maintain uninterrupted service If you experience trouble with this equipment for repair or warranty information contact your point of purchase If the equipment is causing harm to the telephone network the telephone company may r...

Страница 124: ...rs du réseau téléphonique du Canada Ce produit est conforme aux spécifications techniques d Industrie Canada Le numéro REN ringer equivalence number numéro d équivalence de sonnerie fournit une indication du nombre maximum de terminaux pouvant être connectés à l interface téléphonique En bout de ligne le nombre d appareils qui peuvent être connectés n est pas directement limité maisla somme desREN...

Страница 125: ...billing tone filter to be installed on any line which receives metering pulses in Switzerland The Lexmark filter must be used as metering pulses are present on all analog telephone lines in Switzerland Utilisation de ce produit en Suisse Cet appareil nécessite l utilisation d un filtre de tonalité de facturation suisse devant être installé sur toute ligne recevant des impulsions de comptage en Sui...

Страница 126: ...en the antenna and any persons for this device to satisfy the RF exposure requirements of the FCC and other regulatory agencies Notice to users in Brazil Este equipamento opera em carater secundario isto e nao tem direito a protecao contra interferencia prejudicial mesmo de estacoes do mesmo tipo e nao pode causar interferencia a sistemas operando em carater primario Res ANATEL 282 2001 Industry C...

Страница 127: ...on optimale Si le matériel ou son antenne d émission est installé à l extérieur il doit faire l objet d une licence L installateurde cet équipementradio doit veiller à ce que l antenne soitimplantée etdirigée de manière à n émettre aucun champ HF dépassant les limites fixées pour l ensemble de la population par Santé Canada Reportez vous au Code de sécurité 6 que vous pouvez consulter sur le site ...

Страница 128: ...ed in the countries indicated in the table below AT BE BG CH CY CZ DE DK EE EL ES FI FR HR HU IE IS IT LI LT LU LV MT NL NO PL PT RO SE SI SK TR UK Česky SpolečnostLexmark International Inc tímto prohlašuje že výrobek tento výrobek je ve shodě sezákladními požadavky a dalšími příslušnými ustanoveními směrnice 1999 5 ES Dansk Lexmark International Inc erklærer herved at dette produkt overholder de ...

Страница 129: ...a konformi mal ħtiġijiet essenzjali u ma dispożizzjonijiet oħrajn relevanti li jinsabu fid Direttiva 1999 5 KE Nederlands Hierbij verklaart Lexmark International Inc dat het toestel dit product in overeenstemming is met de essentiële eisen en de andere relevante bepalingen van richtlijn 1999 5 EG Norsk Lexmark International Inc erklærer herved at dette produktet er i samsvar med de grunnleggende k...

Страница 130: ...ddress 64 connection configurations 80 conserving energy using Eco Mode 17 conserving energy ink and paper 6 conserving paper using Eco Mode 17 continue button greyed out 106 continue button not working 106 continue button unavailable 106 copier or scanner does not respond 98 copies making 49 copy and scan troubleshooting cannot scan to computer over a network 99 copier or scanner does not respond...

Страница 131: ...talling network printer 82 installing optional software 22 interference wireless network 77 internal wireless print server resetting to factory default settings 102 IP address 81 configuring 64 IP address assigning 82 iron on transfers 28 J jams and misfeeds troubleshooting paper jam in the duplex unit 94 paper jam in the paper support 93 paper jam in the printer 93 paper or specialty media 95 K k...

Страница 132: ...ss wireless network 101 photos from memory device printing using printer software 39 PictBridge and USB port location 9 PictBridge enabled camera connecting 40 plain paper 26 poor quality at the edges of page 95 poor scanned image quality 98 postcards 27 Power Saver timeout changing 17 power supply port location 10 print job canceling 48 pausing 47 resuming 47 print media greeting cards 27 labels ...

Страница 133: ...inthead error 87 software did not install 90 shared printing 71 sharing printer in Windows 70 software Service Center 86 software did not install 90 software updates checking 23 enabling 23 software optional finding installing 22 SSID ad hoc 65 finding 78 locating 72 wireless network 72 streaks or lines on printed image 96 supported memory cards and file types 37 supported operating systems 19 swi...

Страница 134: ...lbar 19 Wireless Setup Utility 19 wireless 68 80 printer does not print 107 troubleshooting 108 116 wireless network adding a printer to existing ad hoc network 68 common home configurations 73 creating an ad hoc network using Macintosh 65 creating an ad hoc network using Windows 65 information needed for setting up wireless printing 61 interference 77 resolving communication problems 116 security...

Отзывы: