Front-Panel Inserts
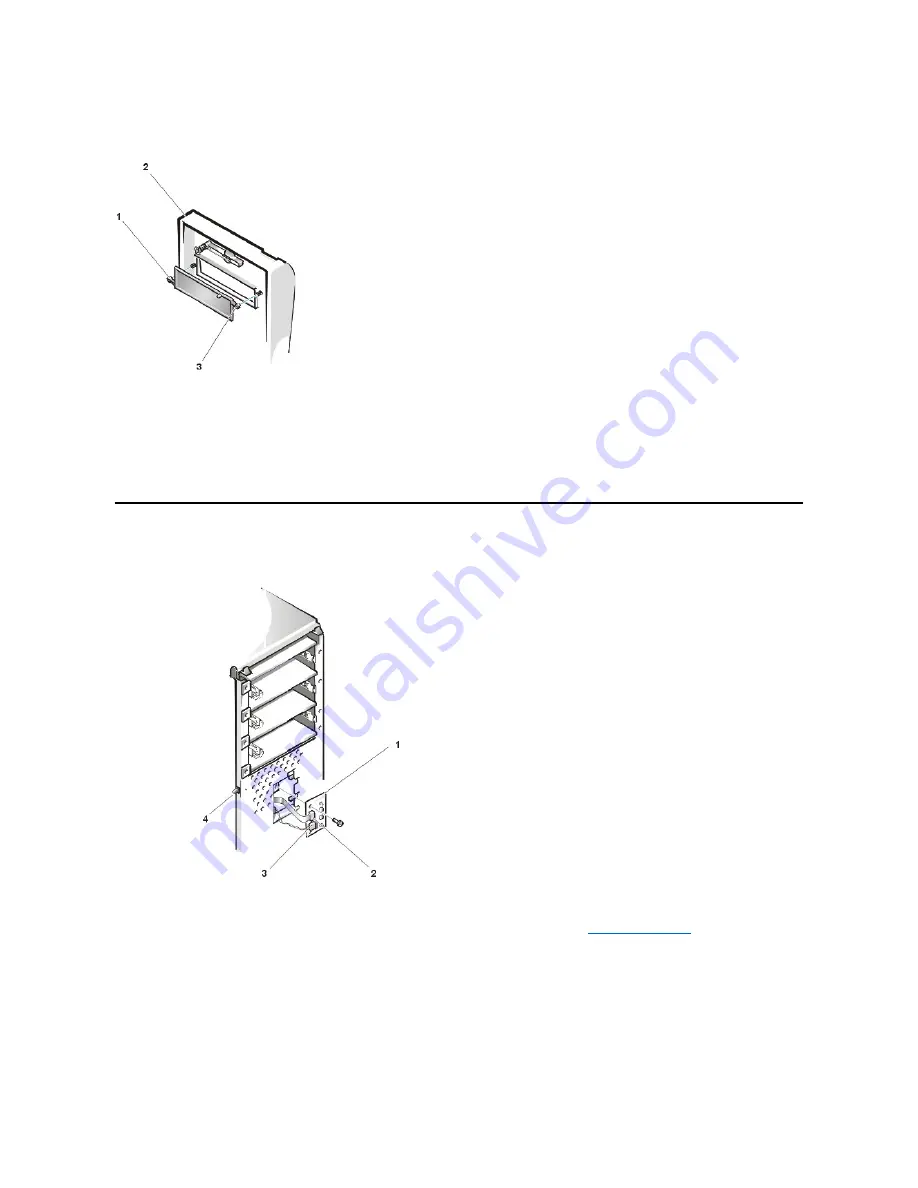
Figure 7. 5.25
-Inch Front-Panel Insert Removal
To remove a 5.25-inch front-panel insert, perform the following steps:
1. Hold the bezel with the front facing you.
2. From the front of the bezel, use your thumbs to press inward on the insert until it snaps free of the bezel.
To replace a 5.25-inch front-panel insert, position the two ring-tabs over the posts on the inside of the bay opening, and then press the ring-tabs
over the posts.
Control Panel
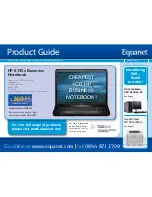
Figure 8. Control Panel Removal
To remove the control panel, perform the following steps:
1. Disconnect the control panel cable from the control panel connector on the system board (see "
PANEL connector).
Note the routing of the control panel cable as you remove it from the chassis.
2. Disconnect the the chassis intrusion switch cable connector from the control panel.
3. Remove the mounting screw that secures the control panel to the chassis.
4. Remove the control panel cable.
5. Pull the control panel cable through the opening in the front wall, and carefully remove the cable from the routing tab in the chassis.
1
Front panel insert
2
Bezel
3
Ring-tab (2)
1
Control panel
2
Control panel connector
3
Chassis intrusion cable connector
4
Chassis intrusion switch
Содержание OptiPlex GX110
Страница 52: ...board Back to Contents Page ...


