background image

16

Dell OptiPlex FX160 

重新映像指南

8

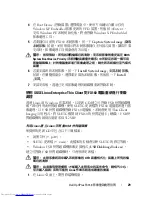
安装完成后,重新启动系统,从已映像的驱动器中进行引导。

使用可引导

 USB 

闪存盘

 (UFD) 

 FX160 

计算机进行重新映像

可在

 UFD 

上使用可引导

 Windows PE RAM 

磁盘对

 FX160 

计算机进行重新

映像。要手动安装该

 UFD

创建可引导

 Windows UFD 

设备


警告:


 FX160 

计算机进行重新映像会擦除硬盘或闪存卡中的所有数据。

因此,在进行计算机重新映像之前要先将系统备份到外部设备。

您需要:

装有

 Microsoft Vista 

 Microsoft XP 

系统的工作站计算机,可提供所有

工具和源文件。

对运行

 Windows Vista 

 Windows PE 

会话的计算机的访问权限。

一台

 UFD 

设备。

UFD 

设备的容量必须至少比您的

 Windows PE 

映像与

您拥有的任何其它文件的大小之和大

 64MB

FX160 Windows 

更新

 DVD

使用


Copype.cmd


脚本在

 UFD 

设备上创建可引导

 Windows PE RAM 

磁盘。

有了

 Windows PE RAM

,用户可以重新启动计算机以进行部署或恢复。


注:


请确保您有足够的内存来支持

 Windows PE 

映像及任何其它应用程序。


注:


有关此过程的其它信息,请参阅 《

Windows 

预安装环境用户指南

》中

的 “

Include a Custom Script in a Windows PE Image

”(在

 Windows PE 

映像中

包含自定义脚本)和 “

Walkthrough: Create a Custom Windows PE Image

”(漫

游:创建自定义

 Windows PE 

映像)两节。这些信息包含在

 WAIK 

软件的帮助

系统中。

1

下载最新版本的

 Microsoft WAIK 

软件并将其安装到工作站计算机中。


注:


下载文件很大 (约

 1GB

2

单击


Start

(开始)

,依次指向


All Programs

(所有程序)

Windows 

OPK


Windows AIK

,然后单击


Windows PE Tools Command Prompt

Windows PE 

工具命令提示符)


注:


打开命令提示符窗口会自动将环境变量设置为指向所有必要工具。在

默认情况下,所有工具都安装在

 C:\Program Files\<version>\Tools 

中,其中


<version> 

可以是

 Windows OPK 

也可以是

 Windows AIK

3

在命令提示符下,运行以下命令:


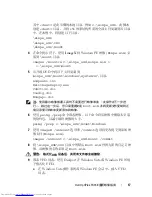
copype.cmd x86 <dest> 

Содержание OptiPlex FX160

Страница 1: ...w w w d e l l c o m s u p p o r t d e l l c o m Dell OptiPlex FX160 Re Imaging Guide Model DC01T ...

Страница 2: ...nge without notice 2008 Dell Inc All rights reserved Reproduction of these materials in any manner whatsoever without the written permission of Dell Inc is strictly forbidden Trademarks used in this text Dell the DELL logo and OptiPlex are trademarks of Dell Inc Microsoft Windows Windows Vista and the Windows Vista start button are either trademarks or registered trademarks of Microsoft Corporatio...

Страница 3: ...on Kit WAIK software The update can then installed on the FX160 flash card when booting the FX160 computer from the USB flash drive Re Imaging an FX160 Computer With the Update DVD CAUTION Re imaging your FX160 computer will erase all data from the hard drive or flash card Back up your system to an external device before re imaging your computer 1 Power off the FX160 computer 2 Attach an external ...

Страница 4: ... UFD This UFD is built manually Create a Bootable Windows UFD Device CAUTION Re imaging your FX160 computer will erase all data from the hard drive or flash card Back up your system to an external device before re imaging your computer What you will need A workstation computer with Microsoft Vista or Microsoft XP that provides all tools and source files Access to a computer running Windows Vista o...

Страница 5: ...environment variables to point to all the necessary tools By default all tools are installed at C Program Files version Tools where version can be Windows OPK or Windows AIK 3 At the command prompt run the command copype cmd x86 dest where dest is a local directory for this procedure such as c winpe_x86 This script creates the dest directory and copies in all necessary files for the x86 architectu...

Страница 6: ...ImageX unmount option with the commit option imagex unmount c winpe_x86 mount commit 8 Replace the default Boot wim in the winpe_x86 ISO directory with your new customized image The image must be called Boot wim CAUTION When a UFD device is formatted all files on the device are erased 9 Prepare the UFD device Use Diskpart to format the UFD with a Windows Vista or Windows PE environment a Within a ...

Страница 7: ... window options list appears in the upper right corner of the screen press F12 to access the Boot Menu 4 In the Boot Device selection window use the arrow keys to highlight the UFD device with the Windows XP Embedded image update then press Enter When the Windows PE system is initialized the Windows XP Embedded imaging tool is launched 5 To save the current FX160 system image click the Capture Sys...

Страница 8: ...ller USBDiskImageTool exe Only the update file is needed to build the bootable USB flash drive CAUTION This procedure formats the UFD device used to load the system image All files on the device are erased CAUTION Some of the commands entered in this procedure are performed with administrative privileges Use extreme care to prevent typing errors which could result in serious damage to your Linux o...

Страница 9: ...e the image from the CD ROM to the USB flash drive dd bs 1M if SLETC update of dev DEVICENAME where SLETC update is the name of the SLETC image on the CD ROM for example media Novell_SLETC_for_Dell Novell SLETC 10 SP2 1 for Dell raw and dev DEVICENAME is the device name of the USB flash drive 8 When the write operation is complete remove the USB flash drive from the Linux system and use it to re i...

Страница 10: ... window click the Browse button and select the SLETC update file on the update CD 5 In the field Choose a USB device use the pull down menu to select the USB flash drive 6 Click Write Disk Image to initiate the write operation Allow the Write and Verify operations to complete fully before removing the USB flash drive 7 When the message Disk was imaged successfully message appears click Close 8 Rem...

Страница 11: ...k image operation completes the Thin Client Image Tool window closes e Close the Thin Client Imager window 8 Shut down the computer 9 Remove the bootable USB device from the computer 10 Boot the system using the internal flash card Automated Deployment The installed image in the FX160 computer includes a deployment server agent that interacts with an Altiris Deployment Server providing an environm...

Страница 12: ...12 Dell OptiPlex FX160 Re Imaging Guide ...

Страница 13: ...w w w d e l l c o m s u p p o r t d e l l c o m Dell OptiPlex FX160 重新映像指南 型号 DC01T ...

Страница 14: ...容均不适用 ____________________ 本说明文件中的信息如有更改 恕不另行通知 2008 Dell Inc 版权所有 翻印必究 未经 Dell Inc 书面许可 严禁以任何形式复制这些材料 本文中使用的商标 Dell DELL 徽标和 OptiPlex 是 Dell Inc 的商标 Microsoft Windows Windows Vista 和 Windows Vista 开始按钮是 Microsoft Corporation 在美国和 或其它国家和地区 的商标或注册商标 本说明文件中述及的其它商标和商品名称是指拥有相应标记和名称的公司或其制造的产品 Dell Inc 对其它公司的商标和产品名称不拥有任何所有权 型号 DC01T 2008 年 8 月 P N H310K 修订版 A01 ...

Страница 15: ... 然后 可以在从 USB 闪 存盘引导 FX160 计算机时将升级光盘安装在 FX160 闪存卡上 使用 DVD 更新光盘对 FX160 计算机进行重新映像 警告 对 FX160 计算机进行重新映像会擦除硬盘或闪存卡中的所有数据 因此 在进行计算机重新映像之前要先将系统备份到外部设备 1 关闭 FX160 计算机 2 将外部 USB DVD 驱动器连接到 FX160 计算机 3 打开 FX160 计算机 BIOS 窗口选项列表出现后 位于屏幕右上角 按 F12 访问 Boot Device Menu 引导设备菜单 4 在 Boot Device 引导设备 选择窗口中 使用箭头键高亮显示所连接 的 DVD 驱动器 5 将可引导的 Windows 升级 DVD 插入 DVD 驱动器中并按 Enter 键 此时将初始化 Windows 预安装环境 PE 系统 6 要保存当前 FX160 系统映像...

Страница 16: ...UFD 设备上创建可引导 Windows PE RAM 磁盘 有了 Windows PE RAM 用户可以重新启动计算机以进行部署或恢复 注 请确保您有足够的内存来支持 Windows PE 映像及任何其它应用程序 注 有关此过程的其它信息 请参阅 Windows 预安装环境用户指南 中 的 Include a Custom Script in a Windows PE Image 在 Windows PE 映像中 包含自定义脚本 和 Walkthrough Create a Custom Windows PE Image 漫 游 创建自定义 Windows PE 映像 两节 这些信息包含在 WAIK 软件的帮助 系统中 1 下载最新版本的 Microsoft WAIK 软件并将其安装到工作站计算机中 注 下载文件很大 约 1GB 2 单击 Start 开始 依次指向 All Progra...

Страница 17: ...l ini DellImageDeploy exe Comctl32 dll Oledlg dll Wimgapi dll 注 使用戴尔映像部署工具时不需要进行映像准备 此操作在下一步进 行 跳过这一步后 您只需重新安装 boot wim 并将更新文件复制到正 确目录便可将未来更新添加到映像 6 使用 peimg prep 命令准备映像 以下命令将从映像中删除未安装 的软件包 以减小最终映像的大小 peimg prep c winpe_x86 mount Windows 7 使用 ImageX unmount 选项和 commit 选项将更改提交到原始映 像文件 Winpe wim imagex unmount c winpe_x86 mount commit 8 将 winpe_x86 ISO 目录中的默认 Boot wim 替换为新的自定义映 像 该映像的名称必须是 Boot wim ...

Страница 18: ... xcopy c winpe_x86 iso s e f f 其中 c 代表技术人员计算机的硬盘 f 代表 UFD 设备 11 将 UFD 设备从技术员计算机中删除 使用 UFD 设备对 FX160 计算机上的 Windows 进行重新映像 警告 对 FX160 计算机进行重新映像会擦除硬盘或闪存卡中的所有数据 因此 在进行计算机重新映像之前要先将系统备份到外部设备 1 关闭 FX160 计算机 2 将带有可引导嵌入式 Windows XP 映像更新的 UFD 设备插入到 USB 端口 3 打开 FX160 计算机 BIOS 窗口选项列表出现后 位于屏幕右上角 按 F12 访问 Boot Menu 引导菜单 4 在 Boot Device 引导设备 选择窗口中 使用箭头键高亮显示带有 嵌入式 Windows XP 映像更新的 UFD 设备 然后按 Enter 键 Windows PE 系统...

Страница 19: ...60 计算机进行重新映像 将 FX160 计算机引导到 USB 闪存盘后 便可使用 Thin Client 映像公用程序将 SLETC 复制到 FX160 闪存卡 硬盘 中 USB 闪存盘的最小容量为 512MB 使用 Linux 创建 Linux 可引导 USB 闪存盘 所提供的升级 CD 包括以下三个文件 说明文件 pdf SLETC 升级文件 raw 此升级文件的名称可反映 SLETC 的修订 级别 Windows USB 闪存盘映像安装程序 USBDiskImageTool exe 构建可引导 USB 闪存盘时 仅需要更新文件 警告 此过程将格式化用于加载系统映像的 UFD 设备 该设备中的所有文 件都将被擦除 警告 在此过程中输入的一些命令要以管理员权限执行 在键入命令时务 必要小心谨慎 以避免出错 否则可能会严重损坏 Linux 操作系统 1 在 Linux 桌面上 打开终端窗...

Страница 20: ...志消息以确定 USB 闪存盘的设备名称 7 使用以下命令将 CD ROM 中的映像写入到 USB 闪存盘 dd bs 1M if SLETC update of dev DEVICENAME 其中 SLETC update 是 CD ROM 中 SLETC 映像的名称 例 如 media Novell_SLETC_for_Dell Novell SLETC 10 SP2 1 for Dell raw dev DEVICENAME 是 USB 闪存盘 的设备名称 8 完成写入操作后 将 USB 闪存盘从 Linux 系统中卸下 然后使用该驱 动器对 FX160 计算机进行重新映像 请参阅第 21 页上的 使用 USB 闪存盘对 FX160 计算机上的 SLETC 进行重新映像 使用 Windows 创建 Linux 可引导 USB 闪存盘 所提供的升级 CD 包括以下三个文件 说明文件 pd...

Страница 21: ...当响应以继续 4 在 USB Disk Image Tool USB 磁盘映像工具 窗口中 单击 Browse 浏览 按钮并在更新 CD 中选择 SLETC 更新文件 5 在 Choose a USB device 选择 USB 设备 字段中 使用下拉式菜单 选择 USB 闪存盘 6 单击 Write Disk Image 写入磁盘映像 启动写入操作 待 Write 写入 和 Verify 验证 操作完成后 再卸下 USB 闪存盘 7 在出现消息 Disk was imaged successfully 磁盘已成功映像 时 单击 Close 关闭 8 将 USB 闪存盘和更新 CD 从 Windows 系统中取出 使用 USB 闪存盘对 FX160 计算机上的 SLETC 进行重新映像 警告 对 FX160 计算机进行重新映像会擦除硬盘或闪存卡中的所有数据 因此 在进行计算机重新映像之前要...

Страница 22: ...nd Install Image 擦除 并安装映像 此时将打开 Thin Client Image Tool Thin Client 映像工具 窗口 d 写入磁盘映像操作完成后 Thin Client Image Tool Thin Client 映像工具 窗口将会关闭 e 关闭 Thin Client Image Thin Client 映像 窗口 8 关闭计算机 9 将可引导 USB 设备从计算机中移除 10 使用内置闪存卡引导系统 自动化部署 在 FX160 计算机上安装的映像包括一个部署服务器代理 该代理可与 Altiris Deployment Server 交互 从而提供一个环境来进行系统更新 包括系统映 像 应用程序软件 BIOS 更新和配置等 的自动化部署 FX160 计算机上有一个支持预引导执行环境 PXE 的网络接口 但是 为提高安全性 戴尔建议将自动化部署的系统设置配...

Страница 23: ...w w w d e l l c o m s u p p o r t d e l l c o m 年 Dell OptiPlex FX160 影像重新處理指南 型號 DC01T ...

Страница 24: ...用 ____________________ 本文件中的資訊如有更改 恕不另行通知 2008 Dell Inc 版權所有 翻印必究 未經 Dell Inc 的書面許可 嚴格禁止以任何形式複製這些內容 本文中使用的商標 Dell DELL 徽標和 OptiPlex 是 Dell Inc 的商標 Microsoft Windows Windows Vista 和 Windows Vista 開始按鈕是 Microsoft Corporation 在美國和 或其他國家 地區的 商標或註冊商標 本說明文件中使用的其他商標及商品名稱 係指擁有這些商標及商品名稱的公司或其製造的 產品 Dell Inc 對本公司之外的商標和產品名稱不擁有任何專有權益 型號 DC01T 2008 年 8 月 P N H310K 修訂版 A01 ...

Страница 25: ...s 系統 可以將 DVD 更新磁片的內容傳送至可啟動 USB 快閃磁碟機中 接著 以 USB 快閃磁碟機啟動 FX160 電腦 即可將更新安裝至 FX160 的快閃 記憶卡 使用更新 DVD 對 FX160 電腦重新進行影像處理 警示 對 FX160 電腦重新進行影像處理會清除硬碟或快閃記憶卡中的所有 資料 針對電腦重新進行影像處理之前 請先將系統備份至外接式裝置 1 關閉 FX160 電腦的電源 2 將外接式 USB DVD 光碟機連接至 FX160 電腦 3 開啟 FX160 電腦的電源 BIOS 視窗選項清單出現時 在畫面右上角 按 F12 存取 Boot Device 啟動裝置 選單 4 在 Boot Device 啟動裝置 選擇視窗中 使用方向鍵反白顯示所連接的 DVD 光碟機 5 將可啟動 Windows 更新 DVD 插入 DVD 光碟機 然後按 Enter 鍵 此時會初始化...

Страница 26: ...部執行 Windows Vista 或 Windows PE 工作階段的電腦 一台 UFD 裝置 UFD 裝置的容量必須比 Windows PE 影像的大小多出 至少 64MB 再加上額外加入的檔案大小 FX160 Windows 更新 DVD 使用 Copype cmd 指令碼 在 UFD 裝置上建立可啟動 Windows PE RAM 磁碟 Windows PE RAM 可用來重新啟動電腦 以進行部署或恢復 註 請先確定您的記憶體容量足以容納 Windows PE 影像以及任何額外的應 用軟體 註 如需有關此程序的其他資訊 請參閱 Windows 預先安裝環境使用者 指南 中的 在 Windows PE 影像中加入自訂的指令碼 以及 逐步解說 建立自訂的 Windows PE 影像 兩個章節 本資訊是 WAIK 軟體說明系統的一 部分 1 下載 Microsoft WAIK 軟體的最新...

Страница 27: ...unt 5 將下列檔案從更新 DVD 複製到 winpe_x86 mount windows system32 目錄中 winpeshl ini DellImageDeploy exe Comctl32 dll Oledlg dll Wimgapi dll 註 使用 Dell Image Deployment 工具 即可省略下一個步驟中的影像準備工 作 省略此步驟後 未來只需重新掛載 boot wim 並將更新檔複製到正 確的目錄中 即可將更新加入影像 6 使用 peimg prep 命令來準備影像 此命令會移除影像中未安裝的 封裝 以減少最終影像的大小 peimg prep c winpe_x86 mount Windows 7 一併使用 ImageX unmount 與 commit 這兩個選項 認可對於原 始影像檔 Winpe wim 所做的變更 imagex unmount c w...

Страница 28: ... device select partition 1 active format fs fat32 assign exit 10 在工作站電腦上 將整個 winpe_x86 ISO 目錄複製到 UFD 裝置 中 您可以手動建立目錄結構 亦可使用 xcopy 複製 ISO 中所有的 結構與內容 若使用 xcopy 請輸入 xcopy c winpe_x86 iso s e f f 其中 c 代表技術人員電腦的硬碟機代號 f 則代表 UFD 裝置的 代號 11 從技術人員電腦卸下 UFD 裝置 使用 UFD 裝置在 FX160 電腦上重新進行 Windows 影像處理 警示 對 FX160 電腦重新進行影像處理會清除硬碟或快閃記憶卡中的所有 資料 針對電腦重新進行影像處理之前 請先將系統備份至外接式裝置 1 關閉 FX160 電腦的電源 2 將存有可啟動 Windows XP Embedded...

Страница 29: ...ge 安裝系統影像 按鈕 在瀏覽視窗中 選擇要安裝的系統影像 然後按一下 Install 安裝 7 安裝完成後 透過已完成影像處理的磁碟機重新啟動系統 使用 SUSE Linux Enterprise Thin Client 對 FX160 電腦重新進行影像 處理 透過 Linux 或 Windows 作業系統 以更新 CD 建立可啟動 USB 快閃磁碟機 後 即可利用此快閃磁碟機 使用 SLETC 更新檔對 FX160 電腦重新進行影 像處理 以 USB 快閃磁碟機啟動 FX160 電腦後 系統會使用 Thin Client Imaging 公用程式 將 SLETC 複製到 FX160 的快閃記憶卡 硬碟 USB 快 閃磁碟機的最低容量需求為 512MB 利用 Linux 建立 Linux 可啟動 USB 快閃磁碟機 所提供的更新 CD 中包含以下三個檔案 說明文件 pdf SLETC ...

Страница 30: ... 裝置名稱 代表 USB 快閃磁碟機的裝置名稱 6 確定 USB 快閃磁碟機的裝置名稱 a 若 USB 快閃磁碟機為自動掛載 而您之後才將它卸載 請使用以 下步驟中由 Linux 指定的裝置名稱 b 若 USB 快閃磁碟機 並非 事先掛載 則必須產生 dmesg 記錄 來顯示新連接的裝置 輸入 dmesg 檢查紀錄訊息以確定 USB 快閃磁碟機的裝置名稱 7 將影像從 CD ROM 寫入 USB 快閃磁碟機 dd bs 1M if SLETC 更新檔 of dev 裝置名稱 其中 SLETC 更新檔 為 SLETC 影像在 CD ROM 中的名稱 例如 media Novell_SLETC_for_Dell Novell SLETC 10 SP2 1 for Dell raw 而 dev 裝置名稱 則是 USB 快閃磁碟機的裝置名稱 8 寫入作業完成後 將 USB 快閃磁碟機從 Linux...

Страница 31: ... 放入 CD ROM 光碟機中 並將 USB 快閃磁碟機插入 USB 連接埠 2 開啟檔案總管視窗 顯示更新 CD 的內容 3 尋找並開啟 USBDiskImageTool exe 若使用 Windows Vista 請適當回 應使用者存取控制訊息以繼續下一個步驟 4 在 USB Disk Image Tool USB 磁碟影像工具 視窗中 按一下 Browse 瀏覽 按鈕 然後選擇更新 CD 中的 SLETC 更新檔 5 使用 Choose a USB device 選擇 USB 裝置 欄位中的下拉式選單 選擇 USB 快閃磁碟機 6 按一下 Write Disk Image 寫入磁碟影像 以起始寫入作業 必須等 Write 寫入 及 Verify 驗證 作業完成後 才可卸下 USB 快閃磁 碟機 7 當 Disk was imaged successfully 已順利完成磁碟影像處理 ...

Страница 32: ...l Image 安裝影像 按鈕一秒鐘以起始寫入作業 c 按一下 Warning 警告 視窗中的 Erase and Install Image 清除並安 裝影像 接著會開啟 Thin Client Image Tool Thin Client 影像工 具 視窗 d 磁碟影像寫入作業完成後 Thin Client Image Tool Thin Client 影 像工具 視窗隨即關閉 e 關閉 Thin Client Imager 視窗 8 關閉電腦 9 從電腦上卸下可啟動 USB 裝置 10 使用內部快閃記憶卡啟動系統 自動化部署 安裝在 FX160 電腦上的影像內含部署伺服器代理程式 可與 Altiris Deployment Server Altiris 部署伺服器 互動 提供可自動化部署各項系統更 新的環境 上述更新包括系統影像 應用程式軟體 BIOS 更新與組態等 FX160 電腦...

Страница 33: ...w w w d e l l c o m s u p p o r t d e l l c o m Dell OptiPlex FX160 Handleiding voor het laden van een nieuwe image Model DC01T ...

Страница 34: ...afgaande kennisgeving worden gewijzigd 2008 Dell Inc Alle rechten voorbehouden Verveelvoudiging van dit document op welke wijze dan ook zonder de schriftelijke toestemming van Dell Inc is strikt verboden Merken in deze tekst Dell het DELL logo enOptiPlex zijn merken van Dell Inc Microsoft Windows WindowsVistaendeStart knopvanWindowsVistazijnmerkenofgedeponeerdemerkenvanMicrosoft Corporation in de ...

Страница 35: ...amma s voor een draadloze kaart moet apart worden geladen Op een Windows systeem kan de dvd met de updates met de WAIK software Microsoft Windows Automation Installation Kit naar een opstartbare USB stick worden overgezet De updates kunnen vervolgens op de flashcard van de FX160 worden geïnstalleerd door de FX160 computer vanaf de USB stick op te starten Een nieuwe image op een FX160 computer lade...

Страница 36: ...ge te installeren Selecteer de systeemimage die u wilt installeren en klik vervolgens op Install Installeren 8 Als de installatie is voltooid wordt het systeem opnieuw opgestart vanaf het station waarop de image is geïnstalleerd Een nieuwe image maken op een FX160 computer met een opstartbare USB stick UFD U kunt een nieuwe image op een FX160 computer laden met een opstartbare Windows PE RAM schij...

Страница 37: ...Het downloadbestand is erg groot ongeveer 1 GB 2 Klik op Start plaats de muisaanwijzer op Alle programma s plaats de muisaanwijzer op Windows OPK of Windows AIK en klik vervolgens op Windows PE Tools Command Prompt OPMERKING Als het venster met de opdrachtregel wordt geopend worden de omgevingsvariabelen automatisch op de vereiste hulpprogramma s ingesteld Standaard worden alle hulpprogramma s geï...

Страница 38: ...age minder groot wordt peimg prep c winpe_x86 mount Windows 7 Breng de wijzigingen aan in het oorspronkelijke imagebestand Winpe wim door de optie ImageX unmount met de optie commit te gebruiken imagex unmount c winpe_x86 mount commit 8 Vervang de standaard Boot wim in de map winpe_x86 ISO door de nieuwe aangepaste image De image moet de naam Boot wim krijgen WAARSCHUWING Als u een USB stick forma...

Страница 39: ... up van uw systeem op een extern station voordat u de nieuwe image laadt 1 Schakel de FX160 computer uit 2 Plaats de USB stick met de update van de opstartbare Windows XP Embedded image in een USB poort 3 Schakel de FX160 computer in Druk als de lijst met opties van het BIOS scherm wordt weergegeven rechtsboven in het scherm op F12 om Boot Menu Opstartmenu te openen 4 Gebruik in het selectievenste...

Страница 40: ...or gebruik te maken van de opstartbare USB stick die met de update cd op een Linux of Windows systeem is gemaakt Nadat u de FX160 computer via de USB stick hebt opgestart wordt het hulpprogramma Thin Client Imaging gebruikt om de SLETC update naar de flashcard vaste schijf van de FX160 te kopiëren De USB stick moet minimaal 512 MB groot zijn Een opstartbare Linux USB stick maken met Linux De updat...

Страница 41: ...t beschikbaar is gemaakt a Typ mount b Controleer het resultaat om vast te stellen of de USB stick beschikbaar is gemaakt c Als de USB stick softwarematig aan het systeem is gekoppeld ontkoppel deze dan umount dev DEVICENAME waarbij dev DEVICENAME de naam is van de USB stick 6 De naam van de USB stick bekijken a Als de USB stick automatisch beschikbaar was gemaakt en u dit vervolgens hebt opgeheve...

Страница 42: ...m van dit bestand geeft het revisieniveau van het SLETC bestand aan De Windows USB stick image installer USBDiskImageTool exe Om een opstartbare USB stick met Windows te maken gebruikt u het programma USBDiskImageTool exe om het SLETC bestand naar de USB stick te schrijven OPMERKING Op het Windows besturingssysteem dat wordt gebruikt om de opstartbare USB stick te maken moet Microsoft NET Framewor...

Страница 43: ...ck WAARSCHUWING Als u een nieuwe image op een FX160 computer laadt worden alle gegevens van de vaste schijf of de flashcard verwijderd Maak een back up van uw systeem op een extern station voordat u de nieuwe image laadt 1 Sluit het besturingssysteem af en schakel de computer uit 2 Plaats de opstartbare USB stick met de SLETC image in een USB poort 3 Schakel de FX160 computer in 4 Als de lijst met...

Страница 44: ...ient Imager 8 Sluit de computer af 9 Verwijder de opstartbare USB stick uit de computer 10 Start het systeem op vanaf de interne flashcard Automatische ingebruikneming De geïnstalleerde image op de FX160 computer bevat een deployment server agent die reageert op een Altiris Deployment Server Hierdoor wordt er een omgeving gemaakt voor de automatische ingebruikneming van systeemupdates zoals systee...

Страница 45: ...w w w d e l l c o m s u p p o r t d e l l c o m Dell OptiPlex FX160 Guide de remplacement d une image système Modèle DC01T ...

Страница 46: ...document sont sujettes à modification sans préavis 2008 Dell Inc Tous droits réservés La reproduction de ce document de quelque manière que ce soit sans l autorisation écrite de Dell Inc est strictement interdite Marques utilisées dans ce texte Dell le logo DELL et OptiPlex sont des marques de Dell Inc Microsoft Windows Windows Vista et le logo du bouton Démarrer de Windows Vista sont des marques ...

Страница 47: ...s logiciels comme les pilotes pour carte sans fil sont chargés séparément Le contenu du DVD de mise à jour peut être transféré sur un lecteur flash USB amorçable à l aide d un ordinateur sous Windows et du logiciel Microsoft Windows Automation Installation Kit WAIK La mise à jour peut ensuite être installée sur la carte flash de l ordinateur FX160 lorsque ce dernier démarre à partir du lecteur fla...

Страница 48: ...té des périphériques d amorçage dans le BIOS Avant d en remplacer l image système sauvegardez les données de votre ordinateur sur un périphérique externe 7 Pour installer une nouvelle image système cliquez sur le bouton Install System Image Installer une image système Dans la fenêtre de sélection de l emplacement choisissez l image système à installer puis cliquez sur Install Installer 8 Une fois ...

Страница 49: ...ion supplémentaire REMARQUE pour plus d informations sur cette procédure consultez les sections Include a Custom Script in a Windows PE Image Ajouter un script personnalisé à une image Windows PE et Walkthrough Create a Custom Windows PE Image Procédure création d une image Windows PE personnalisée du guide Windows Preinstallation Environment User Guide Guide d utilisation Windows Preinstallation ...

Страница 50: ...uis le DVD de mise à jour vers le répertoire winpe_x86 mount windows system32 winpeshl ini DellImageDeploy exe Comctl32 dll Oledlg dll Wimgapi dll REMARQUE la préparation de l image à l étape suivante n est pas nécessaire pour l outil Dell Image Deployment Ignorer cette étape vous permet d ajouter ultérieurement des mises à jour à votre image en montant à nouveau boot wim et en copiant les fichier...

Страница 51: ...a totalité du lecteur flash USB en un seul lecteur FAT32 Dans l exemple suivant le lecteur flash USB est disk 1 disque 1 Ouvrez une fenêtre de commande et entrez les commandes suivantes diskpart select disk 1 clean create partition primary size capacité du périphérique select partition 1 active format fs fat32 assign exit 10 Sur la station de travail copiez l intégralité du répertoire winpe_x86 IS...

Страница 52: ...edded puis appuyez sur Entrée Lorsque le système Windows PE s initialise l outil de gestion d image de Windows XP Embedded se lance 5 Pour sauvegarder l image système actuelle de l ordinateur FX160 cliquez sur le bouton Capture System Image Capturer l image système et suivez les indications pour enregistrer l image système sur un périphérique externe Une fois le processus de capture terminé la fen...

Страница 53: ... fichier reflète le numéro de révision de SLETC programme Windows d installation d image pour lecteur flash USB USBDiskImageTool exe Seul le fichier de mise à jour est nécessaire pour créer le lecteur flash USB amorçable PRÉCAUTION cette procédure formate le périphérique flash USB qui servira à charger l image système Tous les fichiers sur le périphérique sont effacés PRÉCAUTION certaines commande...

Страница 54: ...nérez un fichier journal dmesg pour connaître les périphériques connectés dernièrement Entrez dmesg Examinez les messages du fichier journal pour connaître le nom de périphérique du lecteur flash USB 7 Copiez l image depuis le CD ROM vers le lecteur flash USB dd bs 1M if mise à jour SLETC of dev NOMPÉRIPHÉRIQUE où mise à jour SLETC est le nom de l image SLETC qui figure sur le CD ROM par exemple m...

Страница 55: ...ur sont effacés 1 Sur un système sous Windows XP ou Windows Vista insérez le CD de mise à jour SLETC dans un lecteur de CD ROM et le lecteur flash USB dans un port USB 2 Ouvrez l Explorateur pour afficher le contenu du CD de mise à jour dans une fenêtre 3 Recherchez et exécutez USBDiskImageTool exe Sous Windows Vista suivez les indications des messages du Contrôle de compte d utilisateur pour cont...

Страница 56: ... menu Boot Device Périphérique d amorçage 5 Dans la fenêtre de sélection du périphérique d amorçage utilisez les touches fléchées pour mettre en surbrillance le lecteur flash USB contenant l image SLETC puis appuyez sur Entrée 6 Laissez le système d exploitation SLETC finir de démarrer puis cliquez sur le bouton Poste de travail sur le bureau Dans la fenêtre qui s ouvre a Cliquez sur More Applicat...

Страница 57: ...déploiement qui associé à un serveur de déploiement Altiris Deployment Server offre un environnement permettant le déploiement automatisé de mises à jour du système image système applications mises à jour et configuration du BIOS etc L ordinateur FX160 intègre une interface réseau compatible PXE Preboot Execution Environment Cependant par souci de sécurité Dell recommande que les systèmes faisant ...

Страница 58: ...58 Guide de remplacement d une image système Dell OptiPlex FX160 ...

Страница 59: ...w w w d e l l c o m s u p p o r t e u r o d e l l c o m Dell OptiPlex FX160 Handbuch zur Image Wiederherstellung Modell DC01T ...

Страница 60: ... Die in diesem Dokument enthaltenen Informationen können sich ohne vorherige Ankündigungen ändern 2008 Dell Inc Alle Rechte vorbehalten Die Vervielfältigung oder Wiedergabe dieser Unterlagen in jeglicher Weise ohne schriftliche Genehmigung von Dell Inc ist strengstens untersagt In diesem Text verwendete Marken Dell das DELL Logo und OptiPlex sind Marken von Dell Inc Microsoft Windows Windows Vista...

Страница 61: ...he Software wie z B Treiber für Wireless Karten wird separat geladen Die Aktualisierungs DVD kann bei einem Windows System mit einer automatischen Installationssoftware von Microsoft Windows WAIK auf ein startfähiges USB Flashlaufwerk übertragen werden Die Aktualisierung kann anschließend auf einer FX160 Flash Karte installiert werden wenn der FX160 Computer vom USB Flashlaufwerk gestartet wird Im...

Страница 62: ...ystem auf einem externen Gerät bevor Sie eine Image Wiederherstellung auf Ihrem Computer durchführen 7 Um ein neues System Image zu installieren klicken Sie auf die Schaltfläche Install System Image System Image installieren Wählen Sie im Suchfenster das System Image das Sie installieren möchten und klicken Sie anschließend Install Installieren 8 Ist die Installation abgeschlossen starten Sie das ...

Страница 63: ...reinstallation Environment User Guide Benutzerhandbuch zur Windows Vorinstallationsumgebung in den Abschnitten Include a Custom Script in a Windows PE Image Einfügen eines benutzerdefinierten Scripts in ein Windows PE Image und Walkthrough Create a Custom Windows PE Image Komplettlösung Erstellen eines benutzerdefinierten Windows PE Image Diese Informationen sind Teil des Hilfesystems der WAIK Sof...

Страница 64: ...npe_x86 winpe wim 1 c winpe_x86 mount 5 Kopieren Sie die folgenden Dateien von der Aktualisierungs DVD in das Verzeichnis winpe_x86 mount windows system32 winpeshl ini DellImageDeploy exe Comctl32 dll Oledlg dll Wimgapi dll ANMERKUNG Eine Image Vorbereitung die im nächsten Schritt durchgeführt wird ist für das Image Deployment Tool von Dell nicht erforderlich Wenn Sie diesen Schritt überspringen k...

Страница 65: ...matieren a Setzen Sie das USB Flashlaufwerk in einer Sitzung von Windows Vista oder Windows PE ein b Formatieren Sie das gesamte USB Flashlaufwerk als einzelnes FAT32 Laufwerk Im folgenden Beispiel wird das USB Flashlaufwerk als disk 1 verwendet Öffnen Sie ein Befehlsfenster und geben Sie Folgendes ein diskpart select disk 1 clean create partition primary size size of device select partition 1 act...

Страница 66: ...tasten und drücken Sie anschließend die Eingabetaste Ist das Windows PE System initialisiert wird das Image Tool von Windows XP Embedded gestartet 5 Um das aktuelle FX160 System Image zu speichern klicken Sie die Schaltfläche Capture System Image System Image erfassen und folgen Sie den Anweisungen um das System Image auf einem externen Gerät zu speichern Ist der Erfassungsvorgang abgeschlossen wi...

Страница 67: ...sierungsdatei raw Der Name dieser Datei gibt die Versionsstufe von SLETC wieder Windows USB Flashlaufwerk Image Installer USBDiskImageTool exe Für die Erstellung des startfähigen USB Flashlaufwerks ist nur die Aktualisierungsdatei nötig VORSICHT Bei diesem Vorgang wird das USB Flashlaufwerk formatiert mit dem das System Image geladen werden soll Alle Daten auf dem Gerät werden gelöscht VORSICHT Fü...

Страница 68: ...Schritten zugewiesen wird b Wurde das USB Flashlaufwerk nicht vorher gemountet erstellen Sie ein dmesg Protokoll um die neu verbundenen Geräte zu zeigen Geben Sie ein dmesg Suchen Sie in den Protokollmeldungen nach dem Gerätenamen des USB Flashlaufwerks 7 Schreiben Sie das Image von der CD ROM auf das USB Flashlaufwerk dd bs 1M if SLETC update of dev DEVICENAME Dabei ist SLETC update der Name des ...

Страница 69: ... Für die Betriebssysteme Windows XP oder Windows Vista legen Sie die CD mit der SLETC Aktualisierung in das CD ROM Laufwerk ein und schließen das USB Flashlaufwerk an den USB Anschluss an 2 Öffnen Sie zum Anzeigen des Inhalts der Aktualisierungs CD ein Explorer Fenster 3 Suchen Sie nach der Datei USBDiskImageTool exe und öffnen Sie diese Um fortfahren zu können reagieren Sie unter Windows Vista en...

Страница 70: ...der Optionsliste in der oberen rechten Ecke angezeigt drücken Sie die Taste F12 um das Startgerätemenü aufzurufen 5 Markieren Sie im Fenster für die Startgeräteauswahl mithilfe der Pfeiltasten das USB Flashlaufwerk mit dem SLETC Image und drücken Sie anschließend die Eingabetaste 6 Warten Sie bis das SLETC Betriebssystem mit dem Starten fertig ist und klicken Sie anschließend auf dem Desktop auf d...

Страница 71: ...uter enthält einen Deployment Server Agenten der mit einem Altiris Deployment Server interagiert und somit eine Umgebung für das automatisierte Deployment der Systemaktualisierungen der Anwendungssoftware der BIOS Aktualisierungen und Konfigurationen usw ermöglicht Der FX160 Computer verfügt über eine Netzwerkschnittstelle die für PXE Preboot Execution Environment geeignet ist Dell weist zur Erhöh...

Страница 72: ...72 Dell OptiPlex FX160 Handbuch zur Image Wiederherstellung ...

Страница 73: ...w w w d e l l c o m s u p p o r t d e l l c o m Dell OptiPlex FX160 Guida al re imaging Modello DC01T ...

Страница 74: ...vviso 2008 Dell Inc Tutti i diritti riservati È severamente vietata la riproduzione con qualsiasi strumento senza l autorizzazione scritta di Dell Inc Marchi commerciali utilizzati in questo testo Dell il logo DELL e OptiPlex sono marchi commerciali di Dell Inc Microsoft Windows Windows Vista e il pulsante Start di Windows Vista sono marchi commerciali o marchi registrati di Microsoft Corporation ...

Страница 75: ...emoria flash USB di avvio tramite un sistema Windows con il software Microsoft Windows Automation Installation Kit WAIK È possibile quindi installare l aggiornamento sulla scheda flash FX160 quando il computer FX160 viene avviato dall unità memoria flash USB Re imaging di un computer FX160 con il DVD di aggiornamento ATTENZIONE il re imaging del computer FX160 cancellerà tutti i dati dal disco rig...

Страница 76: ...selezionare l immagine del sistema da installare quindi fare clic su Installa 8 Una volta completata l installazione riavviare il sistema dall unità che è stata sottoposta a imaging Re imaging di un computer FX160 con l unità memoria flash USB di avvio UFD È possibile eseguire il re imaging su un computer FX160 con un disco RAM di Windows PE di avvio su un unità UFD Questa unità UFD viene creata m...

Страница 77: ...N B Il file di download ha dimensioni molto elevate circa 1 GB 2 Fare clic su Start selezionare Tutti i programmi Windows OPK o Windows AIK e quindi scegliere Prompt dei comandi degli strumenti di Windows PE N B All apertura della finestra del prompt dei comandi le variabili dell ambiente verranno automaticamente impostate in modo da fare riferimento a tutti gli strumenti necessari Per impostazion...

Страница 78: ... mount Windows 7 Applicare le modifiche al file di immagine originale Winpe wim utilizzando l opzione ImageX unmount con l opzione commit imagex unmount c winpe_x86 mount commit 8 Sostituire il file predefinito Boot wim nella directory winpe_x86 ISO con la nuova immagine personalizzata È necessario denominare l immagine Boot wim ATTENZIONE quando viene eseguita la formattazione di un dispositivo U...

Страница 79: ...ma del re imaging del computer 1 Spegnere il computer FX160 2 Collegare il dispositivo UFD con l aggiornamento dell immagine di Windows XP Embedded di avvio a una porta USB 3 Accendere il computer FX160 Quando viene visualizzato l elenco di opzioni della finestra del BIOS nell angolo superiore destro dello schermo premere F12 per accedere al menu di avvio 4 Nella finestra di selezione Dispositivo ...

Страница 80: ...ata con il CD di aggiornamento e un sistema Linux o Windows Dopo aver avviato il computer FX160 dall unità memoria flash USB l utilità di imaging Thin Client viene utilizzata per copiare SLETC sulla scheda flash FX160 disco rigido La dimensione minima per l unità memoria flash USB è 512 MB Creazione di un unità memoria flash USB di avvio con Linux Il CD di aggiornamento fornito include i tre file ...

Страница 81: ...re mount b Esaminare l output per determinare se l unità memoria flash USB è montata c Se l unità è montata smontarla umount dev DEVICENAME dove dev DEVICENAME è il nome del dispositivo dell unità memoria flash USB 6 Determinare il nome del dispositivo dell unità memoria flash USB a Se l unità memoria flash USB è stata montata automaticamente e successivamente smontata utilizzare il nome del dispo...

Страница 82: ...lo di revisione di SLETC Programma di installazione dell immagine dell unità memoria flash USB di Windows USBDiskImageTool exe Per creare l unità memoria flash USB di avvio con Windows utilizzare il programma USBDiskImageTool exe per scrivere il file SLETC sull unità memoria flash USB N B Il sistema operativo Windows utilizzato per creare l unità memoria flash USB di avvio deve includere Microsoft...

Страница 83: ... di SLETC su un computer FX160 con un unità memoria flash USB ATTENZIONE il re imaging del computer FX160 cancellerà tutti i dati dal disco rigido o dalla scheda flash Eseguire il backup del sistema su una periferica esterna prima del re imaging del computer 1 Arrestare il sistema operativo e spegnere il computer 2 Inserire l unità memoria flash di avvio con l immagine di SLETC in una porta USB 3 ...

Страница 84: ...sistema 9 Rimuovere il dispositivo USB di avvio dal computer 10 Avviare il sistema tramite la scheda flash interna Distribuzione automatizzata L immagine installata nel computer FX160 include un agente server di distribuzione che interagisce con un Altiris Deployment Server fornendo un ambiente per la distribuzione automatizzata degli aggiornamenti del sistema inclusi immagine del sistema software...

Страница 85: ...w w w d e l l c o m j p s u p p o r t j p d e l l c o m Dell OptiPlex FX160 イメージ再作成ガイド モデル DC01T ...

Страница 86: ...せん ____________________ この文書の情報は 事前の通知なく変更されることがあります 2008 Dell Inc All rights reserved Dell Inc の書面による許可のない複製は いかなる形態においても厳重に禁じられています 本書に使用されている商標 Dell DELL ロゴ および OptiPlex は Dell Inc の商標です Microsoft Windows Windows Vista および Windows Vista のスタートボタンは米国その他の国における Microsoft Corporation の商標または登録商標です この文書では 上記記載以外の商標および会社名が使用されている場合があります それらの商標や会 社名は 一切 Dell Inc に帰属するものではありません モデル DC01T 2008 年 8 月 P N H...

Страница 87: ...アを搭載した Windows システムを使用して ブータブ ルユニバーサルシリアルバス USB フラッシュドライブに転送できます その 後 FX160 コンピュータを USB フラッシュドライブから起動して アップデー トを FX160 フラッシュカードにインストールします アップデート DVD を使用した FX160 コンピュータのイメージ再作成 警告 FX160 コンピュータのイメージを再作成すると ハードドライブまたはフラッ シュカードのデータがすべて消去されます コンピュータのイメージを再作成する 前に 外付けデバイスにシステムのバックアップを作成してください 1 FX160 コンピュータの電源を切ります 2 外付け USB DVD リーダードライブを FX160 コンピュータに接続します 3 FX160 コンピュータの電源を入れます BIOS ウィンドウオプションリスト が 画面...

Страница 88: ... Windows PE ブータブル RAM ディスクを使用して FX160 コン ピュータのイメージを再作成できます この UFD は手動でビルドされます Windows ブータブル UFD デバイスの作成 警告 FX160 コンピュータのイメージを再作成すると ハードドライブまたはフラッ シュカードのデータがすべて消去されます コンピュータのイメージを再作成する 前に 外付けデバイスにシステムのバックアップを作成してください 次のものが必要です すべてのツールやソースファイルを提供する Microsoft Vista または Microsoft XP 搭載ワークステーションコンピュータ Windows Vista または Windows PE セッションを実行するコンピュータ へのアクセス UFD デバイス UFD デバイスのサイズは Windows PE イメージとその他に 格納するフ...

Страница 89: ...PE Tools Command Prompt Windows PE ツールコマンドプロンプト をクリックします メモ コマンドプロンプトウィンドウが自動的に開き すべての必要なツールを指 定する環境変数が設定されます デフォルトでは すべてのツールが C Program Files version Tools にインストールされます version には Windows OPK また は Windows AIK が入ります 3 コマンドプロンプトで次のコマンドを実行します copype cmd x86 dest 4 dest には この手順で使用するローカルディレクトリ c winpe_x86 など を指定します このスクリプトが dest ディレクトリを作成し x86 アーキテクチャに必要なすべてのファイルをこのディレクトリにコピー します この例では 次のディレクトリが作成されます ...

Страница 90: ... imagex unmount c winpe_x86 mount commit 9 winpe_x86 ISO ディレクトリ内のデフォルトの Boot wim を新しくカ ス タ マ イ ズ し た イ メ ー ジ に 置 き 換 え ま す こ の イ メ ー ジ の 名 前 は Boot wim にする必要があります 警告 UFD デバイスをフォーマットすると デバイス上のファイルはすべて消去さ れます 10 UFD デバイスを準備します Diskpart を使用して Windows Vista または Windows PE 環境で UFD をフォーマットします a Windows Vista オペレーティングシステムまたは Windows PE のセッ ション中に UFD デバイスを挿入します b UFD 全体を 1 つの FAT32 ドライブとしてフォーマットします 次の例 では...

Страница 91: ...ンピュータの電源を入れます BIOS ウィンドウオプションリスト が 画面の右上隅に 表示されたら F12 を押して Boot Menu 起動メ ニュー にアクセスします 4 Boot Device 起動デバイス 選択ウィンドウで 矢印キーを使用して Windows XP Embedded イメージアップデートが格納された UFD デバイ スをハイライトし Enter を押します Windows PE システムが初期化 されると Windows XP Embedded イメージ作成ツールが起動します 5 現在の FX160 システムイメージを保存するには Capture System Image システムイメージのキャプチャ ボタンをクリックし プロンプトに従っ てシステムイメージを外付けデバイスに保存します キャプチャが完了す ると イメージ作成ツールのウィンドウが再表示されます 警告 ...

Страница 92: ...ETC アップデートファイル raw このファイルの名前には SLETC の リビジョンレベルが使用されます Windows USB フラッシュドライブイメージインストーラ USBDiskImageTool exe ブータブル USB フラッシュドライブをビルドするために必要なのは アップ デートファイルだけです 警告 この手順では システムイメージをロードする UFD デバイスをフォーマット します デバイス上のファイルはすべて消去されます 警告 この手順で入力するコマンドには 管理者権限がないと実行できないものが あります 入力エラーがないように十分注意してください 入力エラーによって Linux オペレーティングシステムに深刻な障害が発生するおそれがあります 1 Linux デスクトップで ターミナルウィンドウを開きます 2 root ユーザーとしてログインしていない場合は 次のコマ...

Страница 93: ...ライブのデバイス名を確認します 7 CD ROM 内のイメージを USB フラッシュドライブに書き込みます dd bs 1M if SLETC update of dev DEVICENAME SLETC update には CD ROM 上の SLETC イメージの名前 例 media Novell_SLETC_for_Dell Novell SLETC 10 SP2 1 for Dell raw dev DEVICENAME には USB フラッシュドライブのデ バイス名を指定します 8 書き込み動作が完了したら USB フラッシュドライブを Linux システムから 取り外し そのドライブを使用して FX160 コンピュータのイメージを再作成 します 94 ページの USB フラッシュドライブを使用した FX160 コン ピュータの SLETC イメージ再作成 を参照 Windows...

Страница 94: ...ザーアクセス制御メッセージに応答して 続行します 4 USB Disk Image Tool USB ディスクイメージツール ウィンドウで Browse 参照 ボタンをクリックし アップデート CD の SLETC アップデートファ イルを選択します 5 Choose a USB device USB デバイスの選択 フィールドで プルダウン メニューを使用して USB フラッシュドライブを選択します 6 Write Disk Image ディスクイメージの書き込み をクリックして 書き 込み動作を開始します Write 書き込み 動作と Verify 検証 動作 が完全に完了してから USB フラッシュドライブを取り外します 7 Disk was imaged successfully ディスクのイメージ作成に成功しました というメッセージが表示されたら Close 閉じる をクリックし...

Страница 95: ...hin Client イメージ をクリックします 7 Thin Client Image Thin Client イメージ ウィンドウで 次の手順に従い ます a Target ターゲット プルダウンメニューで Hard Drive ハードド ライブ を選択します 警告 ディスクイメージを書き込んでいる間は コンピュータでその他の操作を実 行しないでください b Install Image イメージのインストール ボタンをクリックし 1 秒 間押したままにして 書き込み動作を開始します c Warning 警告 ウィンドウで Erase and Install Image イメージ の消去とインストール をクリックします Thin Client Image Tool Thin Client イメージツール ウィンドウが開きます d ディスクイメージの書き込み動作が完了すると Thin Cl...

Страница 96: ...プリケーションソフトウェア BIOS アップ デート 設定などのシステムアップデートを自動的に展開する環境を提供します FX160 コンピュータには Preboot Execution Environment PXE 対応ネット ワークインタフェースが搭載されています ただし セキュリティを向上させ るためには PXE ではなく自動パーティションを使用するように 自動デプロ イメントをセットアップすることをお勧めします Altiris ソフトウェアのマニュアルは 次のサイトから入手できます http www altiris com Support Documentation aspx FX160 システムは Altiris Deployment Server の使用ライセンスを取得しています ...

Страница 97: ...w w w d e l l c o m s u p p o r t d e l l c o m Dell OptiPlex FX160 이미지 재설치 가이드 모델 DC01T ...

Страница 98: ...____________ 본 설명서에 수록된 정보는 사전 통보 없이 변경될 수 있습니다 2008 Dell Inc 저작권 본사 소유 Dell Inc 의 서면 승인 없이 어떠한 방식으로든 본 자료를 무단 복제하는 행위는 엄격히 금지됩 니다 본 설명서에 사용된 상표 Dell DELL 로고 및 OptiPlex는 Dell Inc 의 상표입니다 Microsoft Windows Windows Vista 및 Windows Vista 시작 단추는 미국 및 또는 기타 국가 지역에서 Microsoft Corporation의 상표 또는 등록 상표입니다 본 설명서에서 특정 회사의 상표 및 회사 이름 또는 제품을 지칭하기 위해 기타 상표 및 상호 를 사용할 수도 있습니다 Dell Inc 는 자사가 소유하고 있는 것 이외에 기타 모든 ...

Страница 99: ...s Automation Installation Kit WAIK 를 사용하면 DVD 업데이트 디스크를 부팅 가능한 USB 플래시 드라이브로 전송할 수 있습니다 그런 다음 USB 플래시 드라이브로 FX160 컴퓨터를 부팅하면 FX160 플래시 카드에 업데이트를 설치할 수 있습니다 업데이트 DVD를 사용하여 FX160 컴퓨터에 이미지 재설치 주의 FX160 컴퓨터에 이미지를 재설치하면 하드 드라이브 또는 플래시 카드 의 모든 데이터가 지워집니다 컴퓨터에 이미지를 재설치하기 전에 시스템을 외부 장치로 백업하십시오 1 FX160 컴퓨터의 전원을 끕니다 2 외장형 USB DVD 판독기 드라이브를 FX160 컴퓨터에 연결합니다 3 FX160 컴퓨터의 전원을 켭니다 BIOS 창 옵션 목록이 나타나면 화면 우측 상단 F12...

Страница 100: ...dows PE RAM 디스크가 들어 있는 UFD를 사용하여 FX160 컴퓨터에 이미지를 재설치할 수 있습니다 이 UFD는 수동으로 만 들어집니다 부팅 가능한 Windows UFD 장치 만들기 주의 FX160 컴퓨터에 이미지를 재설치하면 하드 드라이브 또는 플래시 카드 의 모든 데이터가 지워집니다 컴퓨터에 이미지를 재설치하기 전에 시스템을 외부 장치로 백업하십시오 필요 사항 모든 도구와 소스 파일을 제공하는 Microsoft Vista 또는 Microsoft XP가 설치된 워크스테이션 컴퓨터 Windows Vista 또는 Windows PE 세션을 실행하며 액세스 가능한 컴 퓨터 UFD 장치 UFD 장치의 크기는 사용하려는 Windows PE 이미지와 기타 추가 파일을 합한 크기보다 64MB 이상 커야 합니다...

Страница 101: ...IK를 가리킨 다음 Windows PE 도구 명령 프롬프트를 클릭 합니다 주 명령 프롬프트 창을 열면 필요한 모든 도구를 가리키도록 환경 변수가 자 동으로 설정됩니다 기본적으로 모든 도구는 C Program Files version Tools 에 설치되며 여기에서 version 은 Windows OPK 또는 Windows AIK 중 하나가 될 수 있습니다 3 명령 프롬프트에서 다음 명령을 실행합니다 copype cmd x86 dest 여기에서 dest 은 이 절차에 사용되는 로컬 디렉터리입니다 예 c winpe_x86 이 스크립트는 dest 디렉터리를 만들고 x86 아 키텍처에 필요한 모든 파일을 해당 디렉터리로 복사합니다 이 예에서 는 다음과 같은 디렉터리가 만들어집니다 winpe_x86 winpe_x86...

Страница 102: ...t 옵션과 commit 옵션을 사용하여 원본 이미지 파일 Winpe wim 에 변경 사항을 적용합니다 imagex unmount c winpe_x86 mount commit 8 winpe_x86 ISO 디렉터리의 기본 Boot wim을 새롭게 사용자 지 정된 이미지로 교체합니다 이미지의 이름은 Boot wim이어야 합니다 주의 UFD 장치를 포맷하면 장치에 있는 모든 파일이 지워집니다 9 UFD 장치를 준비합니다 Diskpart 명령을 사용하여 UFD를 Windows Vista 또는 Windows PE 환경으로 포맷합니다 a Windows Vista 운영 체제 또는 Windows PE 세션에 UFD 장치를 삽 입합니다 b 전체 UFD를 하나의 FAT32 드라이브로 포맷합니다 다음 예에서 는 UFD를 disk...

Страница 103: ...트에 연결합니다 3 FX160 컴퓨터의 전원을 켭니다 BIOS 창 옵션 목록이 나타나면 화면 우 측 상단 F12 키를 눌러 Boot 부팅 메뉴에 액세스합니다 4 Boot Device 부팅 장치 선택 창에서 화살표 키를 사용하여 Windows XP Embedded 이미지 업데이트가 들어 있는 UFD 장치를 강조 표시한 다음 Enter 키를 누릅니다 Windows PE 시스템이 초기화되면 Windows XP Embedded 이미징 도구가 실행됩니다 5 현재 FX160 시스템 이미지를 저장하려면 Capture System Image 시스 템 이미지 캡처 단추를 클릭하고 화면에 나타난 지침에 따라 시스템 이 미지를 외부 장치에 저장합니다 캡처 작업이 완료되면 이미징 도구 창 이 다시 나타납니다 주의 기본적으로 기존...

Страница 104: ... 다음의 세 파일이 포함되어 있습니다 설명서 pdf SLETC 업데이트 파일 raw 이 파일의 이름은 SLETC의 개정 수준 을 나타냅니다 Windows USB 플래시 드라이브 이미지 설치 프로그램 USBDiskImageTool exe 부팅 가능한 USB 플래시 드라이브를 만들려면 업데이트 파일만 필요합 니다 주의 이 절차에서 시스템 이미지를 로드하는 데 사용하는 UFD 장치를 포맷 합니다 장치에 있는 모든 파일이 지워집니다 주의 이 절차에서 입력하는 일부 명령은 관리자 권한이 있어야 실행됩니다 명령을 잘못 입력하지 않도록 주의하십시오 Linux 운영 체제에 심각한 손상 이 발생할 수 있습니다 1 Linux 바탕 화면에서 터미널 창을 엽니다 2 root 사용자로 로그인하지 않은 경우 다음 명령을 입력합니다 ...

Страница 105: ...니다 다음을 입력합니다 dmesg 로그 메시지를 조사하여 USB 플래시 드라이브의 장치 이름을 확인합 니다 7 CD ROM에서 USB 플래시 드라이브로 이미지를 씁니다 dd bs 1M if SLETC update of dev DEVICENAME 여기에서 SLETC update 는 CD ROM에 들어 있는 SLETC 이미지 의 이름 예 media Novell_SLETC_for_Dell Novell SLETC 10 SP2 1 for Dell raw 이고 dev DEVICENAME 는 USB 플래시 드라이브의 장치 이름입니다 8 쓰기 작업이 완료되면 Linux 시스템에서 USB 플래시 드라이브를 제거 하여 FX160 컴퓨터의 이미지 재설치 작업에 사용합니다 106페이지의 USB 플래시 드라이브를 사용하여 FX16...

Страница 106: ... 업데이트 CD의 내용을 보여주는 탐색기 창이 열립니다 3 USBDiskImageTool exe를 찾아 엽니다 Windows Vista를 사용하는 경우 사용자 계정 컨트롤 메시지에 적절히 응답하여 계속 진행합니다 4 USB Disk Image Tool USB 디스크 이미지 도구 창에서 Browse 찾아보 기 단추를 클릭하여 업데이트 CD에 들어 있는 SLETC 업데이트 파일 을 선택합니다 5 Choose a USB device USB 장치 선택 필드에서 풀다운 메뉴를 사용하 여 USB 플래시 드라이브를 선택합니다 6 Write Disk Image 디스크 이미지 쓰기 를 클릭하여 쓰기 작업을 시작합 니다 Write 쓰기 및 Verify 확인 을 실행하여 작업을 완전히 종료한 다음 USB 플래시 드라이브를 제거...

Страница 107: ...pplications 기타 응용 프로그램 을 클릭합니다 b Thin Client Image Thin Client 이미지 를 클릭합니다 7 Thin Client Image Thin Client 이미지 창에서 다음을 수행합니다 a Target 대상 풀다운 메뉴를 찾아서 Hard Drive 하드 드라이브 를 선택합니다 주의 디스크 이미지 쓰기가 완료될 때까지 컴퓨터에서 다른 작업을 수행하 지 마십시오 b Install Image 이미지 설치 단추를 1초 정도 눌러 쓰기 작업을 시작 합니다 c Warning 경고 창에서 Erase and Install Image 이미지 지우기 및 설 치 를 클릭합니다 Thin Client Image Tool Thin Client 이미지 도 구 창이 열립니다 d 디스크 이미지 쓰기 ...

Страница 108: ... 을 포함한 시스템 업데이트의 자동 배포 환경을 제공하는 배포 서버 에이 전트가 포함되어 있습니다 FX160 컴퓨터에는 사전 부팅 실행 환경 PXE 을 지원하는 네트워크 인터 페이스도 포함되어 있습니다 그러나 Dell은 높은 보안 수준을 유지하기 위해 자동 배포를 위한 시스템 설정으로 PXE 대신 자동 파티션을 사용하 도록 구성할 것을 권장합니다 Altiris 소프트웨어 설명서를 보려면 다음 사이트를 방문하십시오 http www altiris com Support Documentation aspx FX160 시스템에는 Altiris Deployment Server 사용 라이센스가 포함되어 있 습니다 ...

Страница 109: ...w w w d e l l c o m s u p p o r t d e l l c o m Guía para la generación de imágenes de Dell OptiPlex FX160 Modelo DC01T ...

Страница 110: ... aviso 2008 Dell Inc Todos los derechos reservados Queda estrictamente prohibida la reproducción de este material en cualquier forma sin la autorización por escrito de Dell Inc Marcas comerciales utilizadas en este texto Dell el logotipo de DELL y OptiPlex son marcas comerciales de Dell Inc Microsoft Windows Windows Vista y el botón de inicio de Windows Vista son marcas comerciales o marcas comerc...

Страница 111: ...unidad flash USB de arranque con un sistema Windows usando el software del kit de instalación automatizada de Microsoft Windows WAIK A continuación puede instalar la actualización en la tarjeta flash FX160 cuando arranque el equipo FX160 desde la unidad flash USB Generación de imágenes del equipo FX160 con el DVD de actualización PRECAUCIÓN al generar imágenes del equipo FX160 se borran todos los ...

Страница 112: ...magen de sistema que desea instalar y a continuación haga clic en Install Instalar 8 Cuando finalice la instalación reinicie el sistema arrancando desde la unidad desde la que se ha creado la imagen Generación de imágenes del equipo FX160 con una unidad flash USB UFD de arranque Se pueden generar imágenes del equipo FX160 con un disco RAM de arranque de Windows PE en una unidad UFD Esta unidad UFD...

Страница 113: ...carga es muy grande aproximadamente 1 GB 2 Haga clic en Inicio seleccione Todos los programas OPK de Windows o AIK de Windows y haga clic en Símbolo del sistema de herramientas de Windows PE NOTA al abrir la ventana del símbolo del sistema se configuran automáticamente las variables del entorno para seleccionar todas las herramientas necesarias De forma predeterminada todas las herramientas se ins...

Страница 114: ... para reducir su tamaño final peimg prep c winpe_x86 mount Windows 7 Realice los cambios en el archivo de imagen original Winpe wim mediante la opción ImageX unmount con commit imagex unmount c winpe_x86 mount commit 8 Sustituya el archivo predeterminado Boot wim en el directorio winpe_x86 ISO por su nueva imagen personalizada La imagen debe llamarse Boot wim PRECAUCIÓN cuando se formatea un dispo...

Страница 115: ...ivo externo antes de generar la imagen del equipo 1 Apague el equipo FX160 2 Conecte el dispositivo UFD de arranque con la actualización de la imagen de Windows XP incorporado en un puerto USB 3 Encienda el equipo FX160 Cuando aparezca la lista de opciones de la ventana del BIOS en la esquina superior derecha de la ventana pulse F12 para acceder al menú Boot Inicialización 4 En la ventana de selec...

Страница 116: ...SLECT usando una unidad flash USB de arranque incorporada en el CD de actualización y un sistema informático Linux o Windows Tras arrancar el equipo FX160 con la unidad flash USB la utilidad de Thin Client Imaging se utiliza para copiar SLETC en la tarjeta flash del equipo FX160 disco duro El tamaño mínimo de la unidad flash USB es de 512 MB Creación de una unidad flash USB de arranque Linux con L...

Страница 117: ...r si la unidad flash USB está montada c Si la unidad esta montada desmóntela umount dev NOMBREDISPOSITIVO Donde dev NOMBREDISPOSITIVO es el nombre de dispositivo de la unidad flash USB 6 Determine el nombre de dispositivo de la unidad flash USB a Si la unidad flash USB se montó automáticamente y posteriormente se desmontó utilice el nombre de dispositivo asignado por Linux en los siguientes pasos ...

Страница 118: ...dows USBDiskImageTool exe Para crear la unidad flash USB de arranque con Windows use el programa USBDiskImageTool exe para escribir el archivo SLETC en la unidad flash USB NOTA el sistema operativo Windows que se utiliza para crear la unidad flash USB de arranque debe incluir Microsoft NET Framework v2 0 o posterior PRECAUCIÓN este procedimiento formatea la unidad flash USB que se utiliza para car...

Страница 119: ...ta flash Haga una copia de seguridad del sistema en un dispositivo externo antes de generar la imagen del equipo 1 Cierre el sistema operativo y apague el equipo 2 Introduzca la unidad flash de arranque con la imagen de SLETC en un puerto USB 3 Encienda el equipo FX160 4 Cuando aparezca la lista de opciones de la ventana del BIOS en la esquina superior derecha de la ventana pulse F12 para acceder ...

Страница 120: ... USB de arranque del equipo 10 Arranque el sistema con la tarjeta flash interna Implementación automatizada La imagen instalada en el equipo FX160 incluye un agente de servidor de implementación que interactúa con un servidor Altiris Deployment Server para proporcionar un entorno para la implementación automatizada de actualizaciones de sistema que incluye imágenes del sistema software de aplicaci...

Страница 121: ...w w w d e l l c o m s u p p o r t d e l l c o m Dell OptiPlex FX160 Handbok för ny image Modell DC01T ...

Страница 122: ...det här dokumentet kan komma att ändras 2008 Dell Inc Med ensamrätt Återgivning i någon form utan skriftligt tillstånd från Dell Inc är strängt förbjuden Varumärken som används i texten Dell DELL logotypen och OptiPlex är varumärken som tillhör DellInc Microsoft Windows WindowsVistaoch WindowsVista startknappenärantingenvarumärken eller registrerade varumärken som tillhör Microsoft Corporation i U...

Страница 123: ...ion Installation Kit WAIK Uppdateringen kan sedan installeras på FX160 flashkortet när FX160 datorn startas från USB flashenheten Skapa en ny image för FX160 datorn med uppdaterings dvd skivan VARNING När du skapar en ny image för FX160 datorn tas alla data bort från hårddisken eller flashkortet Säkerhetskopiera ditt system till en extern enhet innan du skapar en ny image för datorn 1 Stäng av FX1...

Страница 124: ...tbar Windows PE RAM disk på en USB flashenhet Den här USB flashenheten skapas manuellt Skapa en startbar USB flashenhet med Windows VARNING När du skapar en ny image för FX160 datorn tas alla data bort från hårddisken eller flashkortet Säkerhetskopiera ditt system till en extern enhet innan du skapar en ny image för datorn Det här behöver du En arbetsstation med Vista eller Microsoft XP och alla v...

Страница 125: ...PE verktyg OBS När du öppnar kommandotolken ställs miljövariablerna automatiskt in så att de pekar på alla nödvändiga verktyg Som standard installeras alla verktyg i C Program version Verktyg där version kan vara Windows OPK eller Windows AIK 3 Vi kommandotolken kör du kommandot copype cmd x86 dest där dest är en lokal katalog för den här proceduren till exempel c winpe_x86 Skriptet skapar katalog...

Страница 126: ...lternativet ImageX unmount med alternativet commit imagex unmount c winpe_x86 mount commit 8 Byt ut standardfilen Boot wim i katalogen winpe_x86 ISO mot den nya anpassade imagefilen Imagefilen måste kallas Boot wim VARNING När en USB flashenhet formateras tas alla filer på enheten bort 9 Förbered USB flashenheten Use DiskPart för att formatera USB flashenheten med en Windows Vista eller Windows PE...

Страница 127: ...F12 så öppnas startmenyn 4 I fönstret för val av startenhet använder du piltangenterna för att markera USB flashenheten med imageuppdateringen av Windows XP Embedded och trycker sedan på Enter När Windows PE systemet initieras startas Windows XP Embedded imageverktyget 5 Spara aktuell FX160 systemimage genom att klicka på knappen Capture System Image spara systemimage och spara systemimagefilen på...

Страница 128: ...för SLETC Verktyget för Windows imageinstallation med USB flashenhet USBDiskImageTool exe Endast uppdateringsfilen krävs för att skapa den startbara USB flashenheten VARNING Med den proceduren formaterar du USB flashenheten som används för att läsa in systemimagefilen Alla filer på enheten tas bort VARNING För vissa av de kommandon som anges i proceduren krävs administratörsbehörighet Var extremt ...

Страница 129: ...ashenheten inte har monterats genererar du loggfilen dmesg där nyligen anslutna enheter visas Ange dmesg Granska loggmeddelandena och sök reda på namnet på USB flashenheten 7 Skriv imagefilen från cd skivan till USB flashenheten dd bs 1M if SLETC update of dev DEVICENAME där SLETC update är namnet på SLETC imagefilen på cd skivan till exempel media Novell_SLETC_for_Dell Novell SLETC 10 SP2 1 for D...

Страница 130: ...t 1 I ett system med Windows XP eller Windows Vista sätter du i cd skivan med SLETC uppdateringen i cd enheten och ansluter USB flashenheten till en USB port 2 Öppna Utforskaren och visa innehållet på uppdaterings cd skivan 3 Sök efter och öppna USBDiskImageTool exe Om du använder Windows Vista anger du lämpliga svar på UAC meddelandena User Access Control 4 I fönstret USB Disk Image Tool USB disk...

Страница 131: ...på Enter 6 Vänta tills SLETC operativsystemet har startats och klicka sedan på knappen Computer dator på skrivbordet I fönstret som öppnas a Klicka på More Applications fler program b Klicka på Thin Client Image 7 I fönstret Thin Client Image a Sök efter listrutan Target mål och välj Hard Drive hårddisk VARNING Utför inga andra åtgärder i datorn medan diskimagefilen skrivs b Håll knappen Install I...

Страница 132: ...mage programvara BIOS uppdateringar och konfiguration FX160 datorn har ett PXE förberett Preboot Execution Environment nätverksgränssnitt Dell rekommenderar emellertid att systemkonfigurationen för automatiserad driftsättning konfigureras för användning av en automatiseringspartition i stället för PXE vilket ger större säkerhet Dokumentation för Altiris programvara finns på http www altiris com Su...

Отзывы: