


Replacing the display assembly
WARNING: Before working inside your computer, read the safety
information that shipped with your computer and follow the steps in
Before working inside your computer
. After working inside your
computer, follow the instructions in
After working inside your
computer
. For more safety best practices, see the Regulatory
Compliance home page at www.dell.com/regulatory_compliance.
Procedure
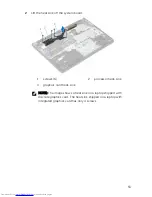
1
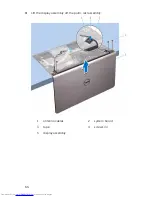
Place the computer on a flat table and align the screw holes on the palm-
rest assembly with the screw holes on the display hinges.
2
Press down the display hinges and replace the screws that secure the
display hinges to the palm-rest assembly.
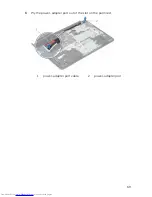
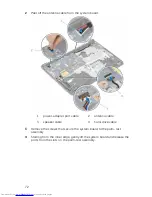
3
Adhere the antenna cables to the system board.
Post-requisites
1
Replace the
base frame
.
2
Replace the
keyboard
.
3
Replace the
fan
.
4
Replace the
wireless card
.
5
Follow the procedure from step 3 to step 5 in replacing the
hard drive
.
6
Replace the
battery
.
7
Replace the
base cover
.
67
Содержание Inspiron 5557
Страница 12: ... Plastic scribe 12 ...
Страница 15: ...3 Using a plastic scribe pry the base cover off the base frame 1 plastic scribe 2 notch 3 base cover 15 ...
Страница 21: ...5 Lift the hard drive off the hard drive bracket 1 hard drive 2 screws 4 3 hard drive bracket 21 ...
Страница 34: ...8 Lift the fan off the base frame 1 screws 2 2 fan 3 fan cable 34 ...
Страница 42: ...2 Replace the base cover 42 ...
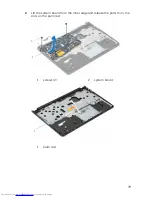
Страница 46: ...4 Remove the screws that secure the base frame to the palm rest assembly 1 screws 9 2 base frame 46 ...
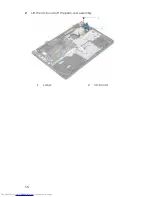
Страница 56: ...2 Lift the I O board off the palm rest assembly 1 screw 2 I O board 56 ...
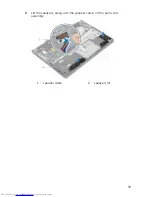
Страница 59: ...3 Lift the speakers along with the speaker cable off the palm rest assembly 1 speaker cable 2 speakers 2 59 ...
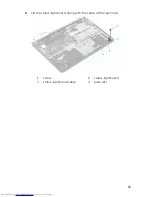
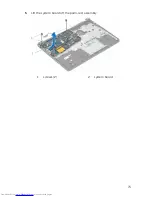
Страница 73: ...5 Lift the system board off the palm rest assembly 1 screws 2 2 system board 73 ...
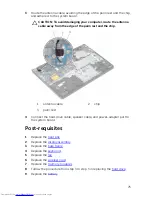
Страница 78: ...Procedure 1 Remove the screws that secure the system board to the palm rest 1 screws 2 2 system board 78 ...
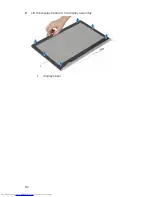
Страница 82: ...2 Lift the display bezel off the display assembly 1 display bezel 82 ...
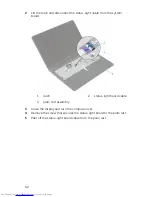
Страница 91: ...2 Lift the display hinges off the display back cover 1 screws 4 2 display hinges 2 3 display back cover 91 ...
Страница 94: ...2 Disconnect the camera cable from the camera 1 camera cable 2 camera 3 plastic scribe 94 ...
Страница 97: ...1 camera cable 2 display cable 97 ...


