


CAUTION: Anyone can access the data stored on your computer if it is not
locked and left unattended.
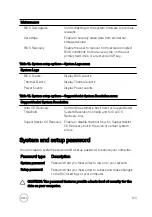
NOTE: Your computer is shipped with the system and setup password
feature is disabled.
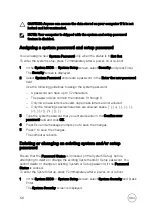
Assigning a system password and setup password
You can assign a new
System Password
only when the status is in
Not Set
.
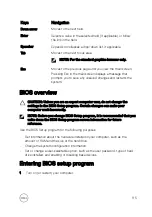
To enter the system setup, press F2 immediately after a power-on or re-boot.
1
In the
System BIOS
or
System Setup
screen, select
Security
and press Enter.
The
Security
screen is displayed.
2
Select
System Password
and create a password in the
Enter the new password
field.
Use the following guidelines to assign the system password:
– A password can have up to 32 characters.
– The password can contain the numbers 0 through 9.
– Only lower case letters are valid, upper case letters are not allowed.
– Only the following special characters are allowed: space, (”), (+), (,), (-), (.),
(/), (;), ([), (\), (]), (`).
3
Type the system password that you entered earlier in the
Confirm new
password
field and click
OK
.
4
Press Esc and a message prompts you to save the changes.
5
Press Y to save the changes.
The computer reboots.
Deleting or changing an existing system and/or setup
password
Ensure that the
Password Status
is Unlocked (in the System Setup) before
attempting to delete or change the existing System and/or Setup password. You
cannot delete or change an existing System or Setup password, if the
Password
Status
is Locked.
To enter the System Setup, press F2 immediately after a power-on or reboot.
1
In the
System BIOS
or
System Setup
screen, select
System Security
and press
Enter.
The
System Security
screen is displayed.
124
Содержание Inspiron 17 7000 Series
Страница 28: ...Post requisites 1 Replace the battery 2 Replace the base cover 28 ...
Страница 55: ...4 Lift the fan off the palm rest assembly Figure 19 Removing the fan 1 screws 2 2 fan 3 tape 4 fan cable 55 ...
Страница 76: ...8 Lift the display assembly off the palm rest assembly Figure 28 Display assembly 1 display assembly 76 ...
Страница 89: ...12 Replace the base cover 89 ...
Страница 93: ...19 Replace the base cover 93 ...
Страница 99: ...Figure 38 Display back cover and antenna assembly 1 display back cover and antenna assembly 99 ...


