Installing USB 3.0 module
Prerequisites
Follow the safety guidelines listed in
NOTE:
The position of the USB 3.0 module may vary depending on the configuration of your
system.
Steps
1
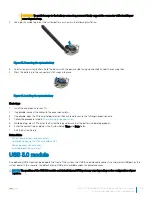
Route the power and the USB cables on the USB 3.0 module through the USB 3.0 module slot on the front panel.
2
Insert the USB 3.0 module into the slot on the front panel.
3
Align the screws on the module with the screw holes on the system.
4
Using the Phillips #2 screwdriver, tighten the screw to secure the module to the system.
5
Route and connect the USB cable to internal USB port and power cable to the backplane 3 power connector on the system board. To
locate the connector, see the System board jumpers and connectors section.
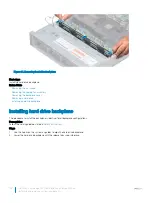
Figure 96. Installing USB 3.0 module
Next steps
1
Install the internal USB memory key.
2
Install the air shroud.
3
Install the cooling fan assembly
4
Install the backplane cover.
5
Follow the procedure listed in
After working inside your system
.
Related links
System board jumpers and connectors
Replacing optional internal USB memory key
Installing the air shroud
Installing the cooling fan assembly
Installing the backplane cover
Dell EMC PowerEdge R740 Installation and Service Manual
Installing and removing system components
145


