Control panel
Removing the left control panel
Prerequisites
1. Follow the safety guidelines listed in
.
2. Follow the procedure listed in
Before working inside your system
Steps
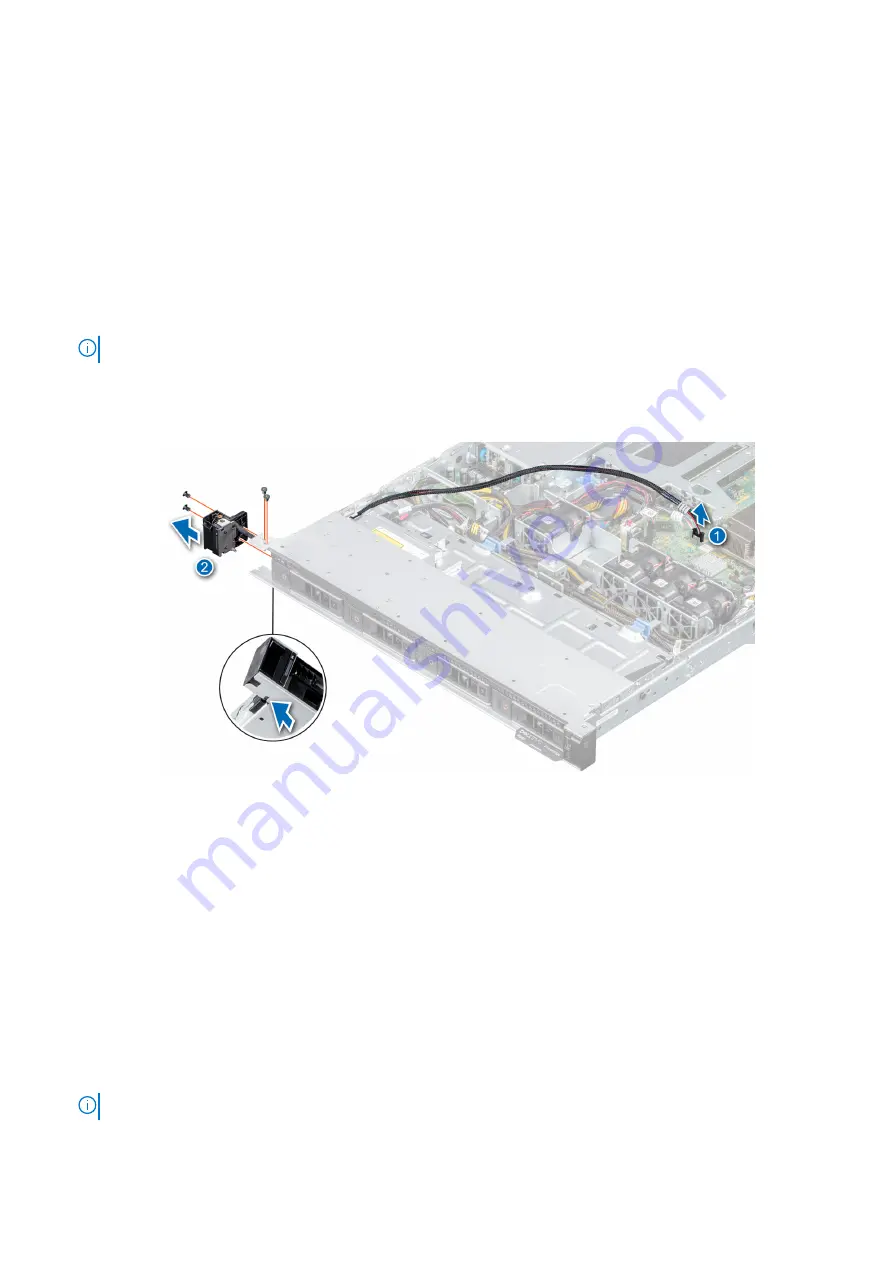
1. Disconnect the control panel cable from the system board connector.
NOTE:
Observe the routing of the cable as you remove it from the system.
2. Using the appropriate screwdriver, remove the screws that secure the left control panel assembly to the system.
3. Disengage the left control panel housing clip which is located on the bottom of the left control panel assembly.
4. Hold the left control panel assembly and remove it from the system.
Figure 78. Removing the left control panel
Next steps
1.
Replace the left control panel
.
Installing the left control panel
Prerequisites
1. Follow the safety guidelines listed in
.
2. Follow the procedure listed in
Before working inside your system
Steps
1. Route the control panel cable through the side wall and the guide slots in the system and connect it to the system board.
NOTE:
Route the cable properly to prevent the cable from being pinched or crimped.
2. Align and insert the left control panel assembly in the slot on the system.
76
Installing and removing system components
Содержание EMC PowerEdge R340
Страница 12: ...Figure 9 Jumper settings Figure 10 Memory information 12 Dell EMC PowerEdge R340 system overview ...
Страница 13: ...Figure 11 System information Dell EMC PowerEdge R340 system overview 13 ...
Страница 14: ...Figure 12 Electrical overview 14 Dell EMC PowerEdge R340 system overview ...


