


Setting Up the Monitor
21
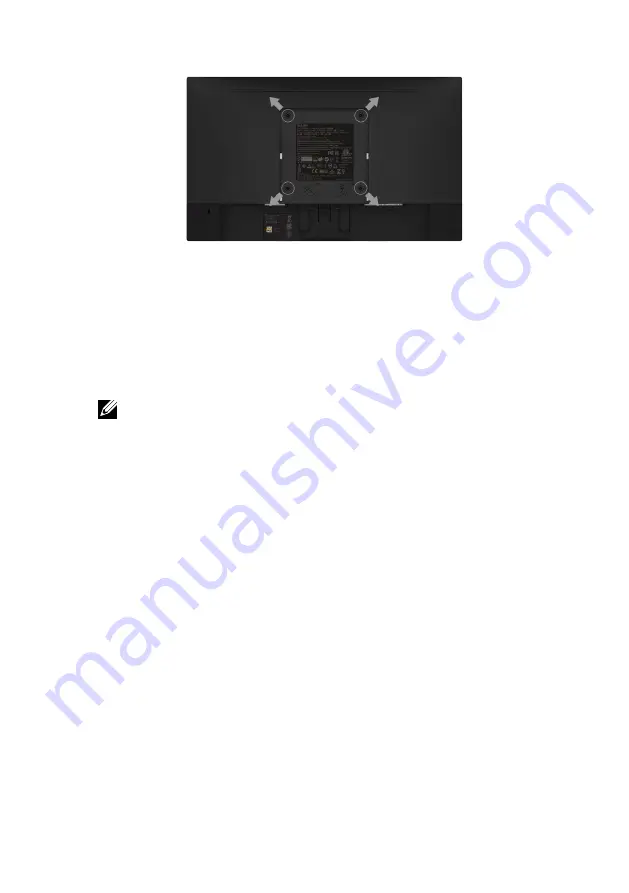
Wall Mounting (Optional)
(Screw dimension: M4 x 10 mm). Refer to the instructions that come with the VESA-
compatible base mounting kit.
1.
Place the monitor panel on a soft cloth or cushion on a stable flat table.
2.
Remove the stand.
3.
Use a screwdriver to remove the four screws securing the plastic cover. (figure 2)
4.
Attach the mounting bracket from the wall mounting kit to the LCD.
5.
Mount the LCD on the wall by following the instructions that came with the base
mounting kit.
NOTE:
For use only with UL-listed wall-mount bracket with minimum
weight/load bearing capacity of 2.26 kg (E1916HV)/2.26kg (E2016HV)/2.83 kg
(E2216HV).
Содержание E1916HV
Страница 1: ...Regulatory model E1916HVf E2016HVf E2216HVf User s Guide Dell E1916HV Dell E2016HV Dell E2216HV ...
Страница 24: ...24 Operating the Monitor ...
Страница 27: ...Operating the Monitor 27 Auto Adjust Use this key to activate automatic setup and adjust menu ...
Страница 29: ...Operating the Monitor 29 Input Color Format Allows you to set the video input mode to RGB or YPbPr ...
Страница 30: ...30 Operating the Monitor Preset Modes Allows you to choose from a list of preset color modes ...
Страница 32: ...32 Operating the Monitor Display Use the Display menu to adjust the monitor s display settings ...
Страница 34: ...34 Operating the Monitor Energy ...
Страница 39: ...Operating the Monitor 39 ...
Страница 42: ...42 Operating the Monitor ...
Страница 67: ...Appendix 67 For Windows 8 or Windows 8 1 ...
Страница 69: ...Appendix 69 For Windows 7 For Windows 8 or Windows 8 1 ...
Страница 71: ...Appendix 71 For Windows 7 ...
Страница 72: ...72 Appendix For Windows 8 or Windows 8 1 ...


