


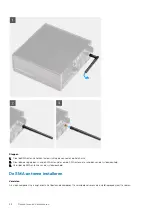
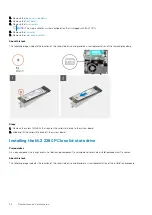


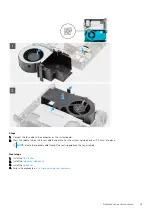


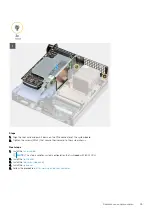

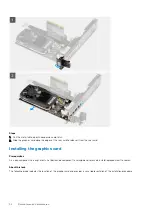
Steps
1. Connect the antenna cables to the WLAN card.
The following table provides the antenna-cable color scheme for the WLAN card of your computer.
Table 8. Antenna-cable color scheme
Connectors on the
wireless card
Antenna-cable color
Silkscreen marking
Main
White
MAIN
△
(white triangle)
Auxiliary
Black
AUX
▲
(black triangle)
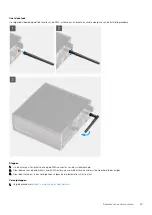
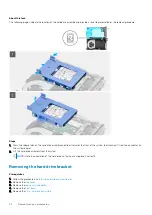
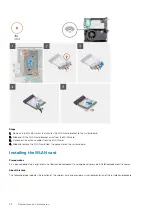
2. Place the WLAN card bracket to secure the antenna cables.
3. Align the notch on the WLAN card with the tab on the WLAN card slot. Insert the WLAN card into the connector on the system
board.
4. Replace the (M2x3.5) screw to secure the WLAN card bracket to the WLAN card.
Next steps
1. Install the
.
2. Install the
3. Install the
Demonteren en hermonteren
39
Содержание D16S
Страница 5: ...Hoofdstuk 6 Hulp verkrijgen en contact opnemen met Dell 78 Inhoudsopgave 5 ...
Страница 17: ...3 Belangrijke componenten van uw systeem 17 ...
Страница 18: ...Belangrijke componenten van uw systeem 18 Belangrijke componenten van uw systeem ...
Страница 25: ...Steps 1 Loosen the thumbscrew 6x32 that secures the side cover to the system Demonteren en hermonteren 25 ...
Страница 52: ...52 Demonteren en hermonteren ...
Страница 58: ...Figure 6 Heat sink shipped with system configuration shipped with 65 W CPU 58 Demonteren en hermonteren ...
Страница 65: ...Demonteren en hermonteren 65 ...
Страница 67: ...Demonteren en hermonteren 67 ...


