


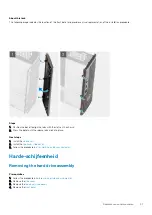
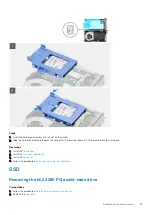


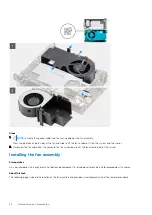
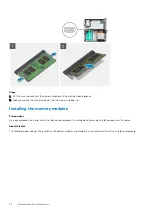


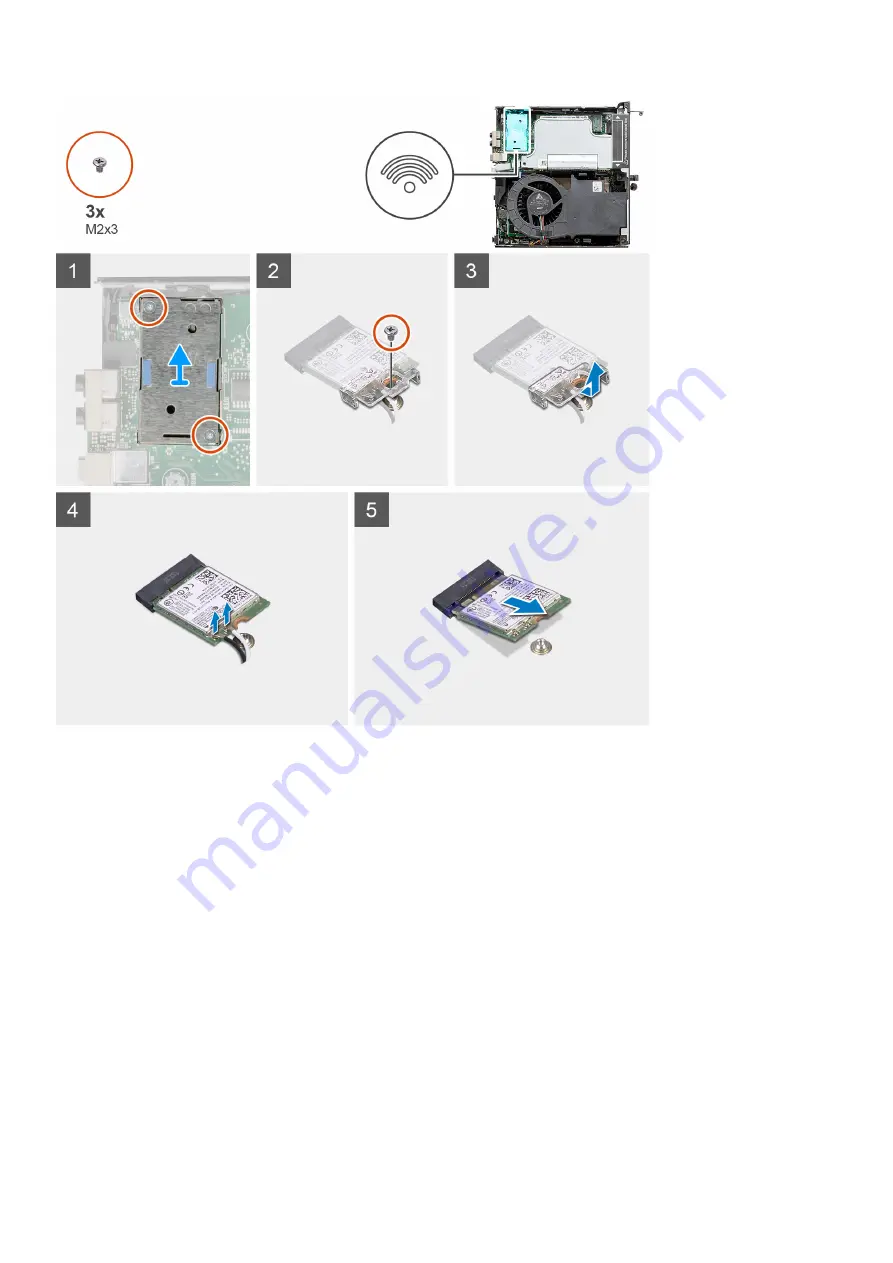
Steps
1. Remove the (M2x3.5) screw that secures the WLAN card bracket to the system board.
2. Slide and lift the WLAN card bracket away from the WLAN card.
3. Disconnect the antenna cables from the WLAN card.
4. Slide and remove the WLAN card from the connector on the system board.
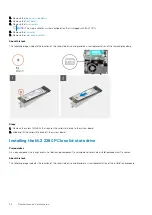
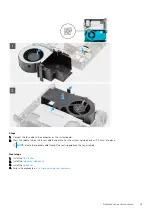
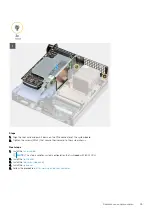
Installing the WLAN card
Prerequisites
Als u een component vervangt, dient u het bestaande component te verwijderen alvorens de installatieprocedure uit te voeren.
About this task
The following image indicates the location of the wireless card and provides a visual representation of the installation procedure.
38
Demonteren en hermonteren
Содержание D16S
Страница 5: ...Hoofdstuk 6 Hulp verkrijgen en contact opnemen met Dell 78 Inhoudsopgave 5 ...
Страница 17: ...3 Belangrijke componenten van uw systeem 17 ...
Страница 18: ...Belangrijke componenten van uw systeem 18 Belangrijke componenten van uw systeem ...
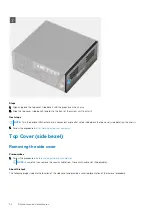
Страница 25: ...Steps 1 Loosen the thumbscrew 6x32 that secures the side cover to the system Demonteren en hermonteren 25 ...
Страница 52: ...52 Demonteren en hermonteren ...
Страница 58: ...Figure 6 Heat sink shipped with system configuration shipped with 65 W CPU 58 Demonteren en hermonteren ...
Страница 65: ...Demonteren en hermonteren 65 ...
Страница 67: ...Demonteren en hermonteren 67 ...


